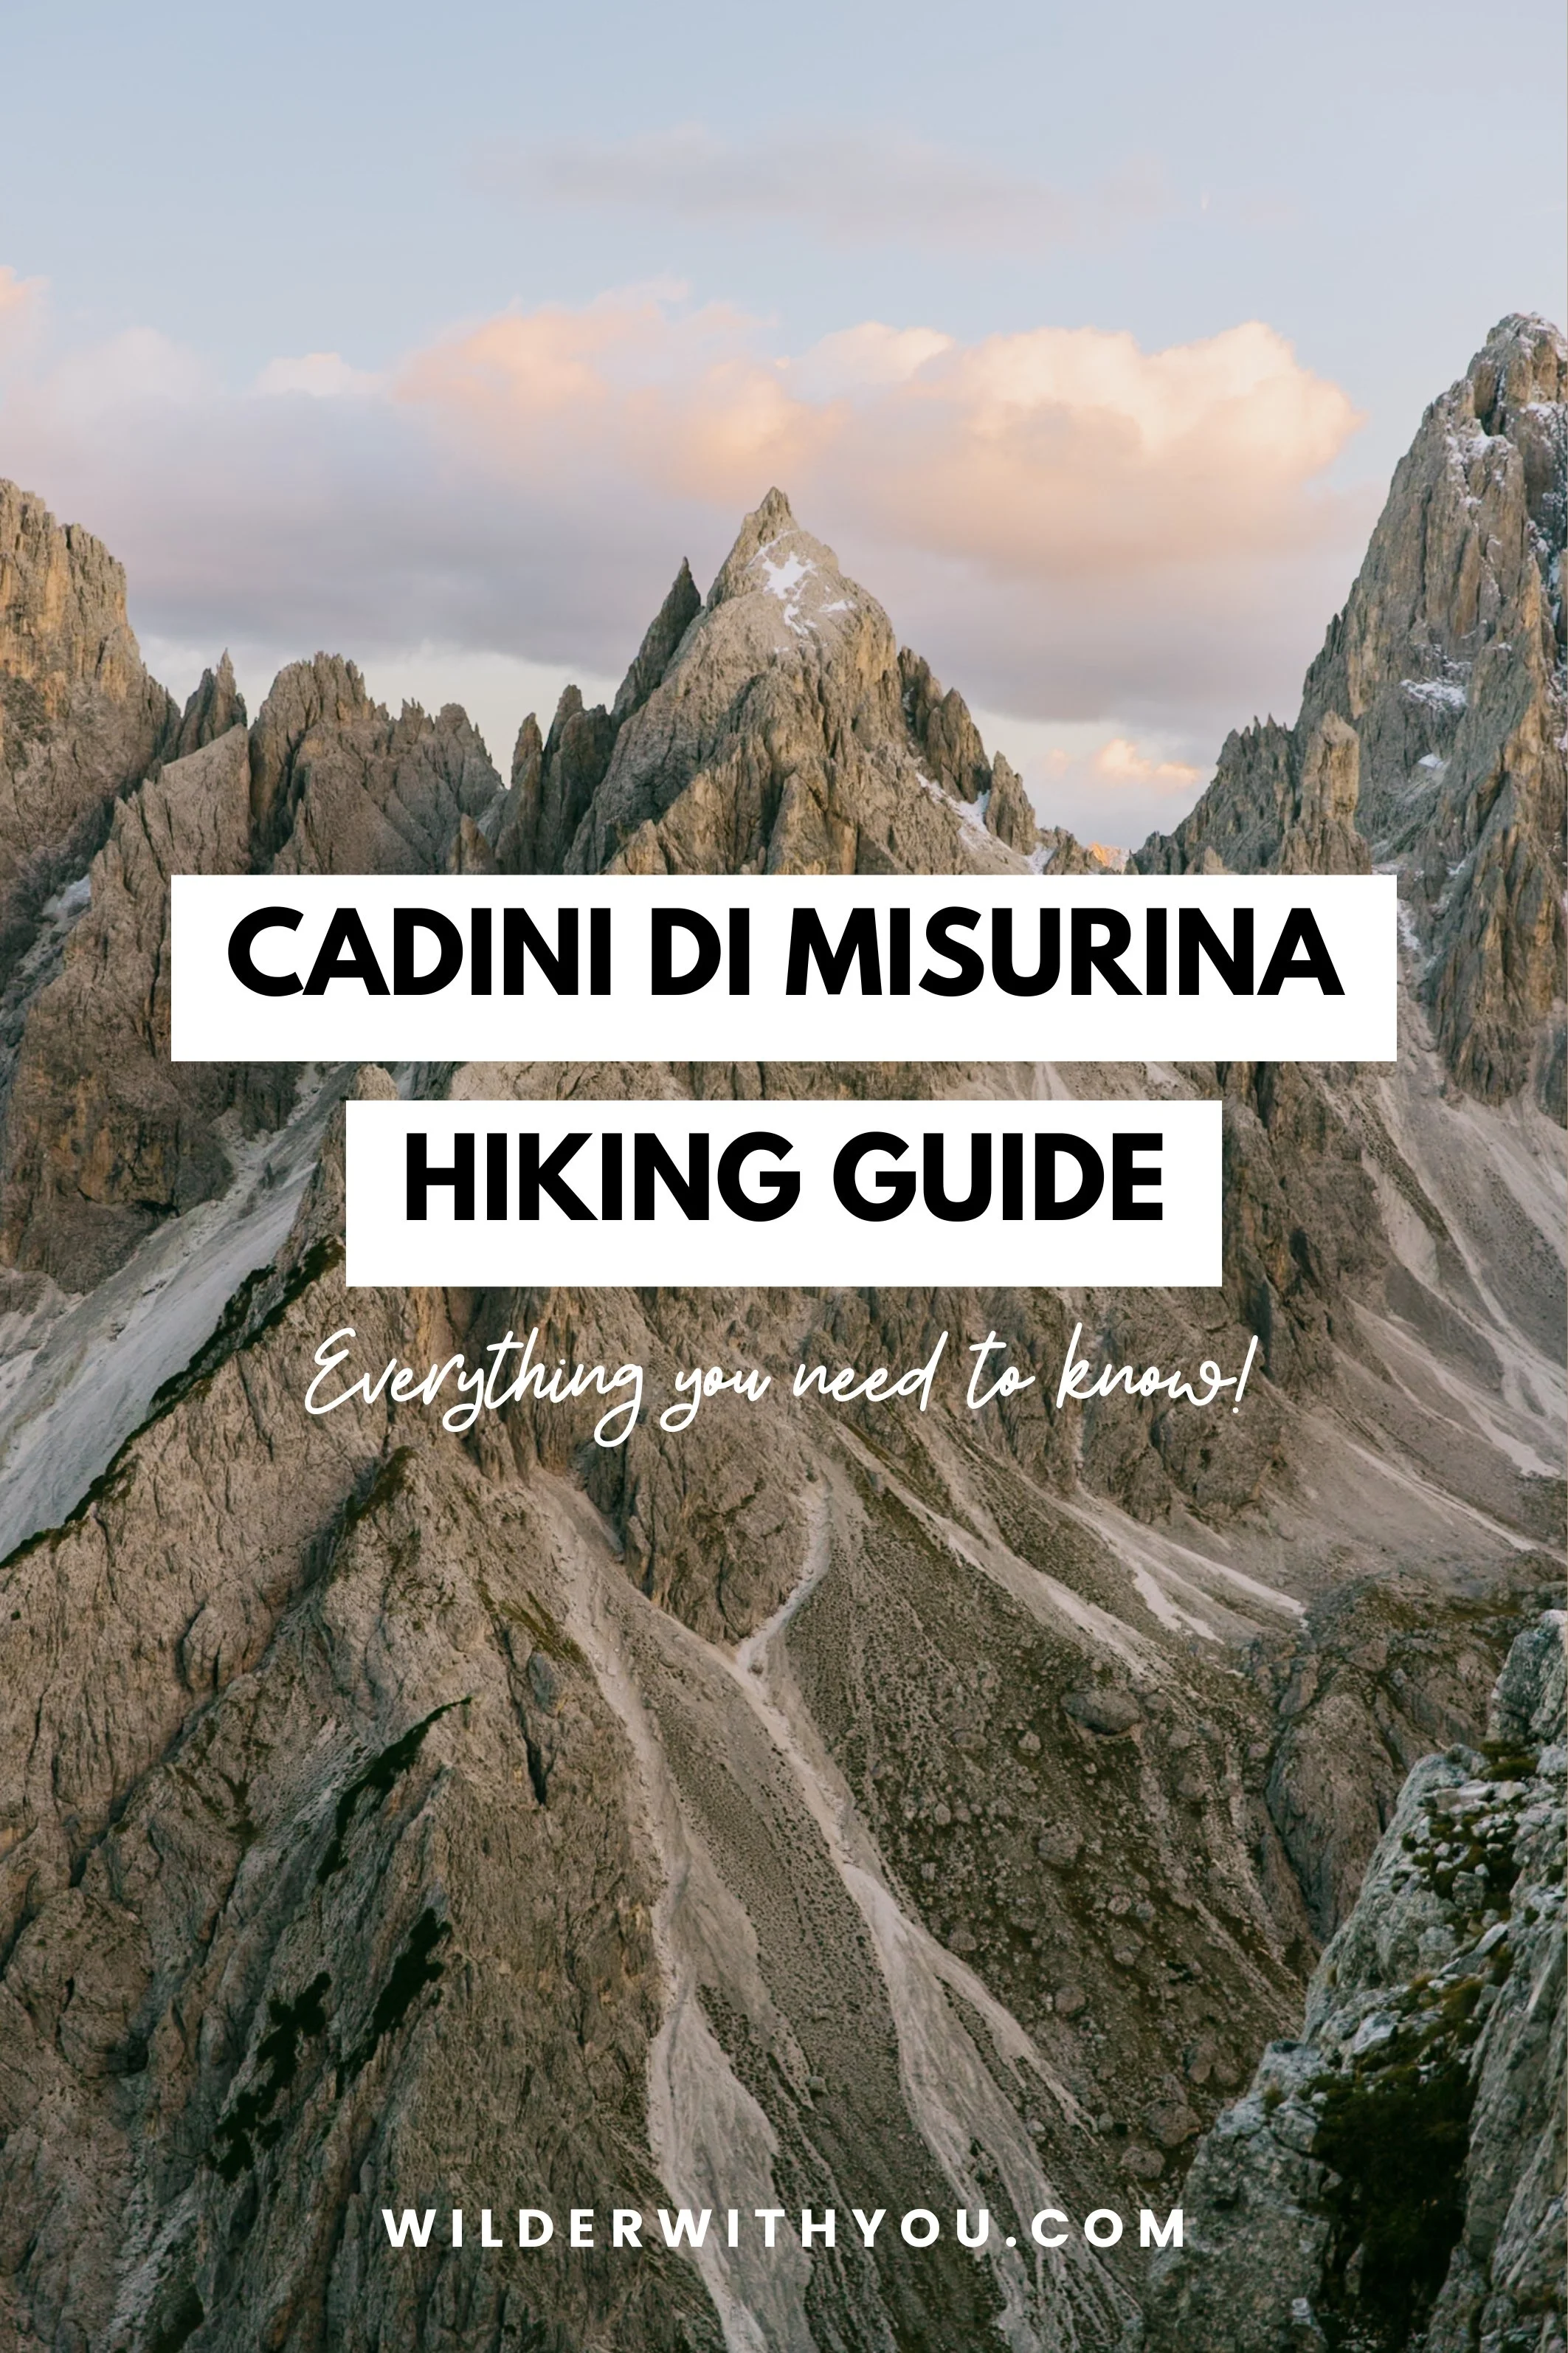
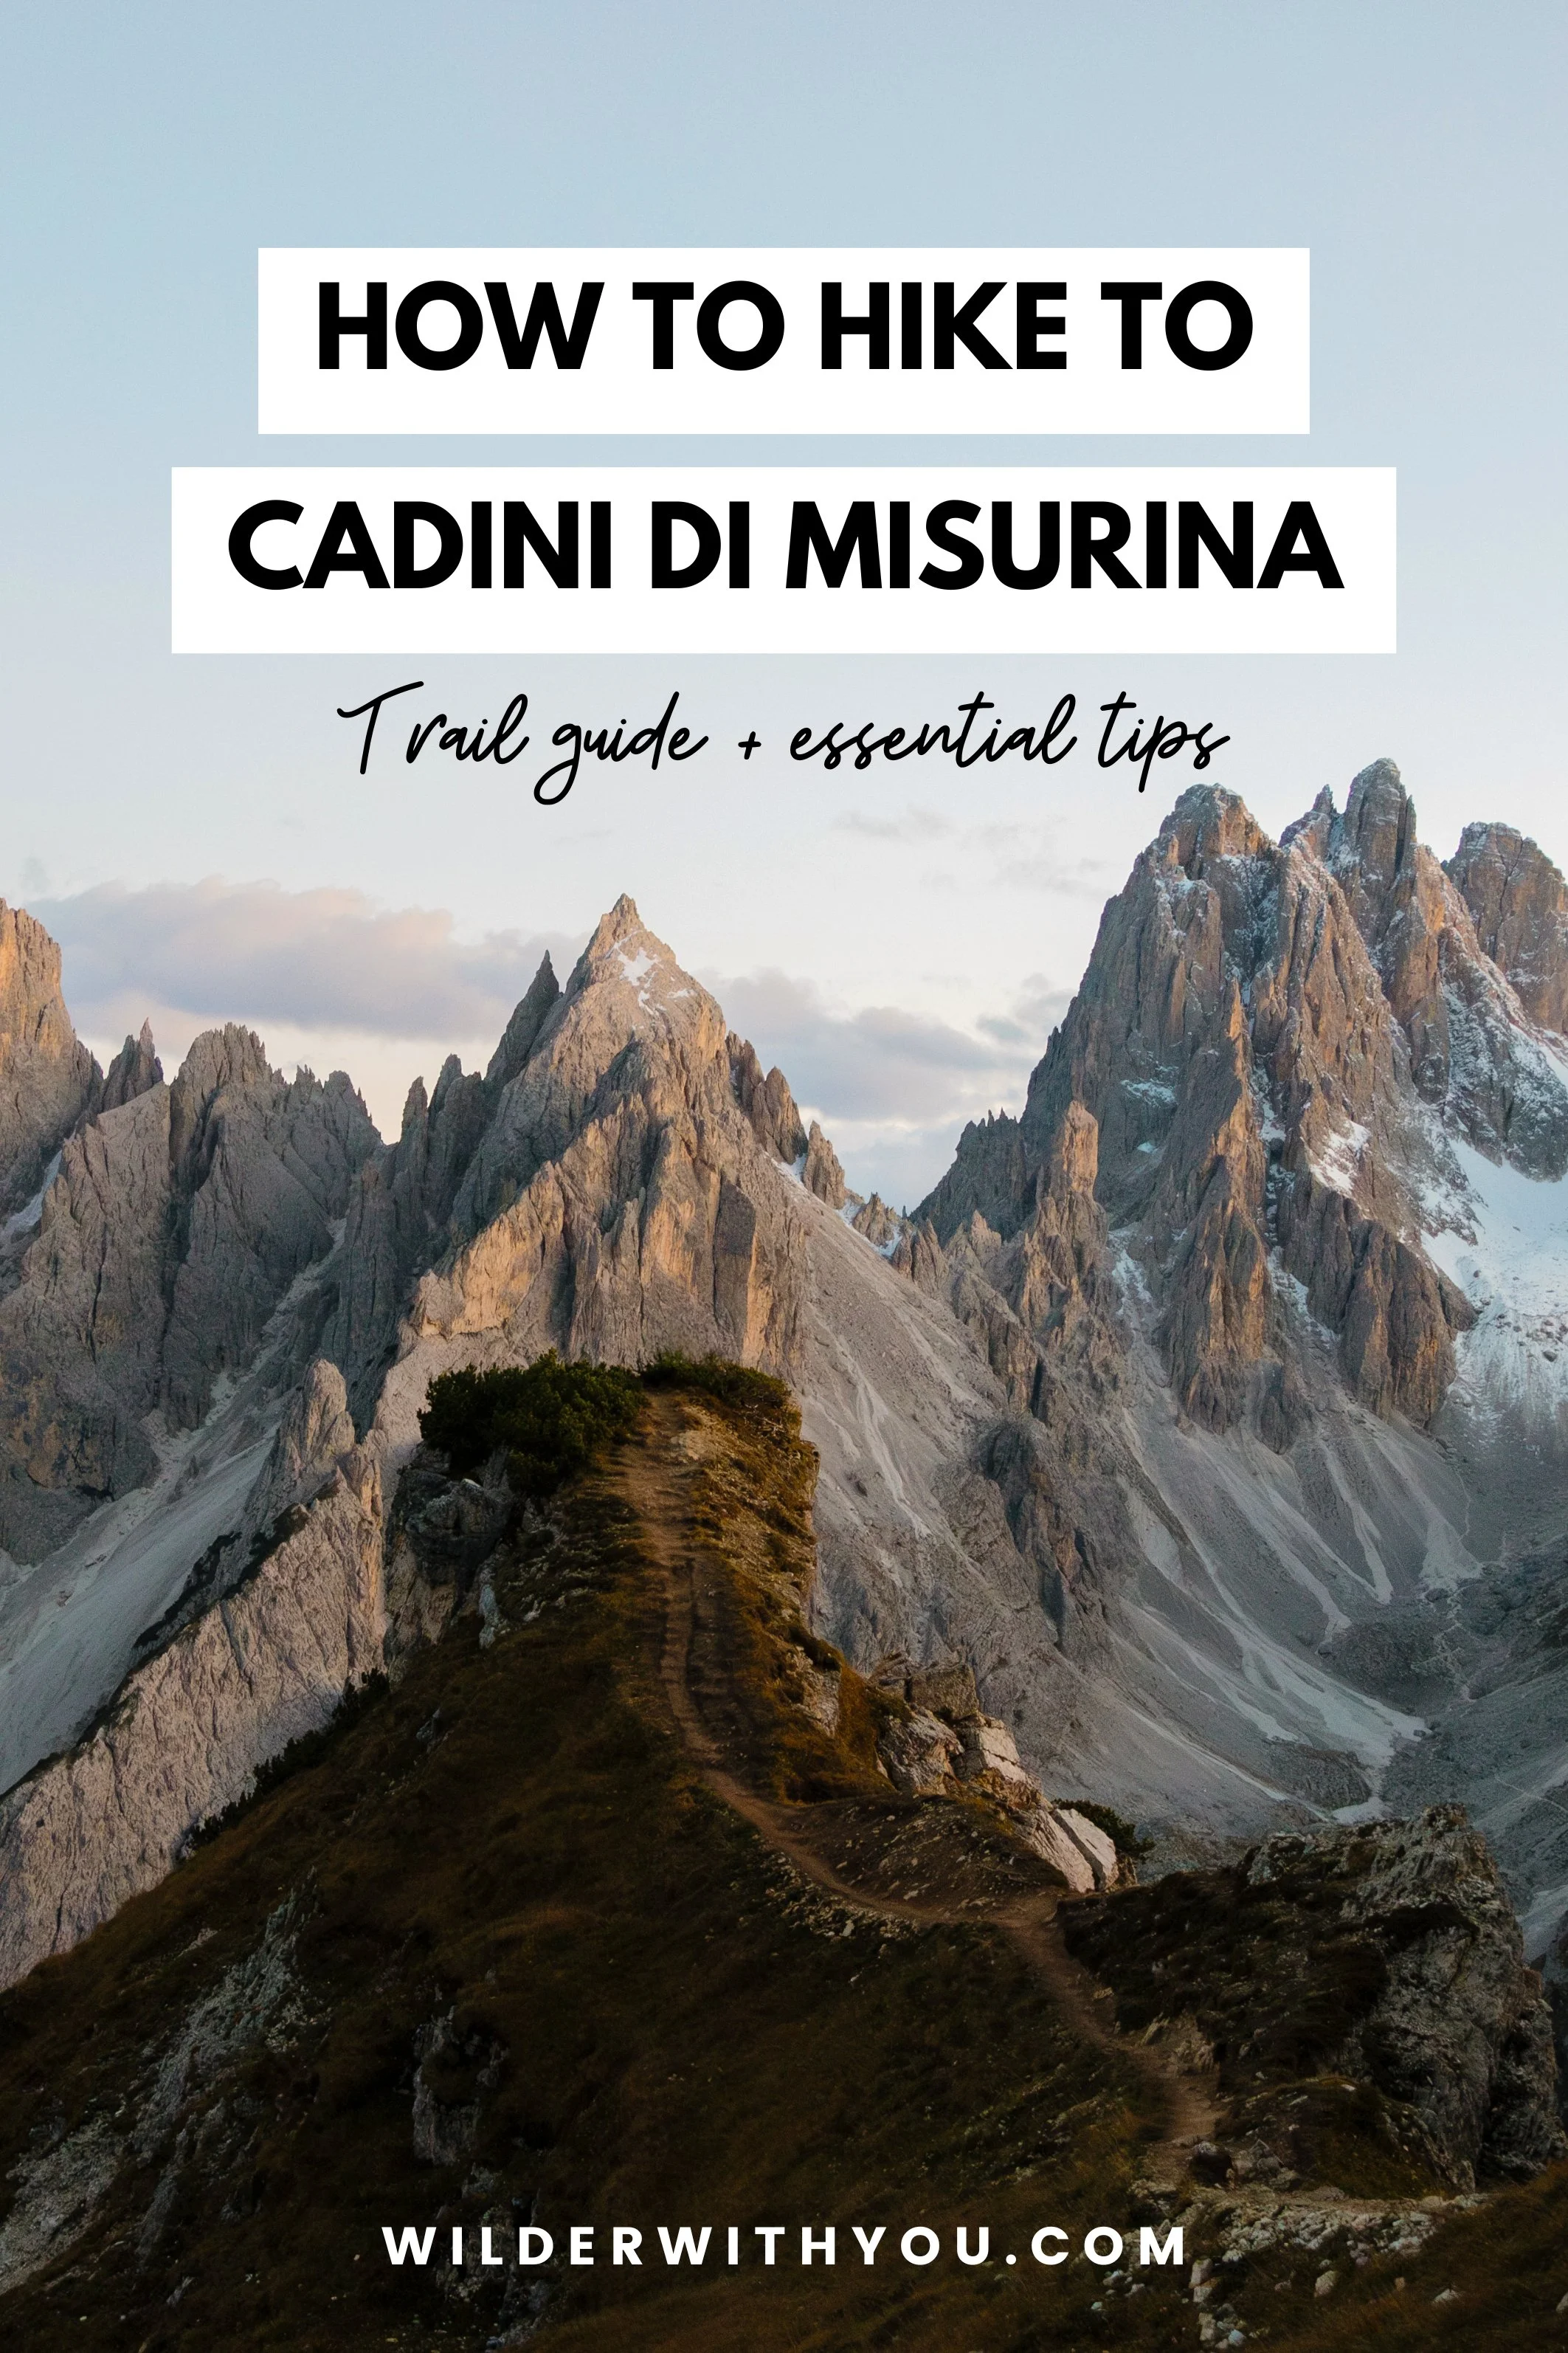
How to Hike Cadini di Misurina: Complete Trail Guide (2026)
I live in northern Italy and have hiked to the Cadini di Misurina viewpoint multiple times across different seasons and conditions. Here's everything you actually need to know before you go!
This post may contain affiliate links. That means if you click and buy, I may make a commission at no cost to you. Please see my full disclosure policy for more details.
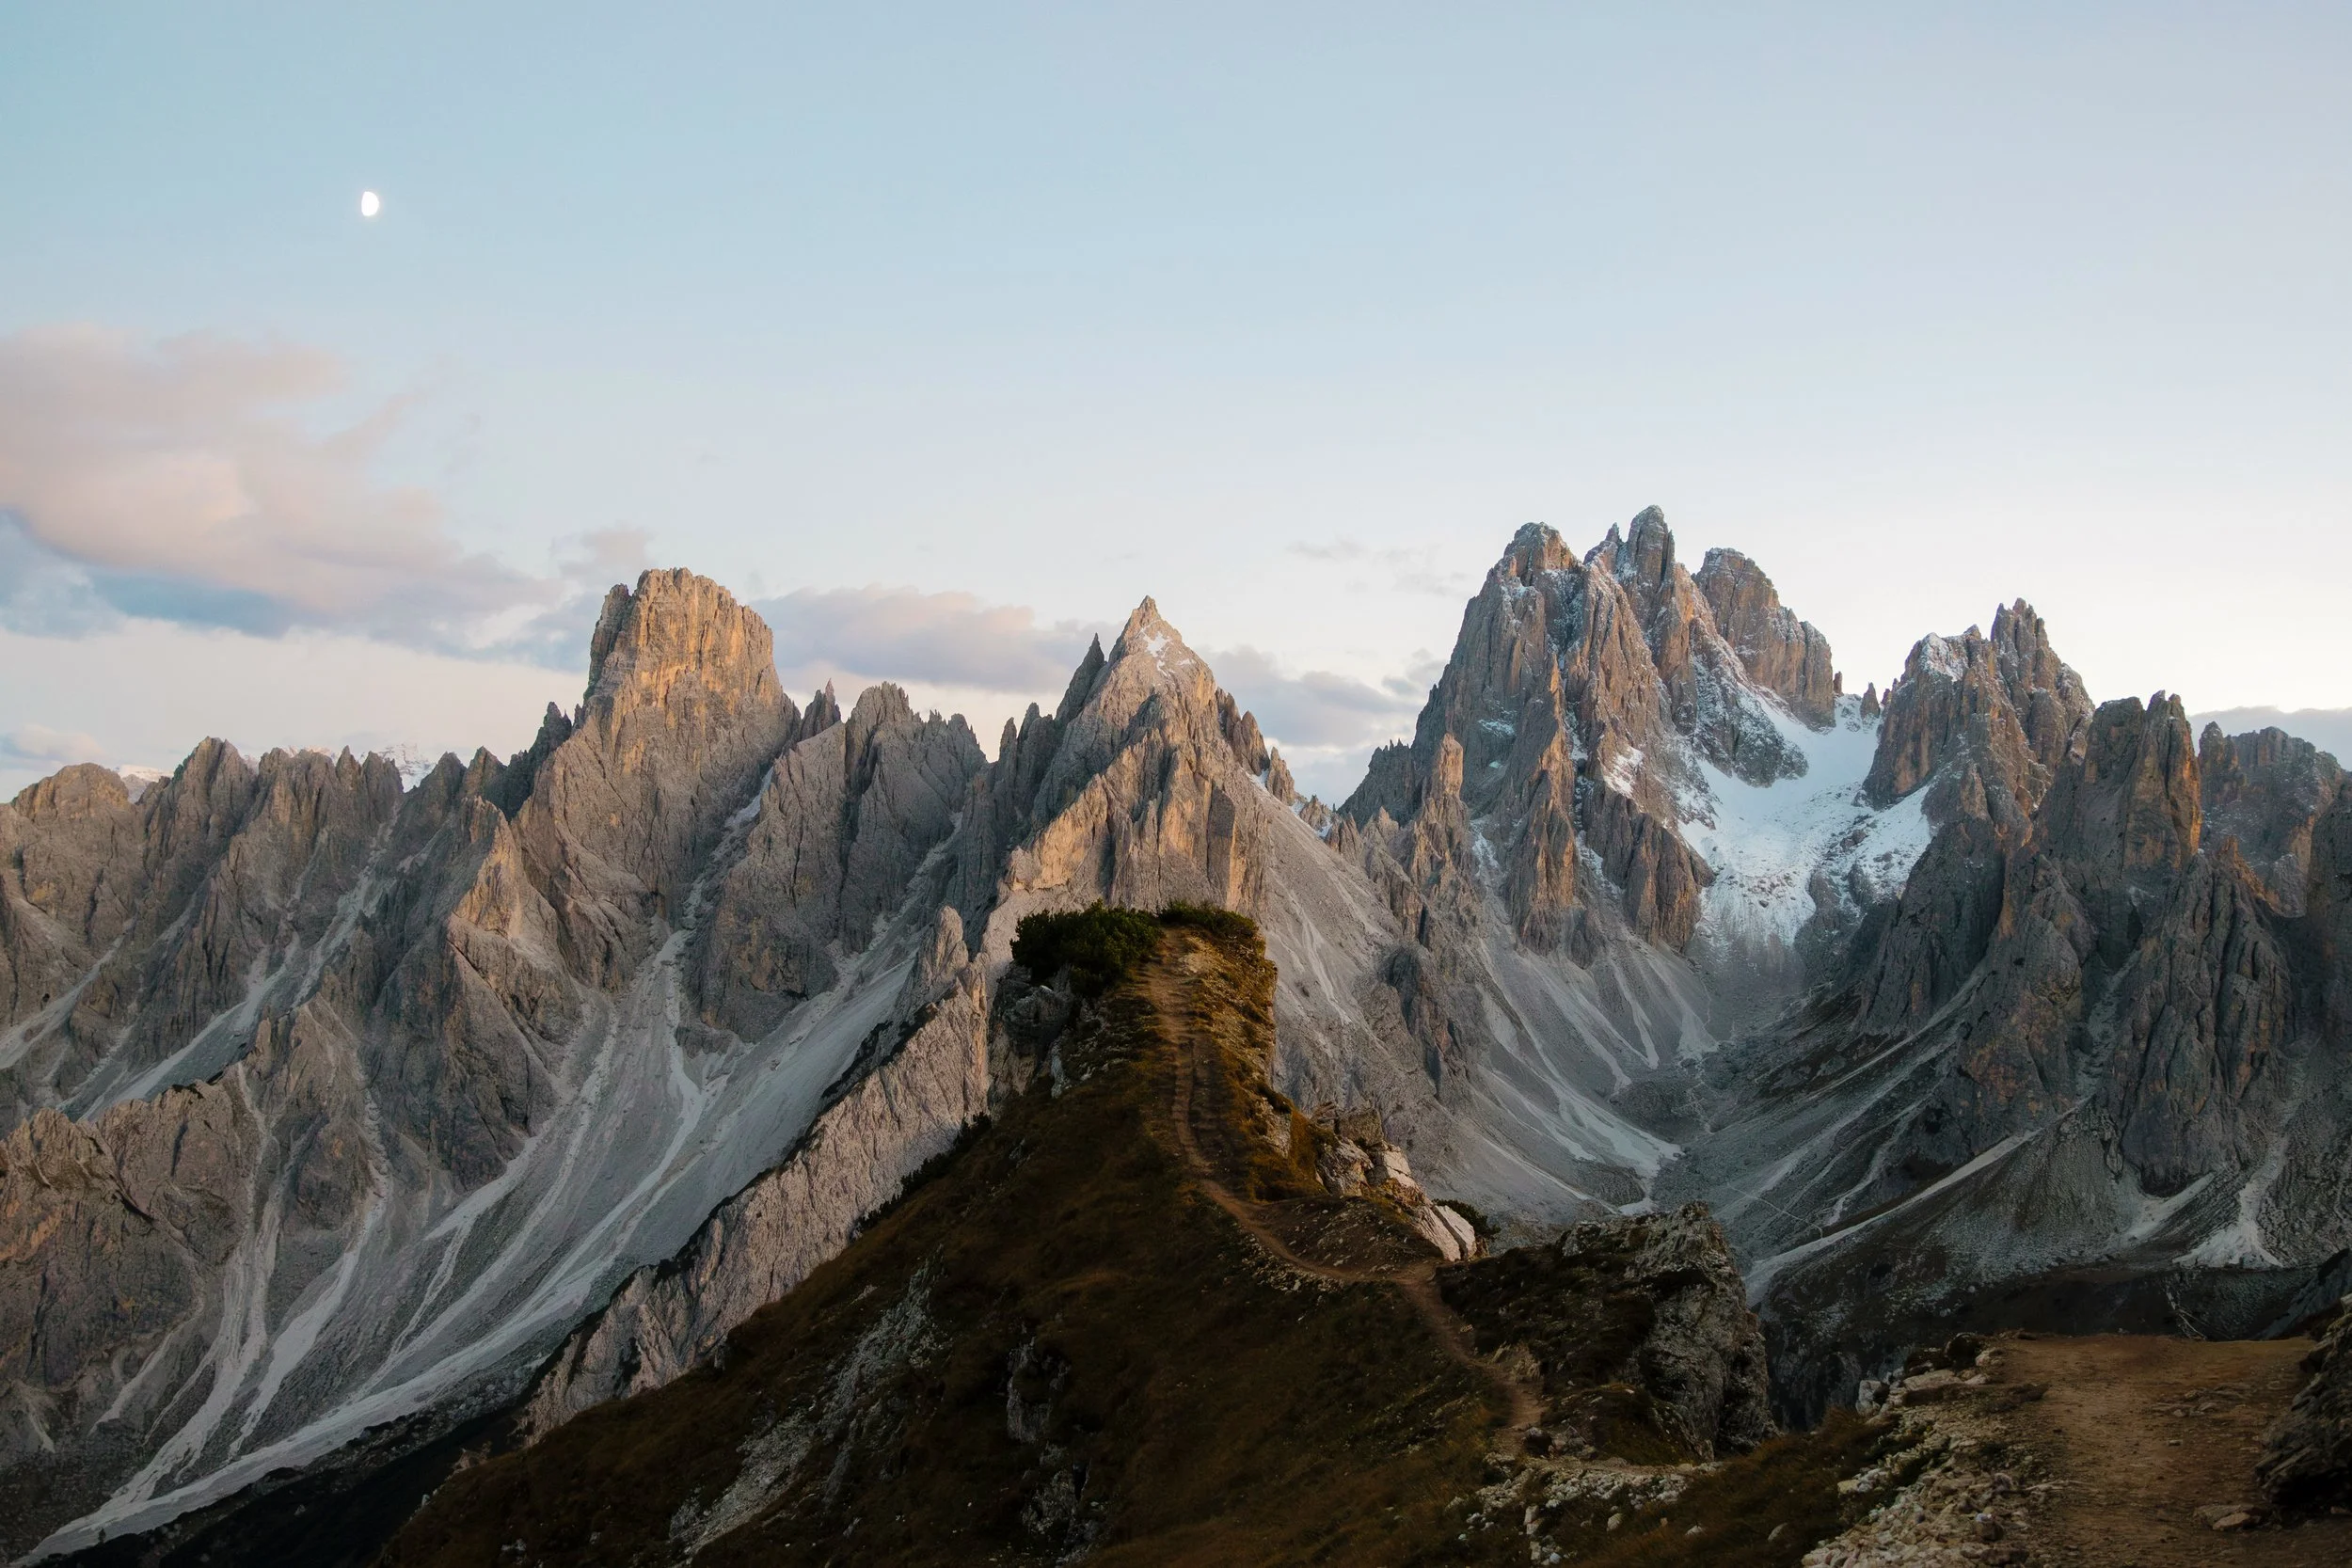
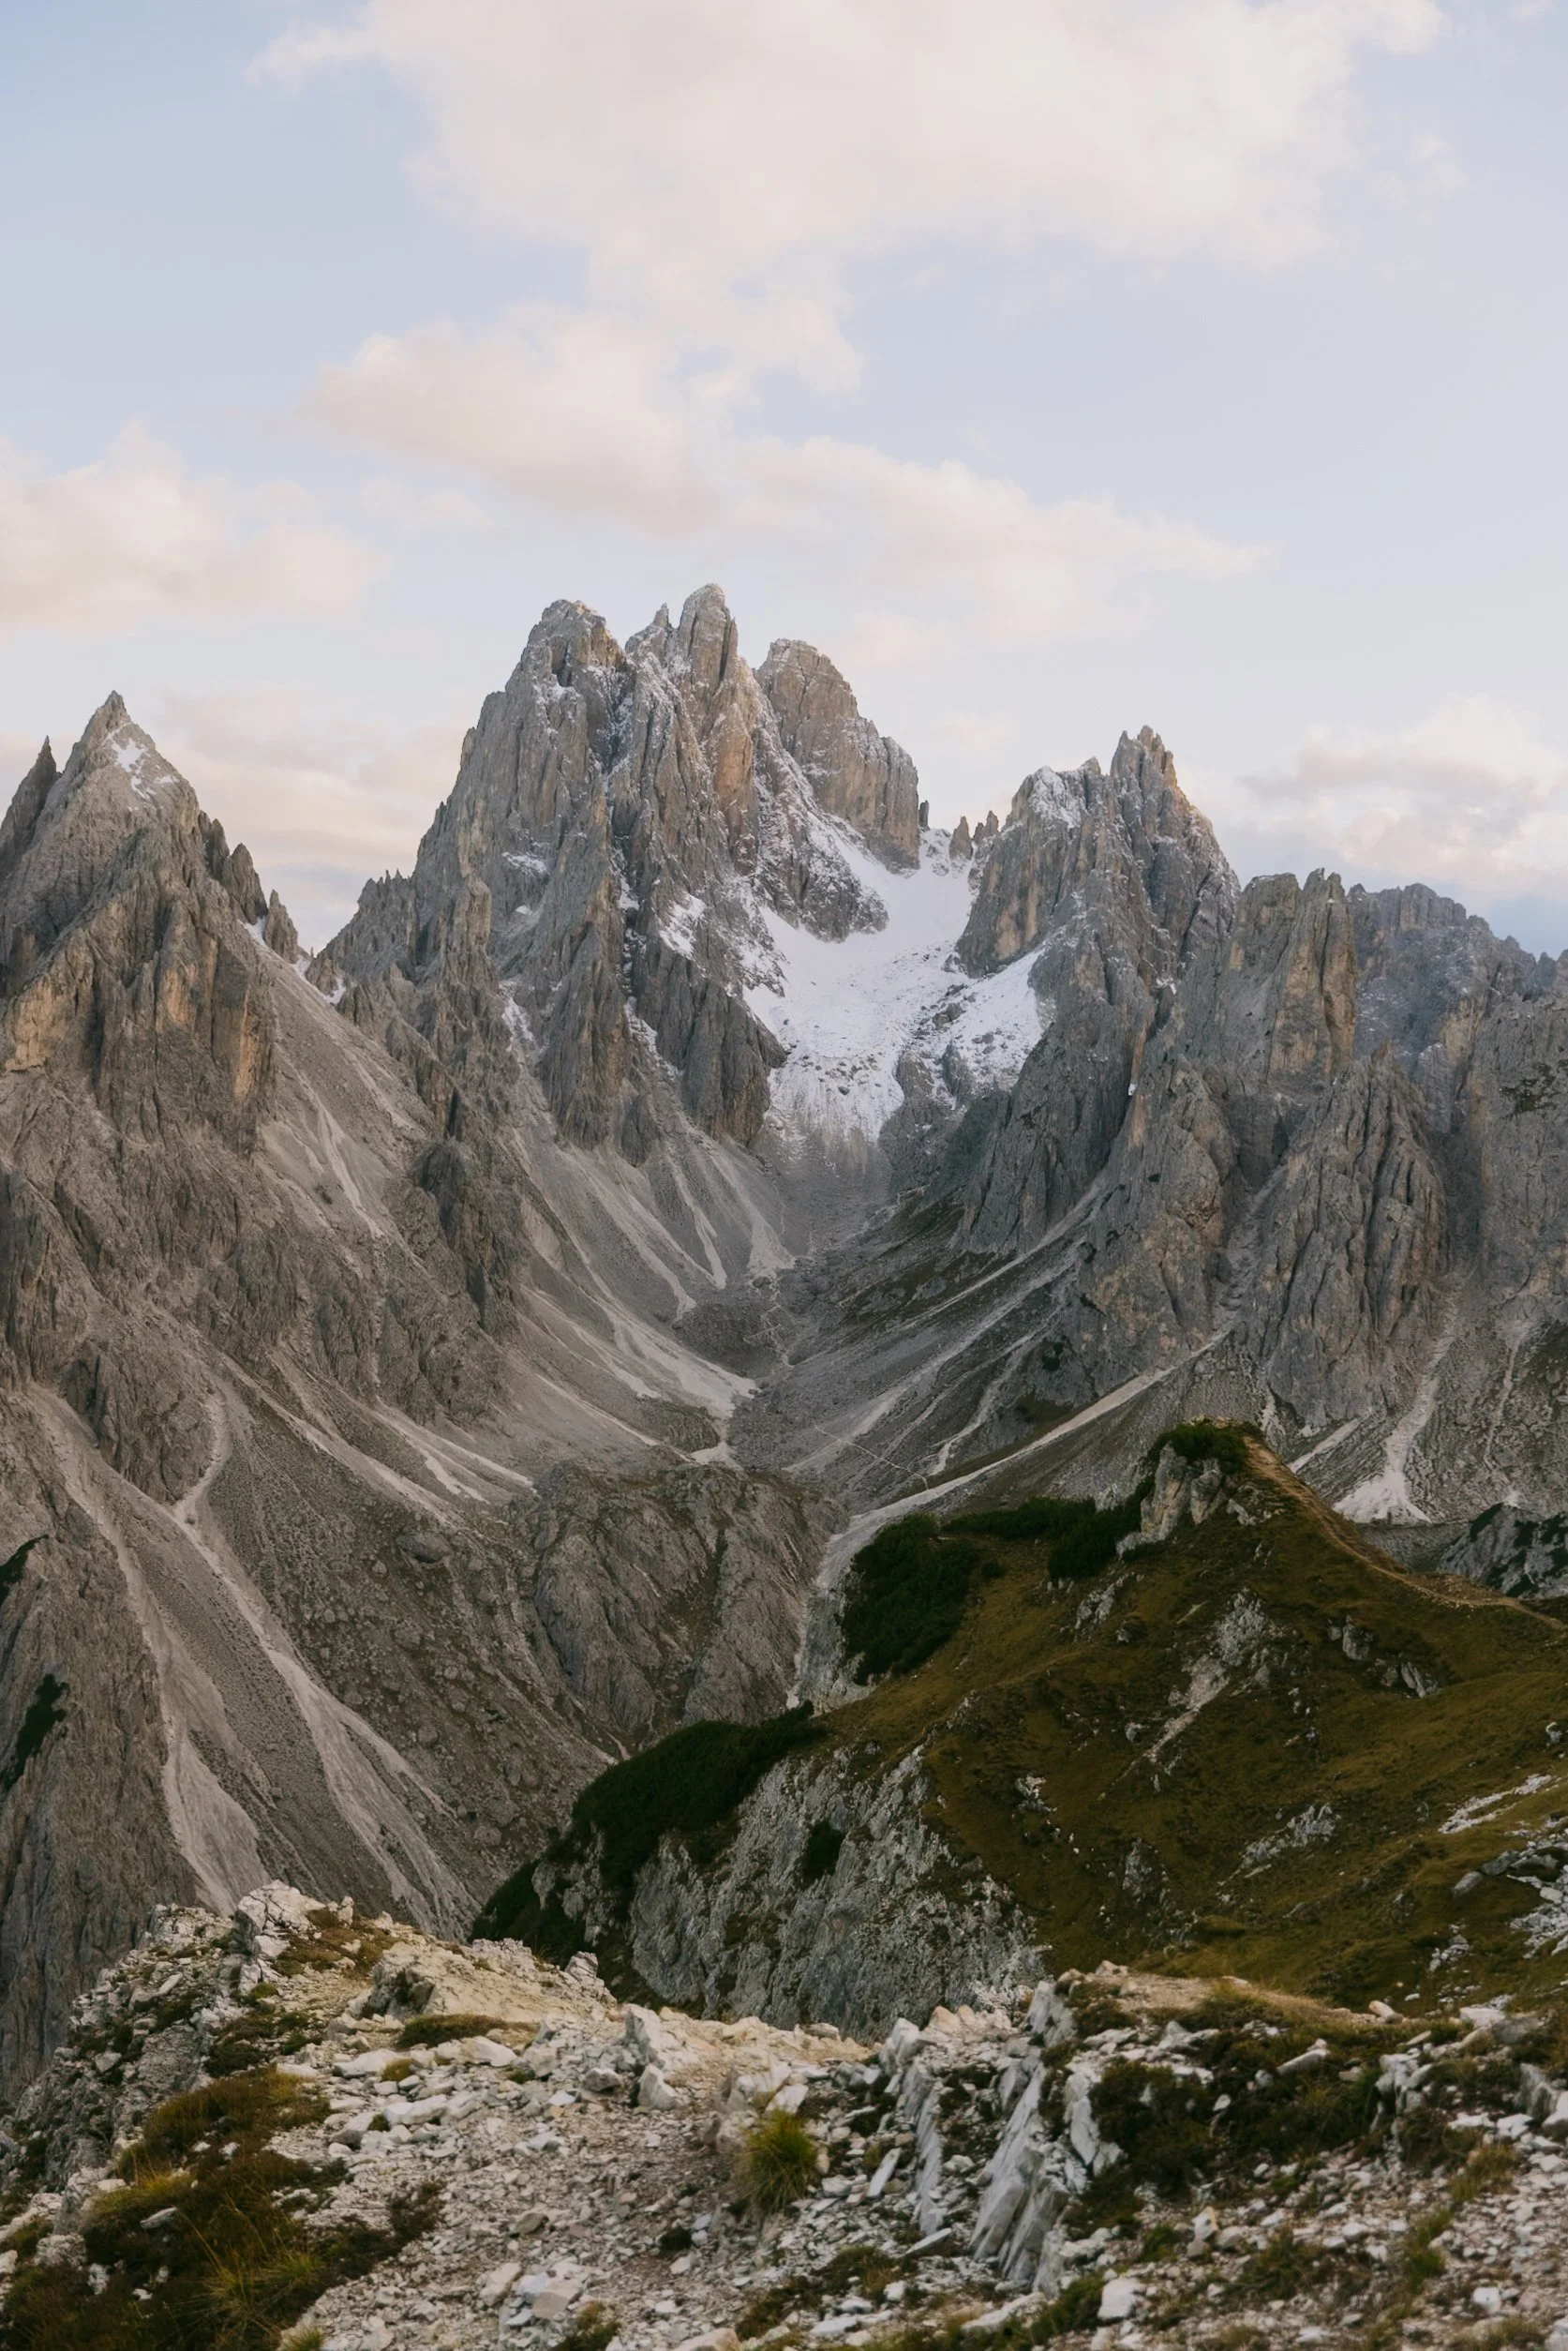
If you've spent any time looking at Dolomites travel photos, you've seen it. A lone hiker standing on a narrow grassy spur, surrounded by shark-tooth limestone spires that look like they belong in a fantasy book. That's Cadini di Misurina, and I can tell you from experience that seeing it in person hits completely differently than any photo can prepare you for!
The hike itself is short and accessible. However, because of its easy accessibility and online fame, this trail has become exponentially busier in recent years. It is no longer considered a "hidden gem," as many travel blogs claim. But that doesn't mean it's skippable - you just need to plan a little bit differently and more consciously to have a great experience.
Getting there requires more planning than most trails in the Dolomites thanks to a mandatory parking reservation system that catches visitors off guard every season. And the experience at the top? That depends entirely on when you go, and whether you're willing to walk five minutes past the famous photo spot.
This guide covers all of it - including the parking reservation details that will make or break your visit, the step-by-step trail guide, my personal favorite viewpoint that most people skip right past, and the honest moments that reminded me why this place is worth coming back to over and over.
Table of Contents
Introduction
Where is the Cadini di Misurina Viewpoint?
Getting There & Parking (Reservation Required)
Trailhead & Step-by-Step Trail Guide
The Famous Viewpoint
The Upper Viewpoint - My Personal Favorite
Hiking Cadini di Misurina Responsibly
When to Visit
What to Pack
Other Things to Do Nearby
Where to Stay Nearby
FAQ
Final Thoughts

📍Cadini di Misurina - Quick Planning Guide
Trailhead Location: Rifugio Auronzo
Difficulty Level: Easy
Distance: Approximately 3.2 km (2 miles) round trip
Elevation Gain: Roughly 210 meters (690 feet)
Duration: 1 to 2 hours just for hiking, not counting photo stops
Parking reservation: Mandatory - €40 per car
Book parking: auronzo.info
Road open: Late May/early June - late October/early November
Best Months: Mid-June to early July, mid-September to early October
Best Time of Day: Late afternoon/sunset or sunrise
Where is the Cadini di Misurina Viewpoint?
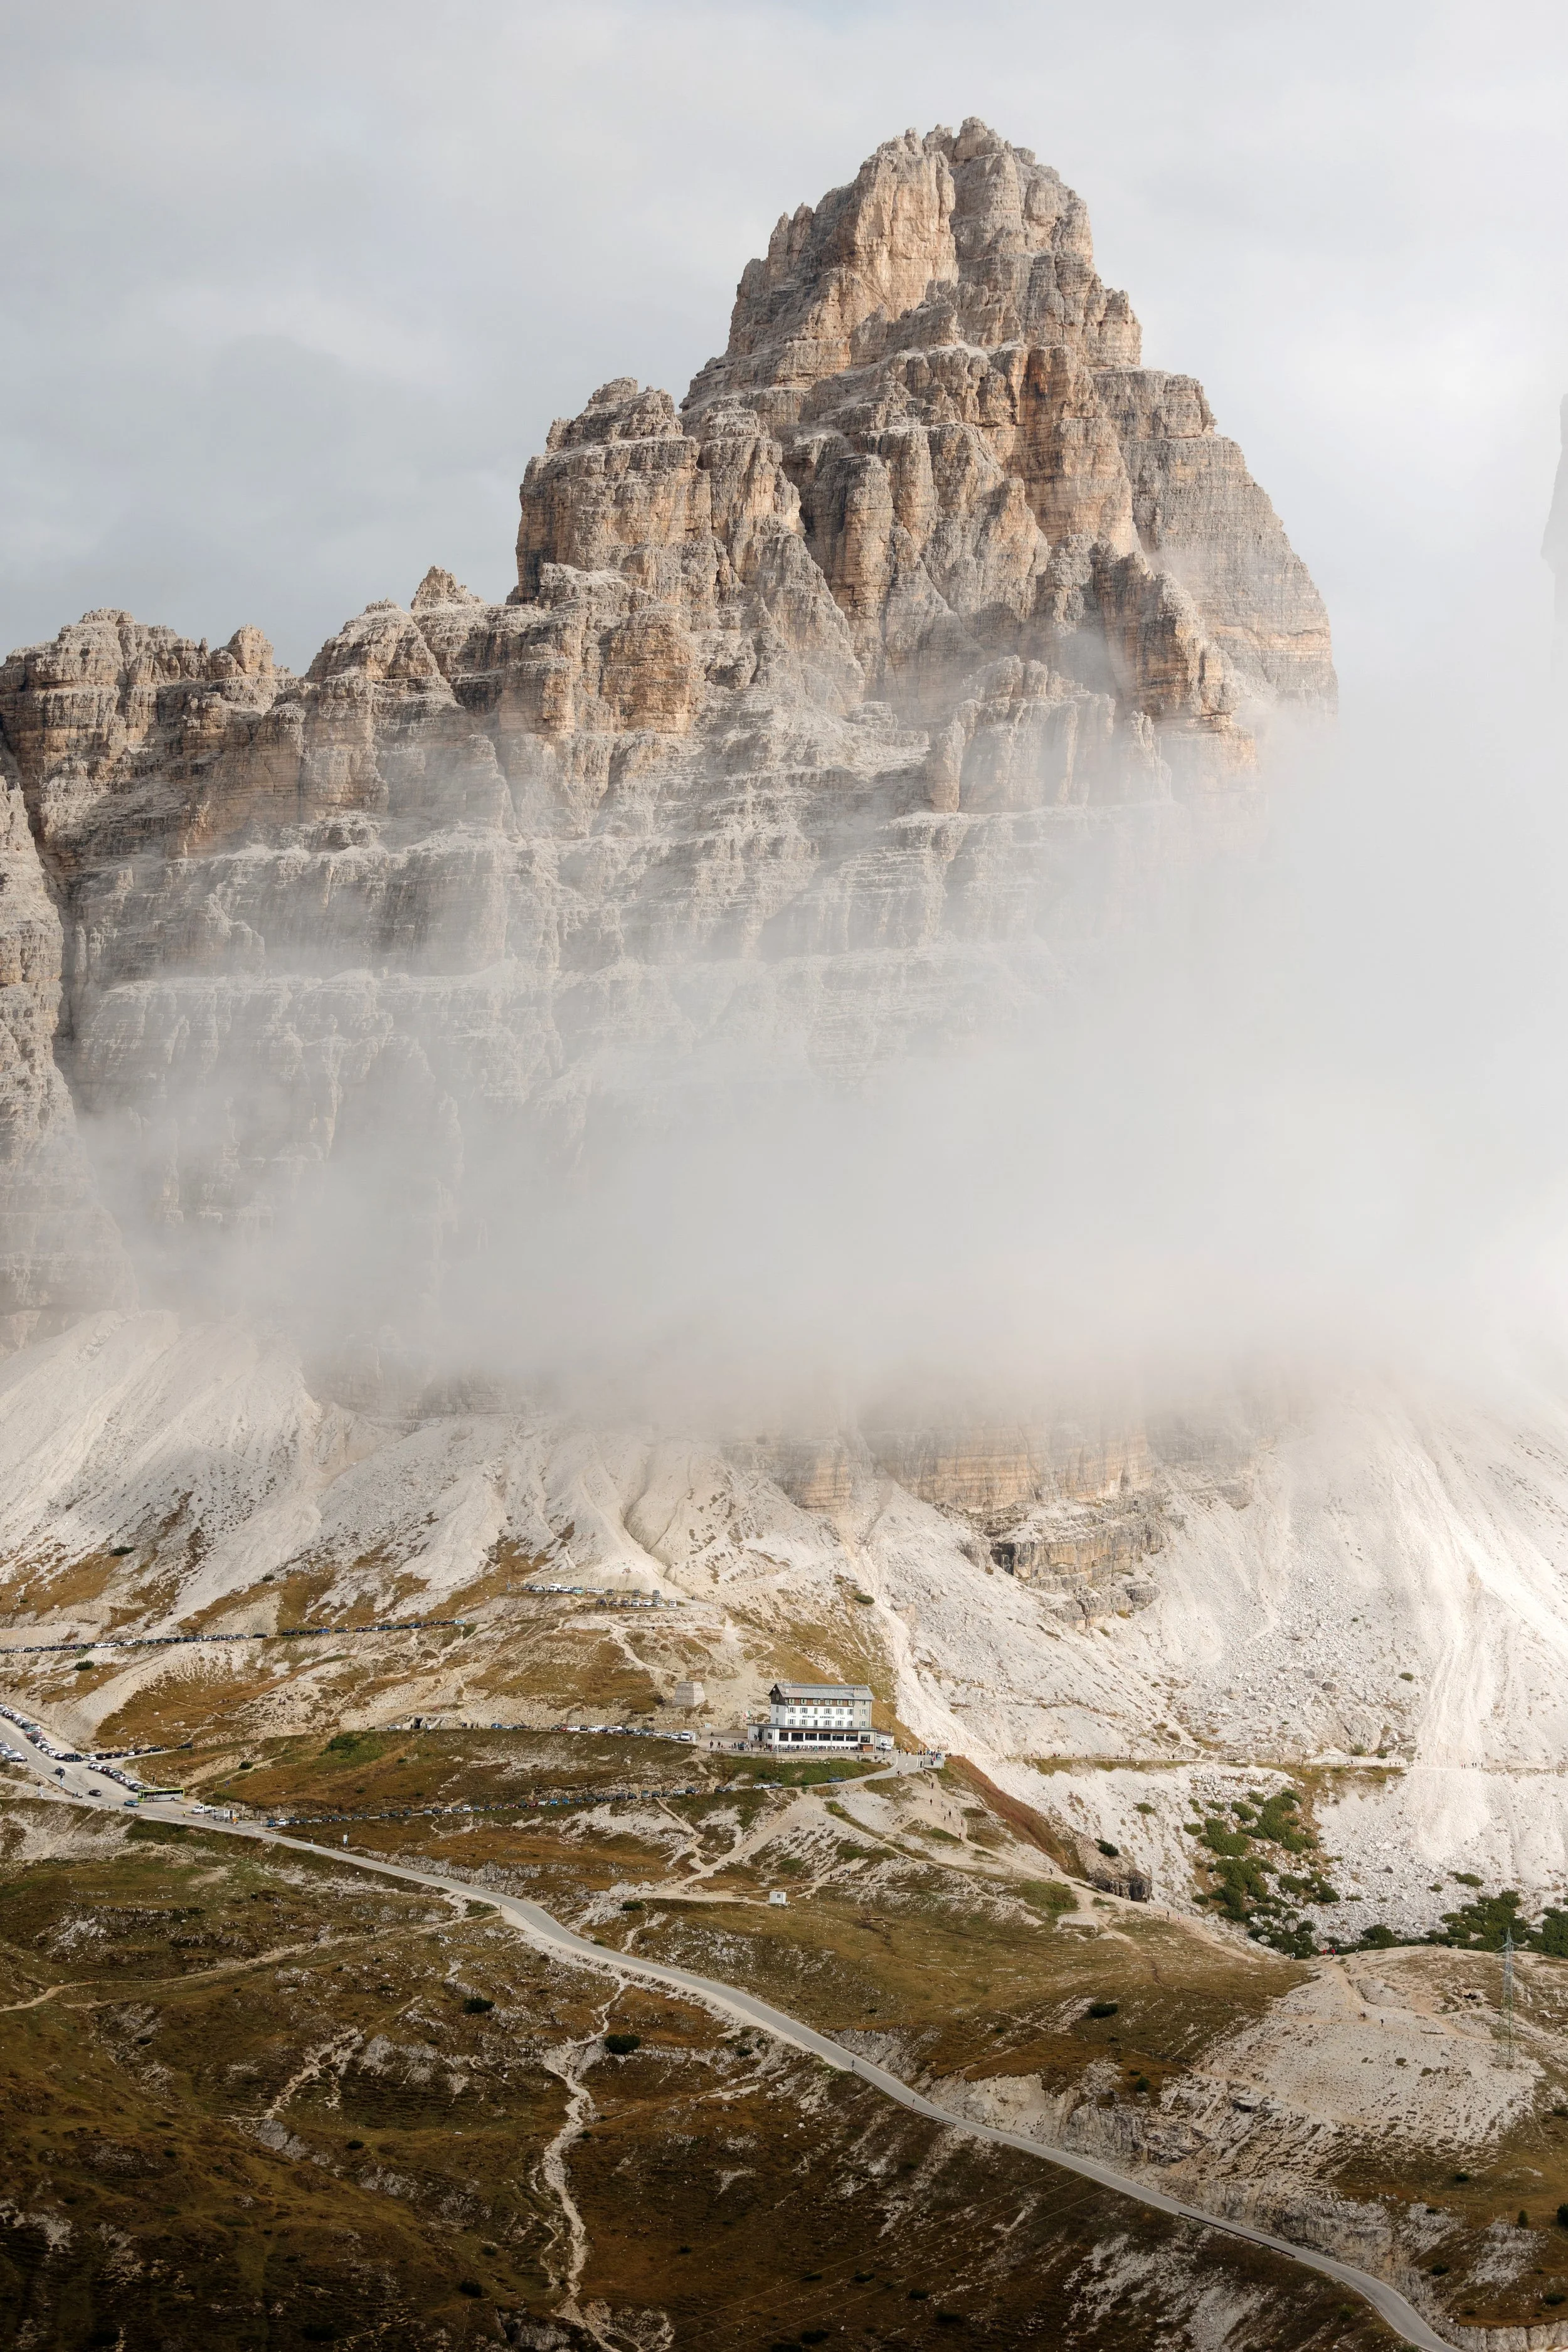
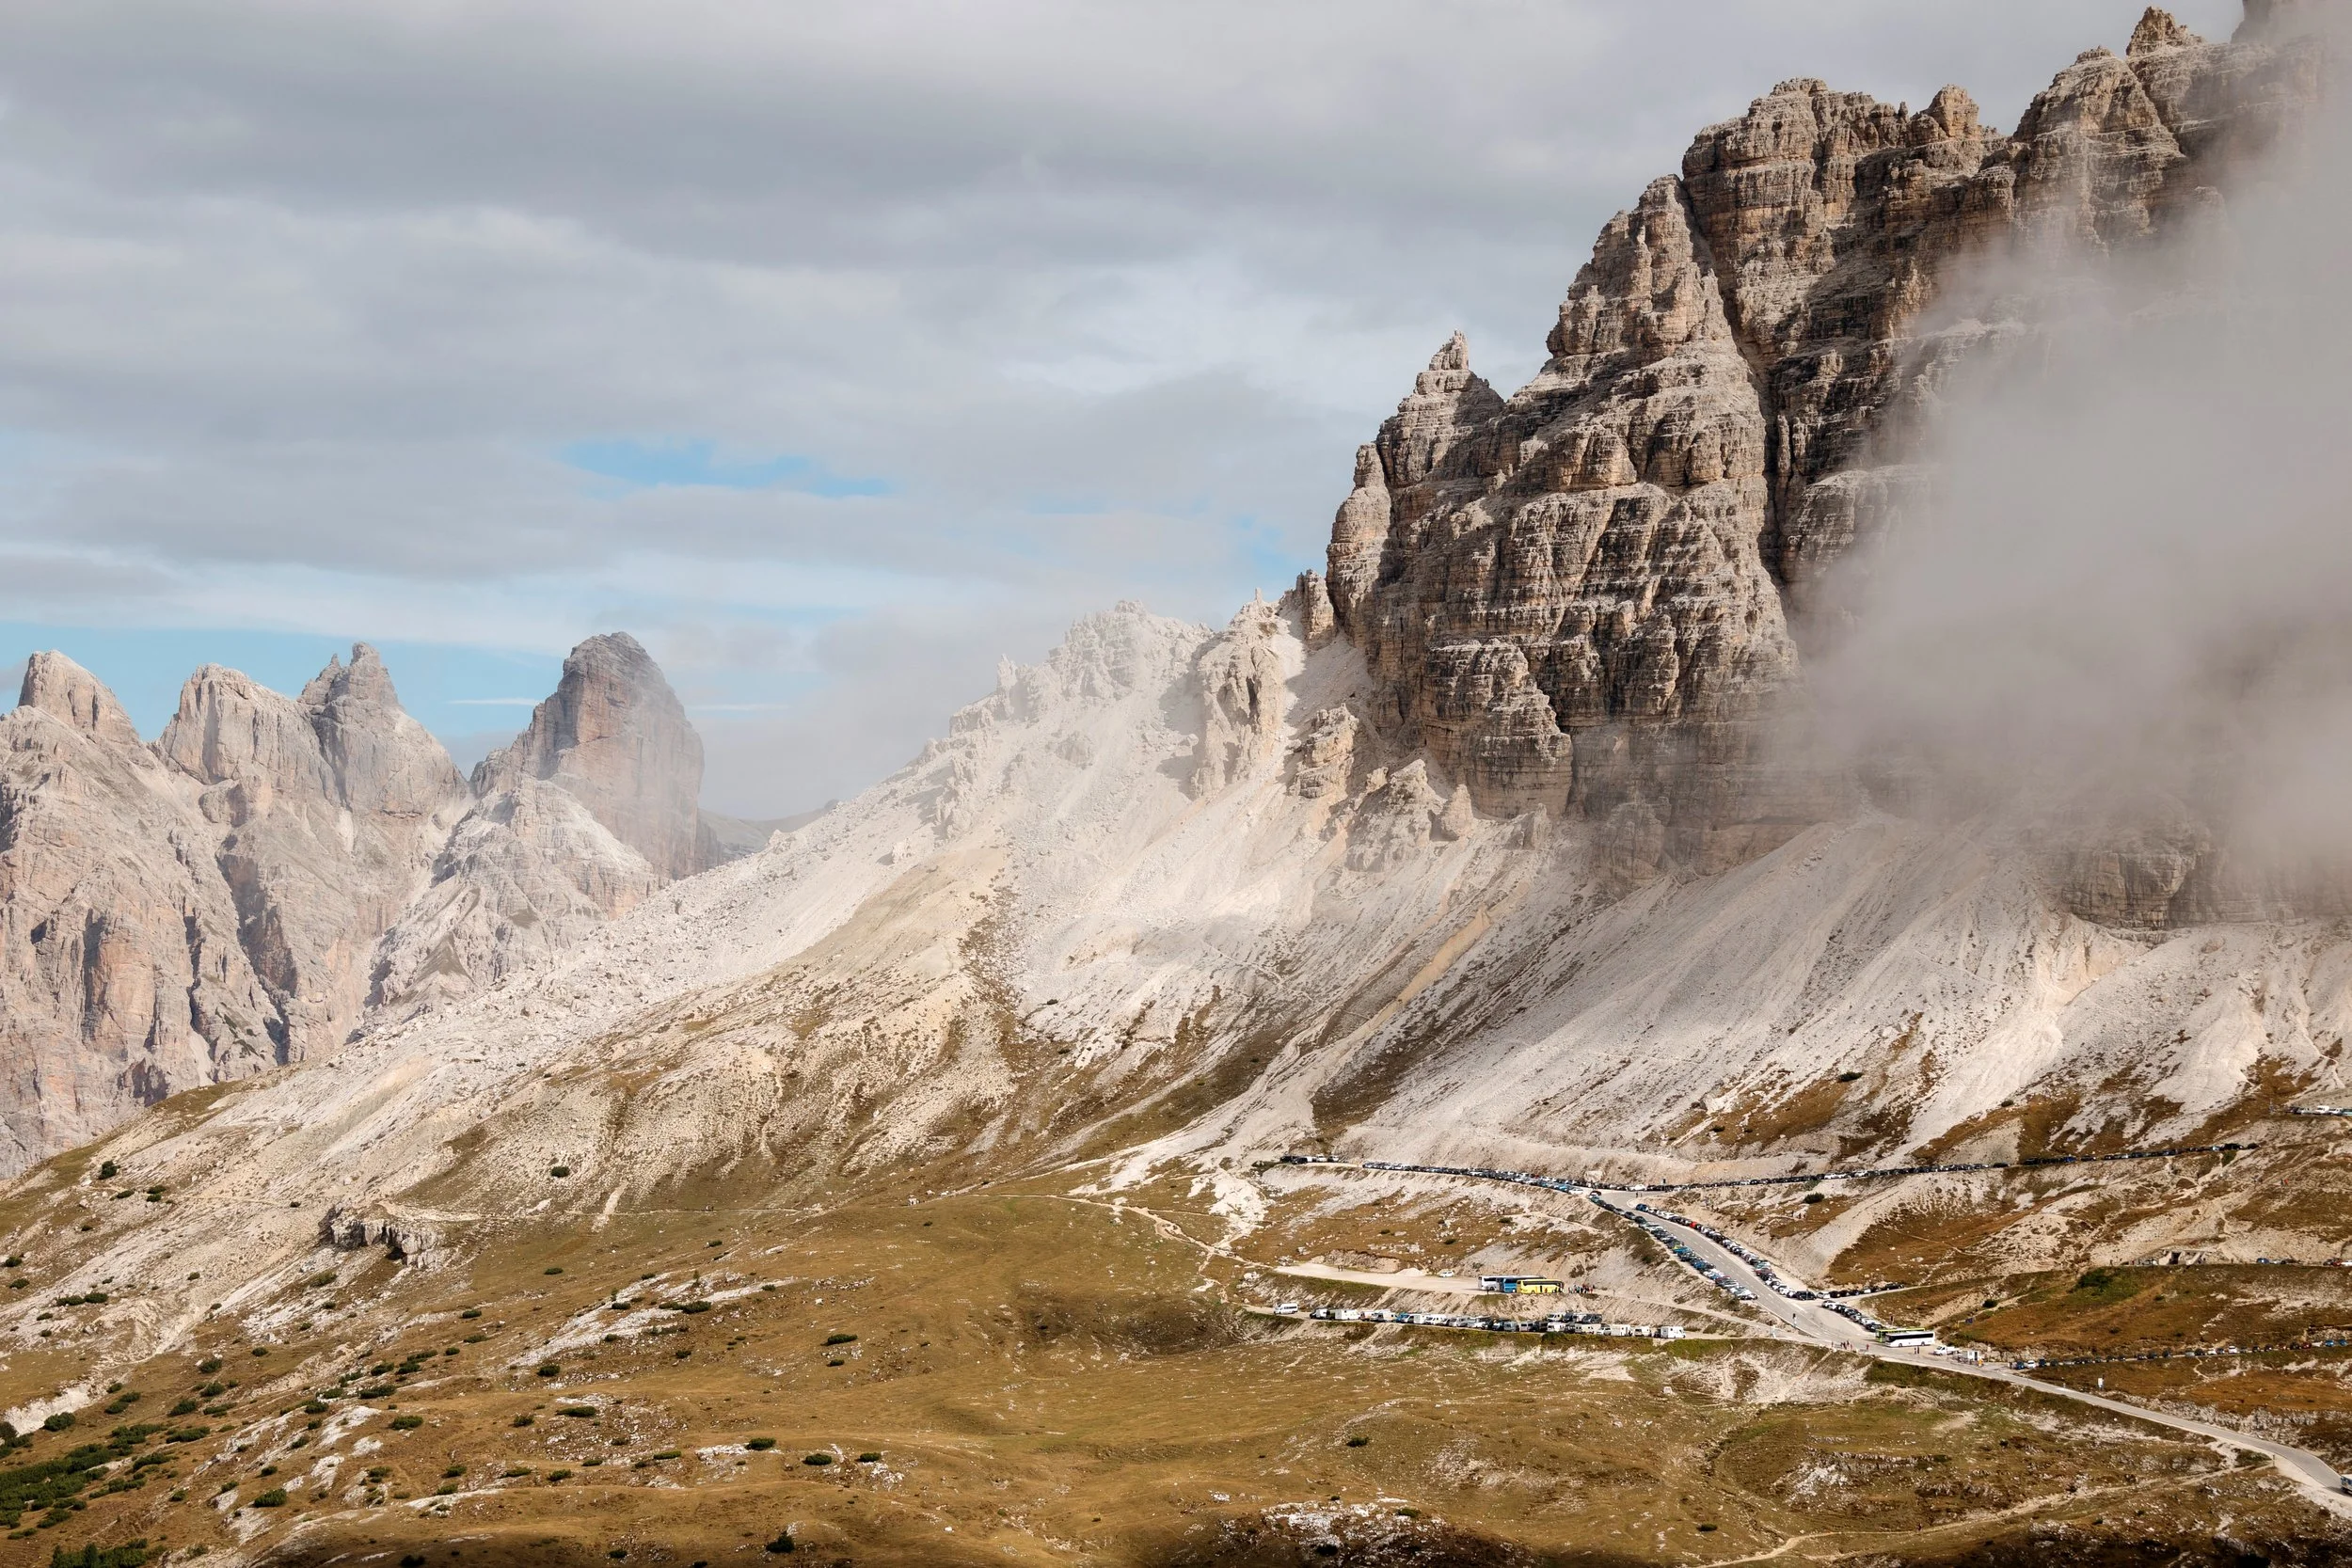
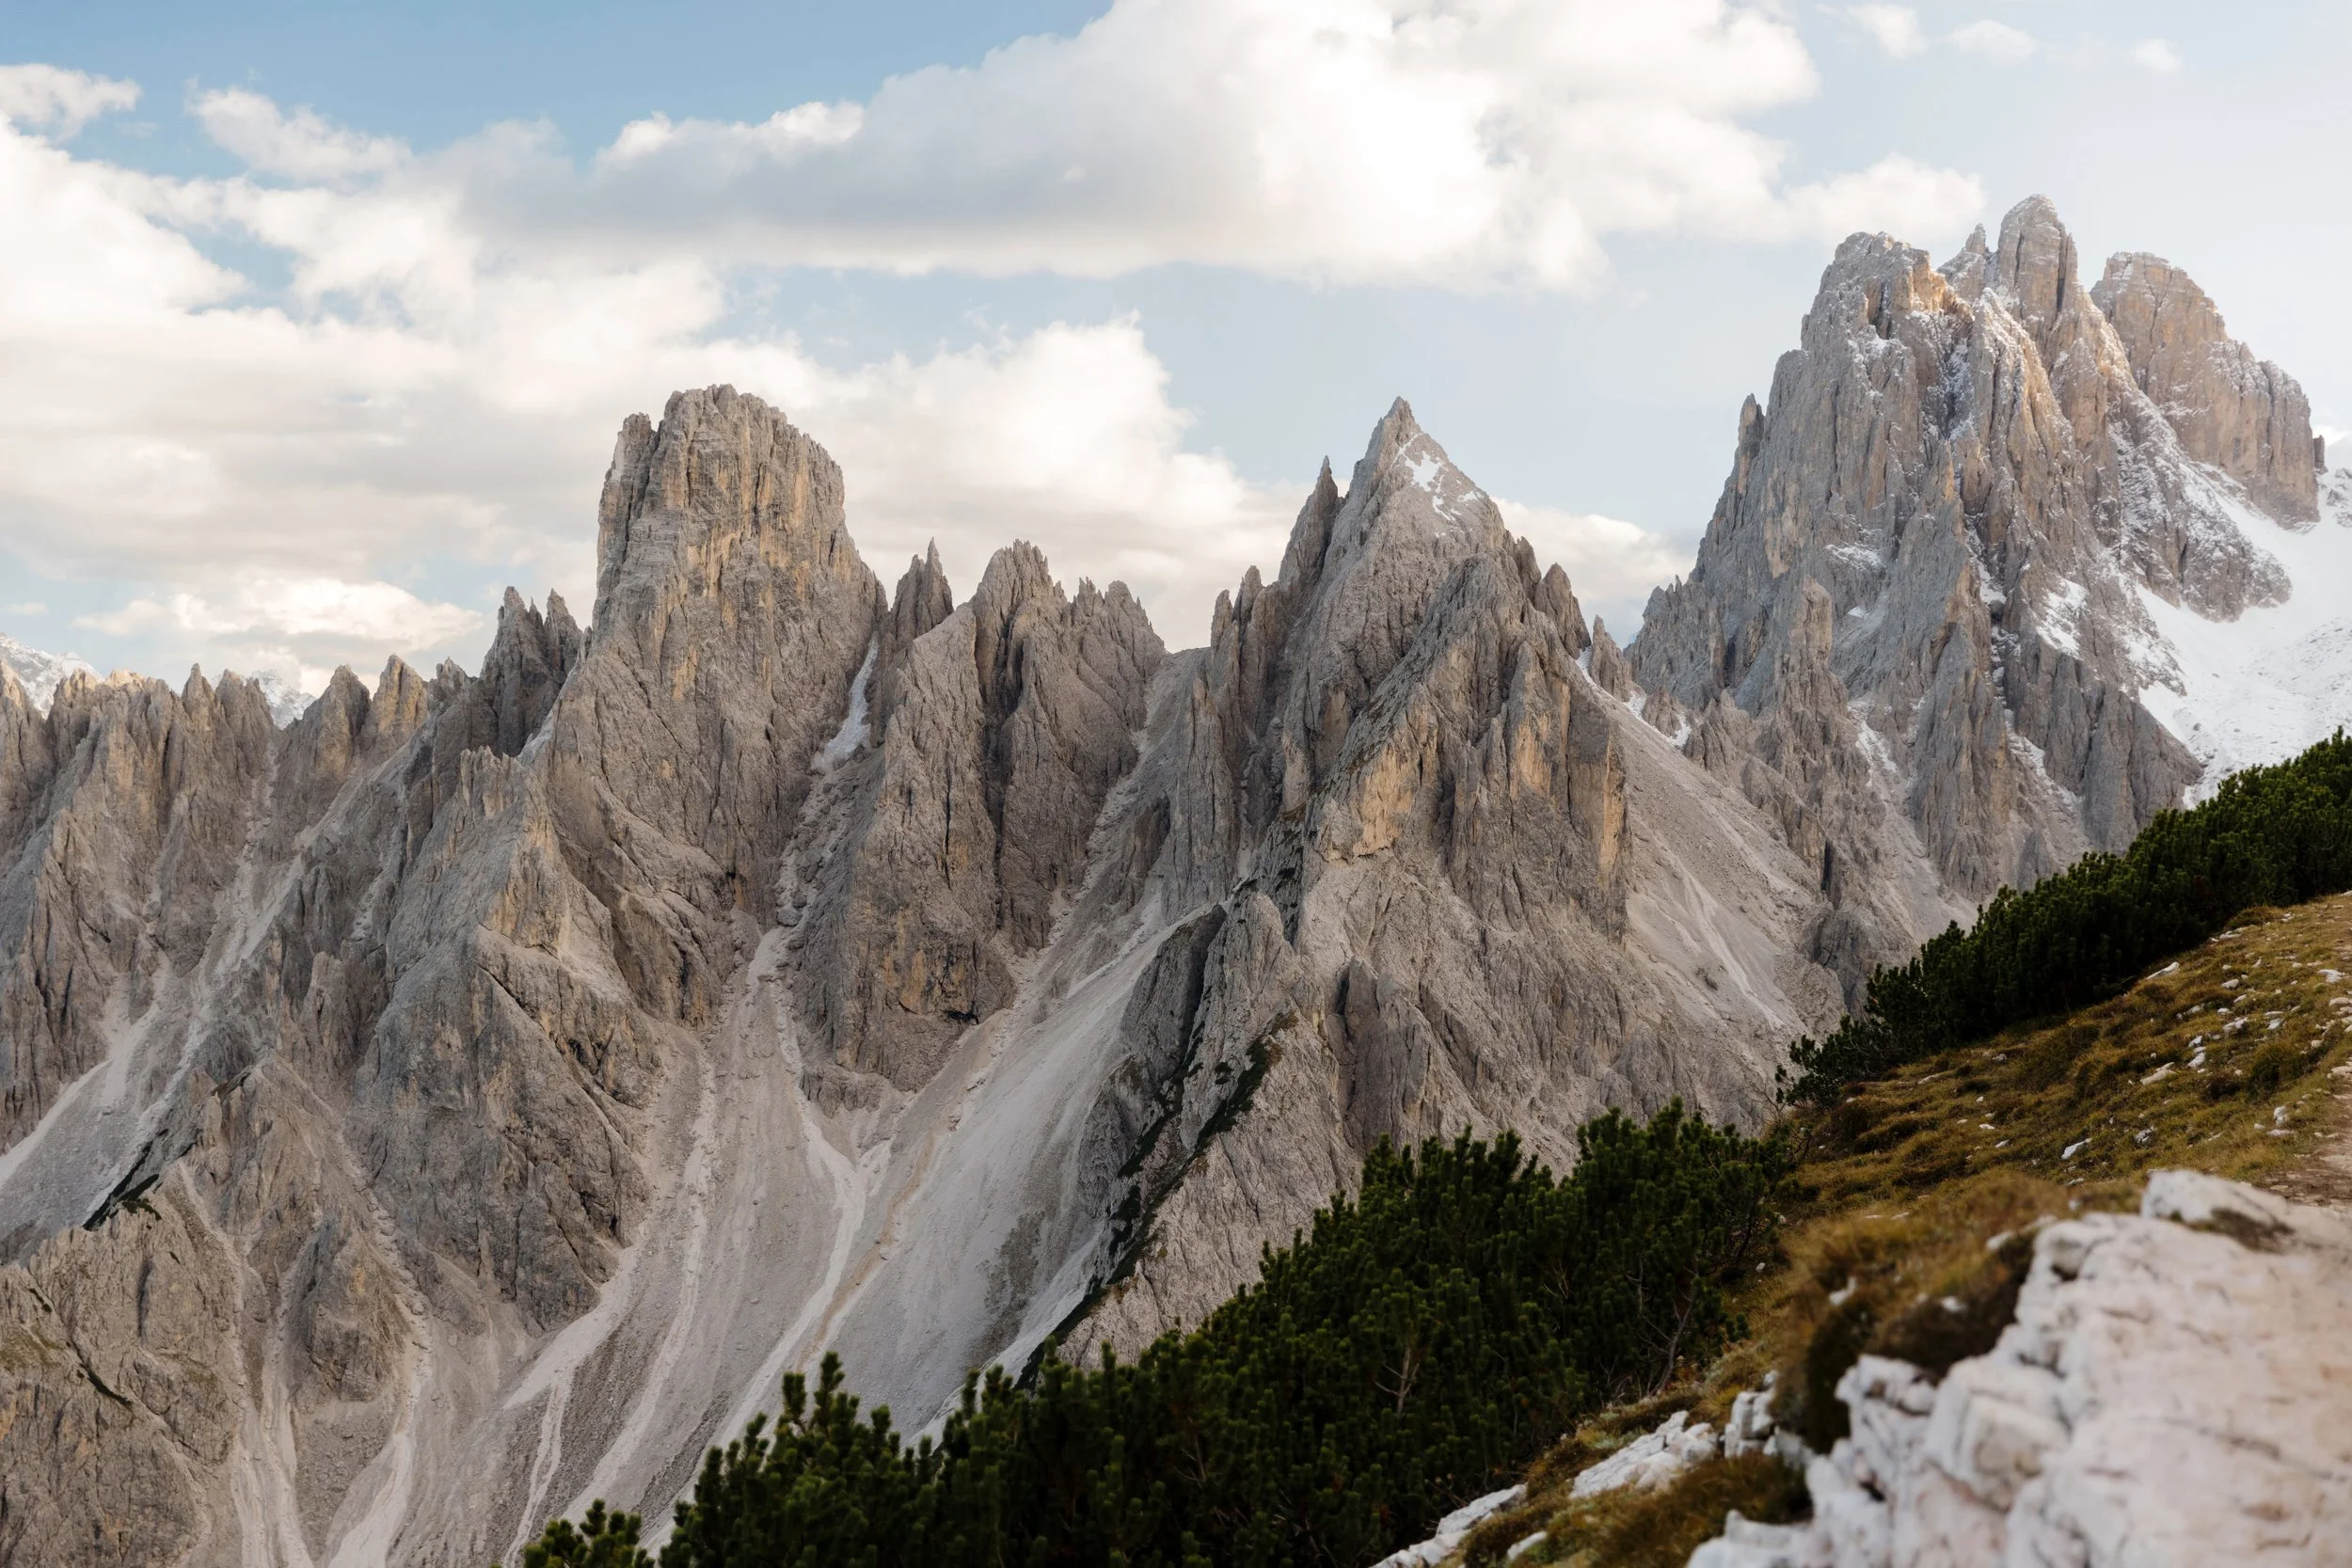
The Cadini di Misurina viewpoint sits within the Tre Cime (Drei Zinnen) Nature Park in the eastern Dolomites - specifically in the Sexten (Sesto) Dolomites in the province of Belluno. The trailhead starts at Rifugio Auronzo at 2,333 meters, which is the exact same starting point as the famous Tre Cime loop. Tackling both bucket list hikes in a single day is completely doable if you have the time and energy.
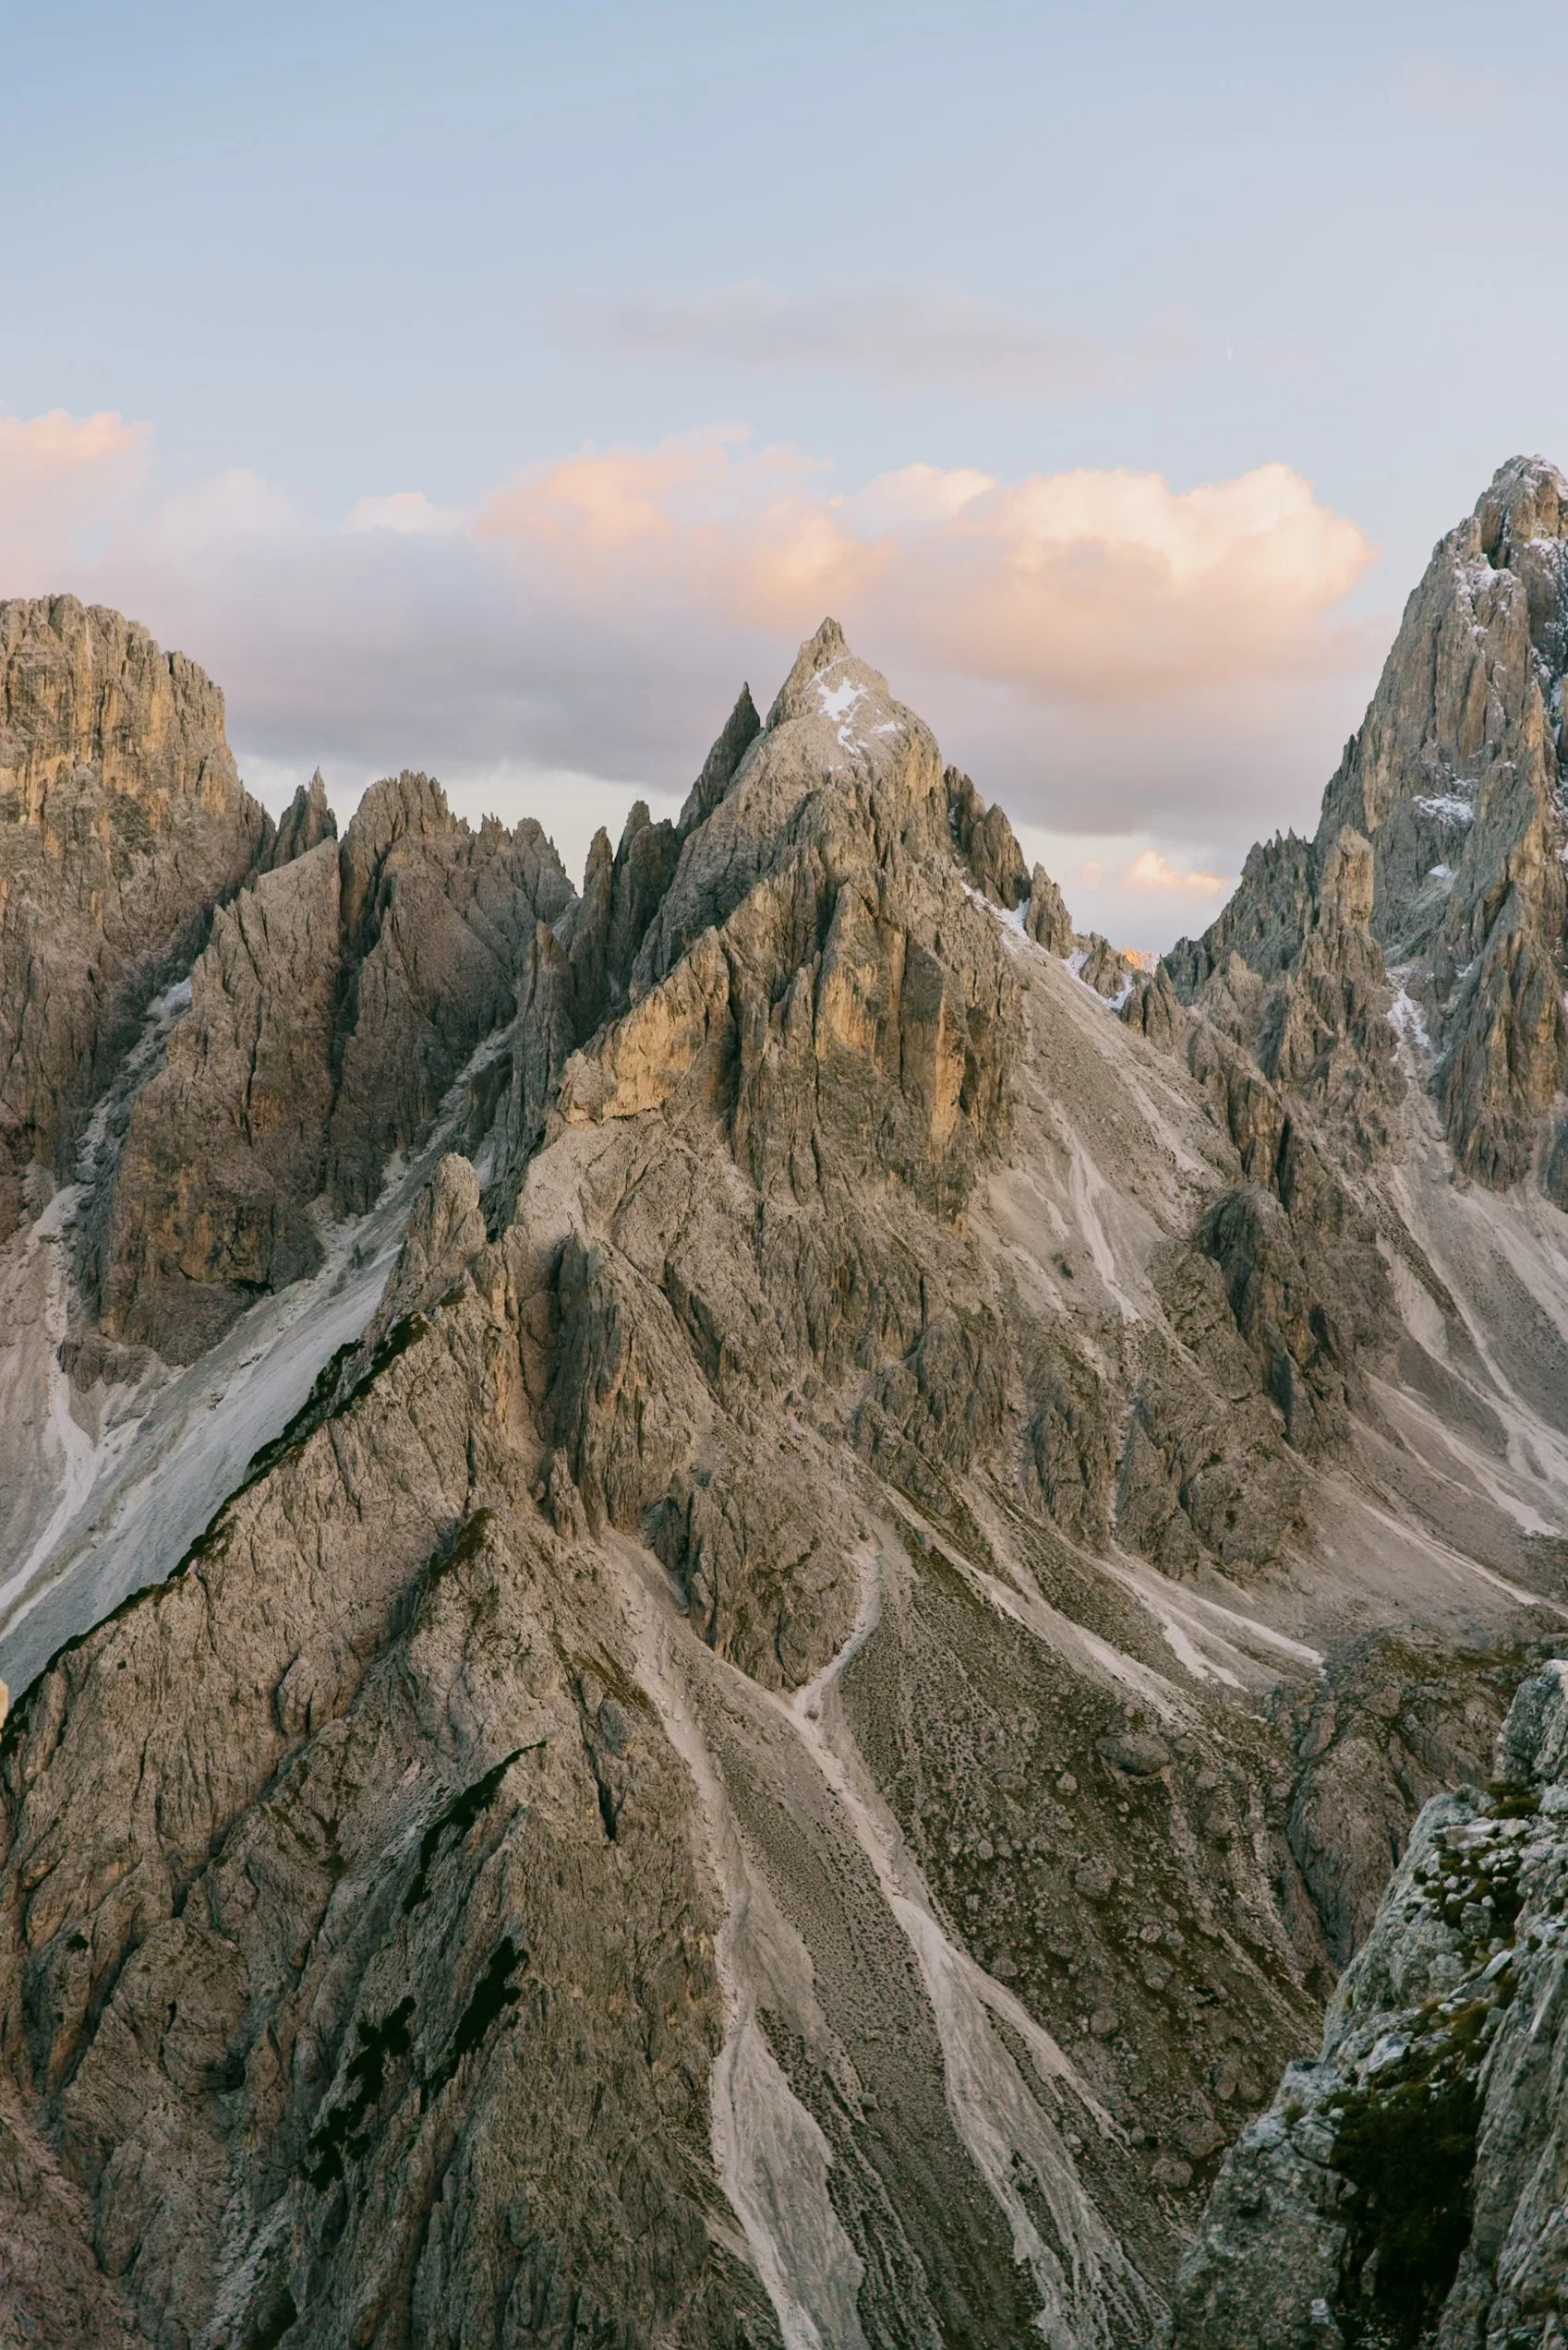
The Cadini group - a cluster of jagged needle-like spires - sits directly south of Rifugio Auronzo and contrasts dramatically with the massive, blocky towers of Tre Cime to the north. From the right angle, they look almost impossibly dramatic. And from the viewpoint itself, standing right amongst them, they look even more otherworldly.
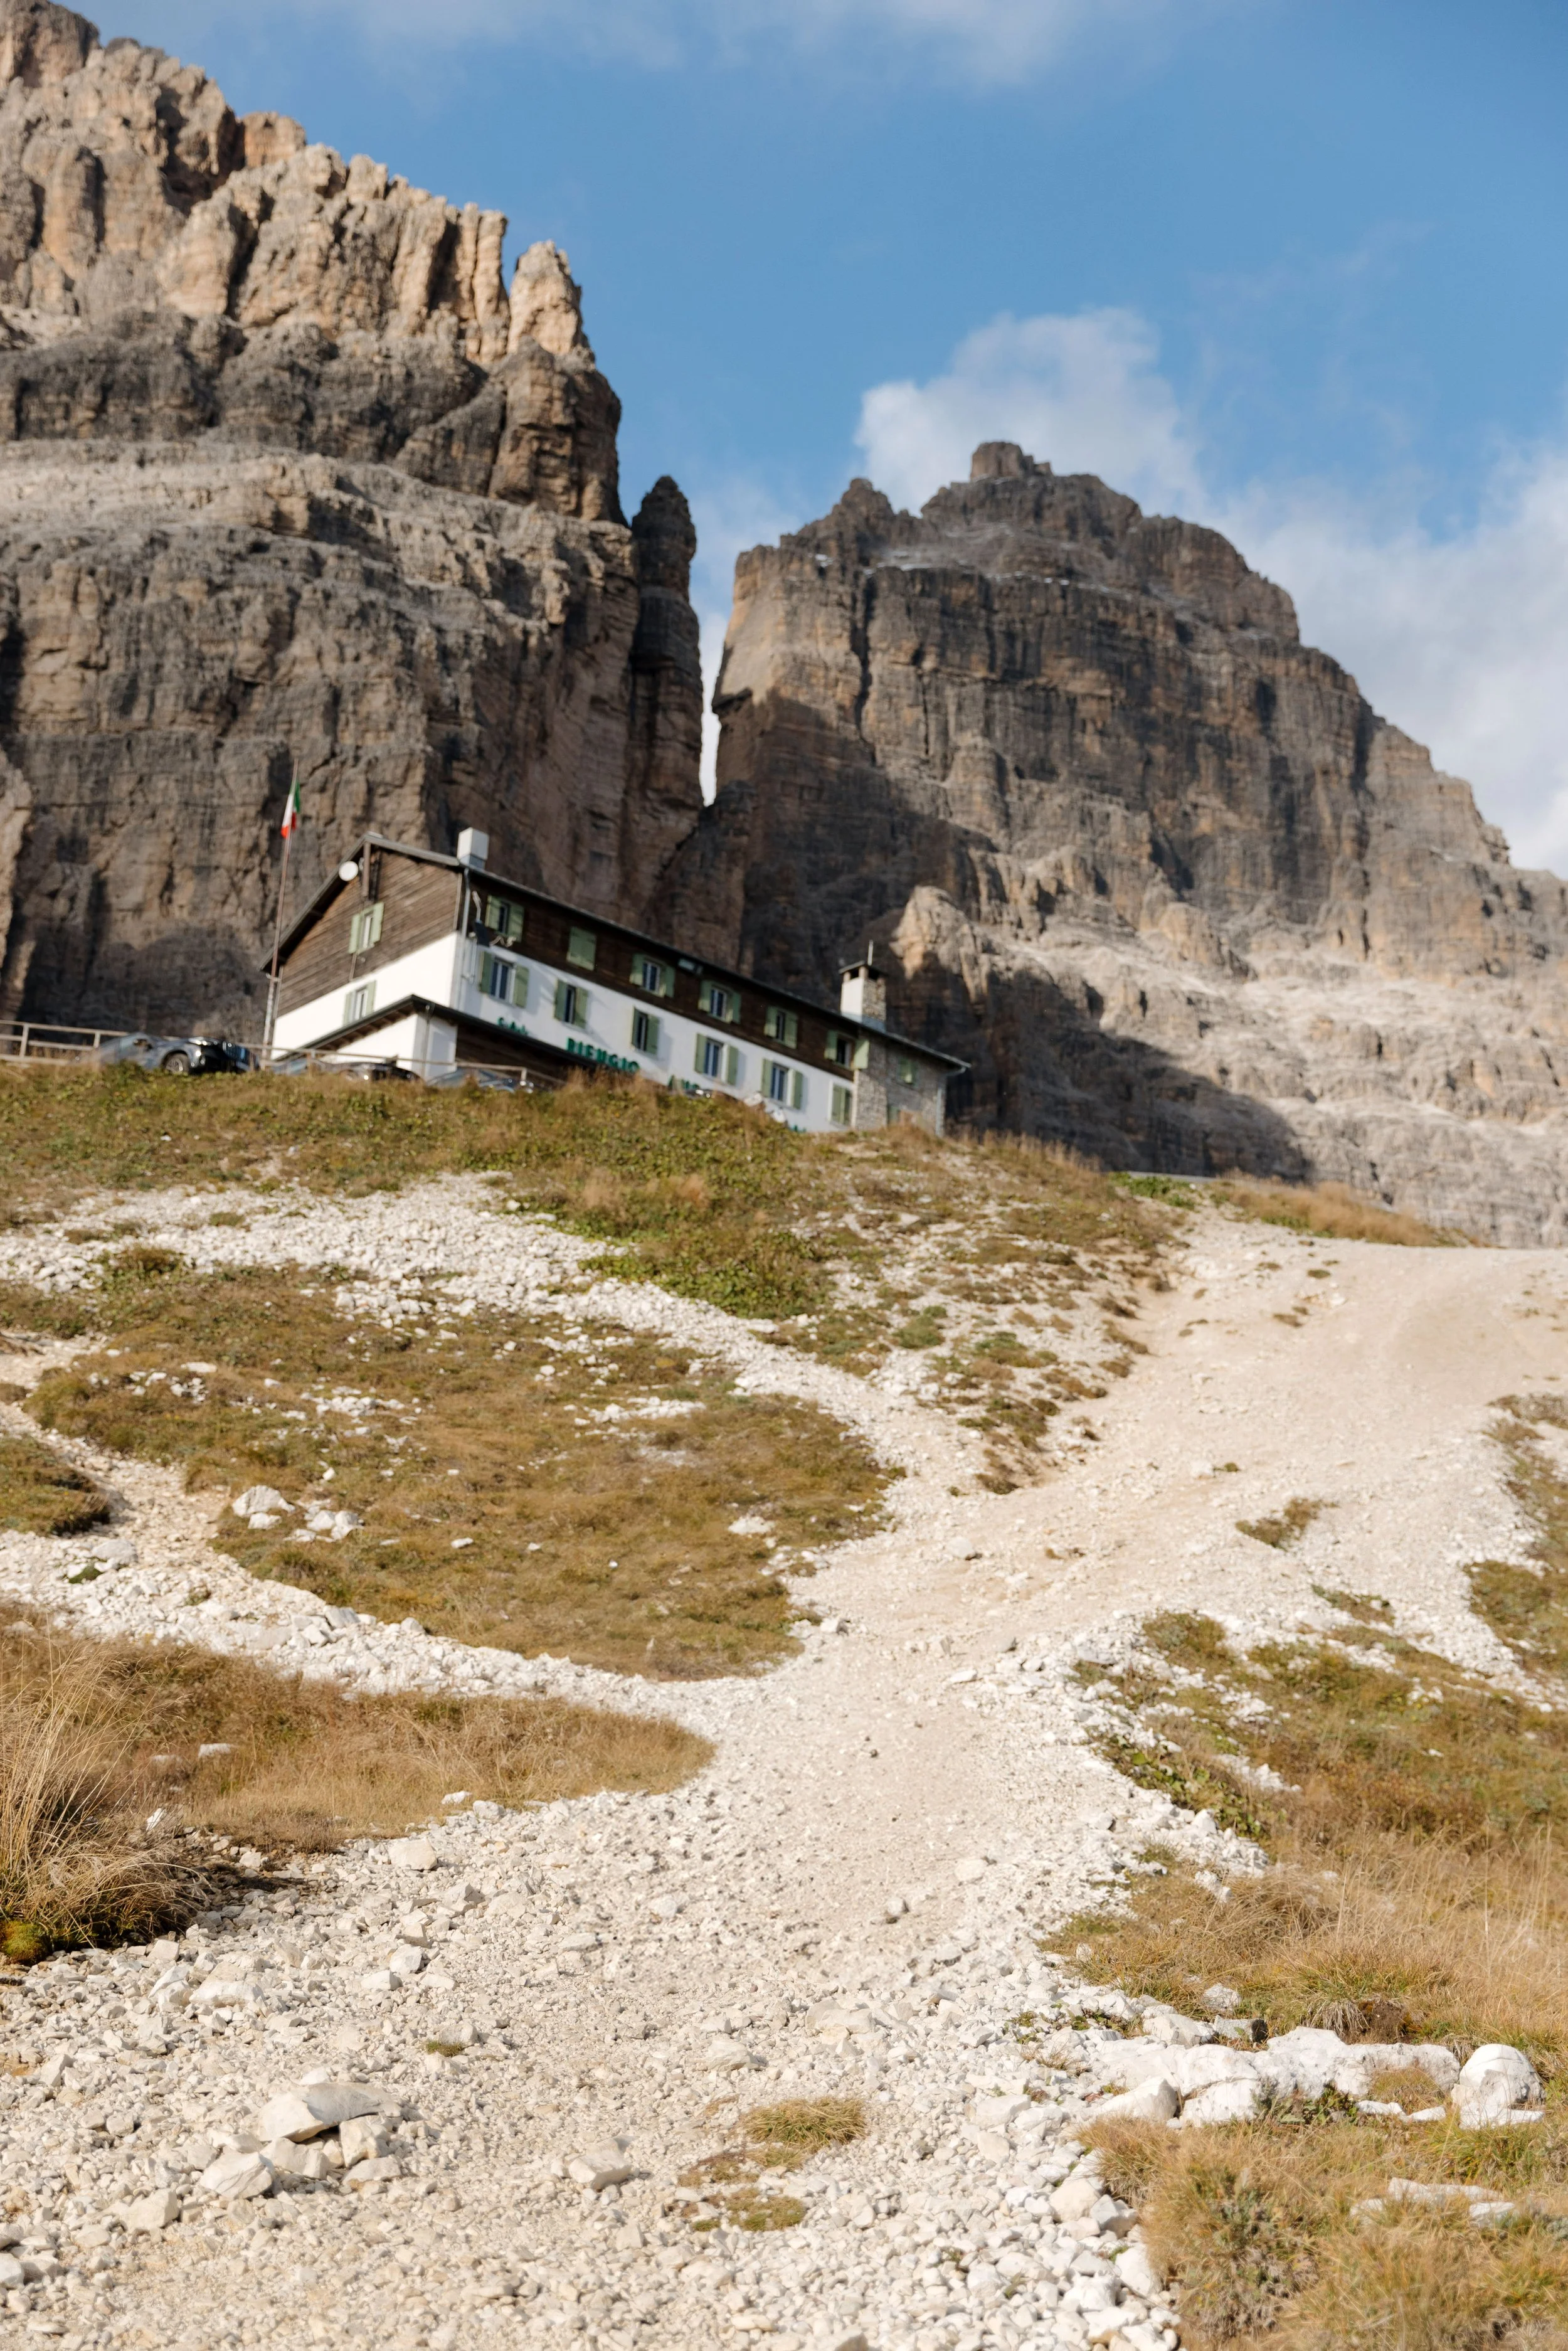
Rifugio Auronzo
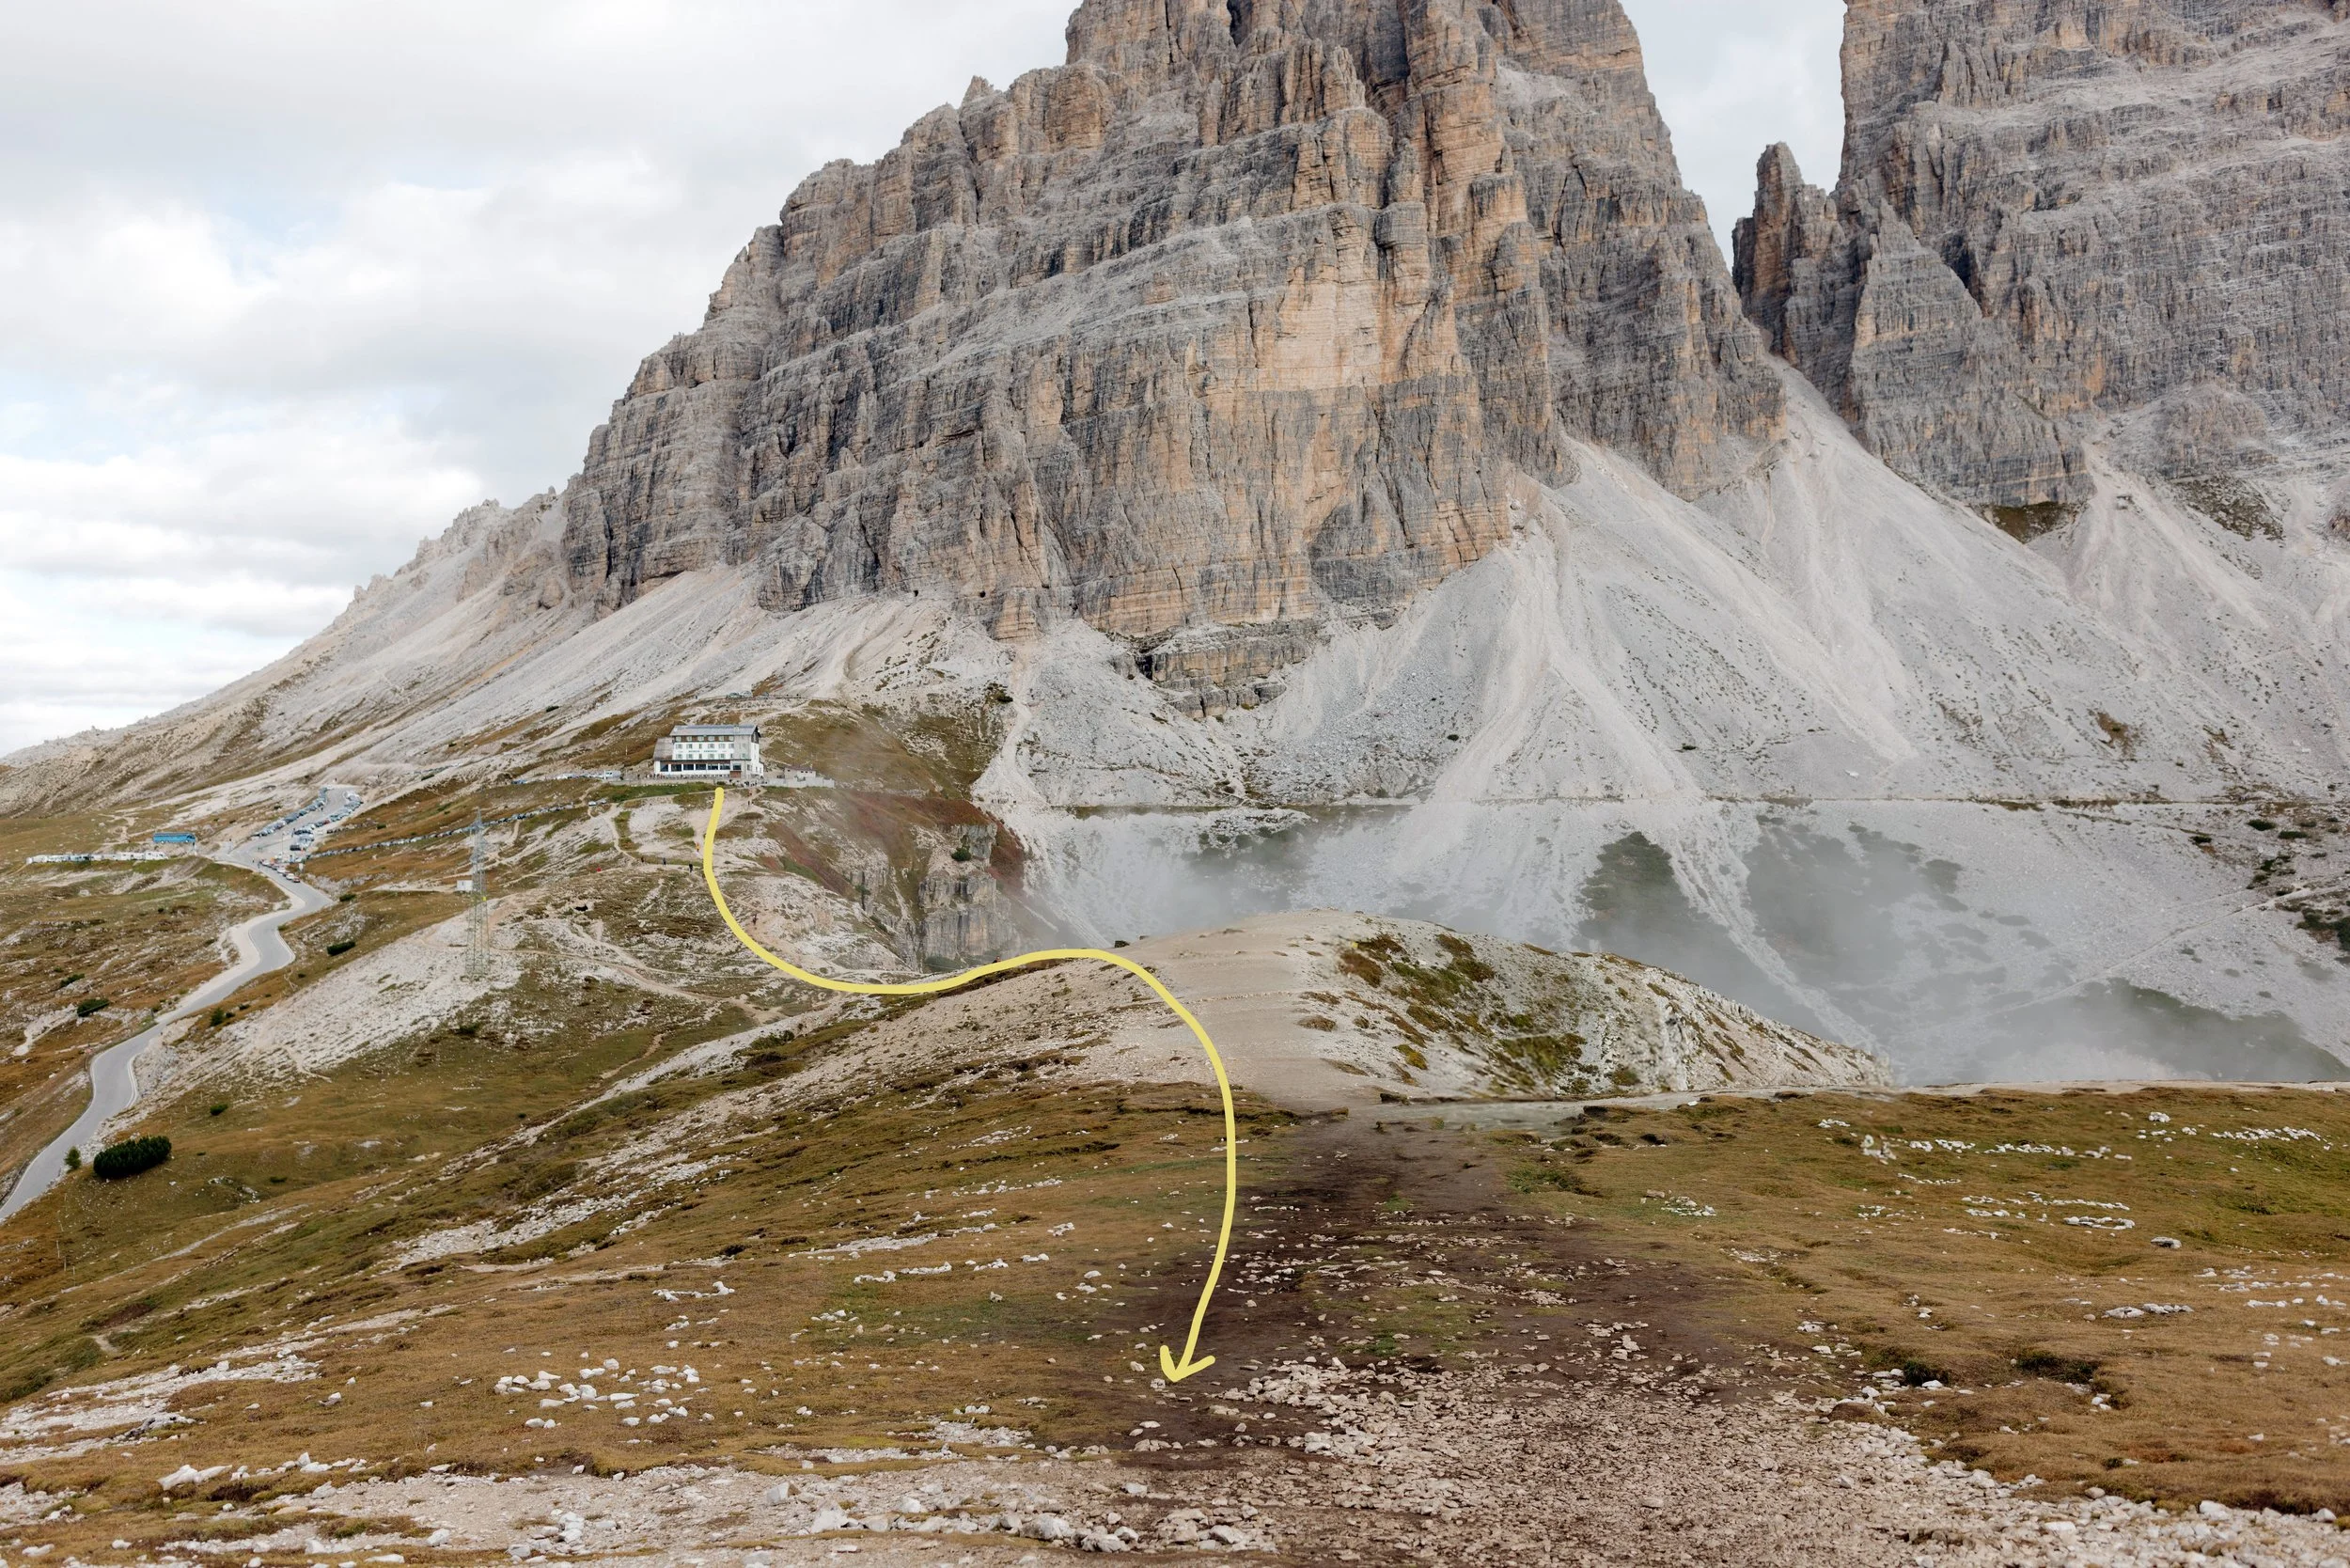
Distant view of the parking lot next to Rifugio Auronzo
Getting There & Parking (Reservation Required)
This is the section that will make or break your visit. Read it carefully!!
The road leading up to Rifugio Auronzo is a paid toll road that now operates under a strict mandatory reservation system for the entire season it's open. You cannot drive up without an online booking. Arriving without a reservation means being turned away at the base of the road - no exceptions.
>> Book your required €40 parking reservation here
Key things to know:
Booking is mandatory for the entire season (typically late May through early November, weather depending)
You must provide your license plate number at the time of booking. If you're in a rental car and don't know your plate yet, you can add it to your booking up to 24 hours before your reservation begins - this is easily done in the reservation portal
Time slots are 12-hour windows. You cannot enter before your booked start time, but you can arrive any time within the 12-hour window. If your reservation begins at 9:00am, arriving at 11:00am is fine - but you still must depart by 9:00pm
Cost: €40 for a standard car (2025/2026 pricing)
Book early: July and August slots sell out fast - book as soon as reservations open in spring. September is safer but sooner is always better
No parking reservation? The Shuttle Bus Line 444 runs from Dobbiaco/Toblach directly up to Rifugio Auronzo. Shuttle tickets also require advance online booking. Summer timetable here.
Trailhead & Step-by-Step Trail Guide
Once you've sorted parking and arrived at Rifugio Auronzo, the hiking is actually very straightforward. Here's exactly how to find the trail:
Step 1: At the parking lot, resist the urge to follow the crowd. Most people immediately head left toward the wide, flat path that hugs the base of Tre Cime. That is not your trail.
Step 2: Walk to Rifugio Auronzo and find the Trail #117 sign pointing toward "Rifugio Col de Varda." You'll be facing south, directly toward the jagged Cadini spires in the distance. You cannot miss them.
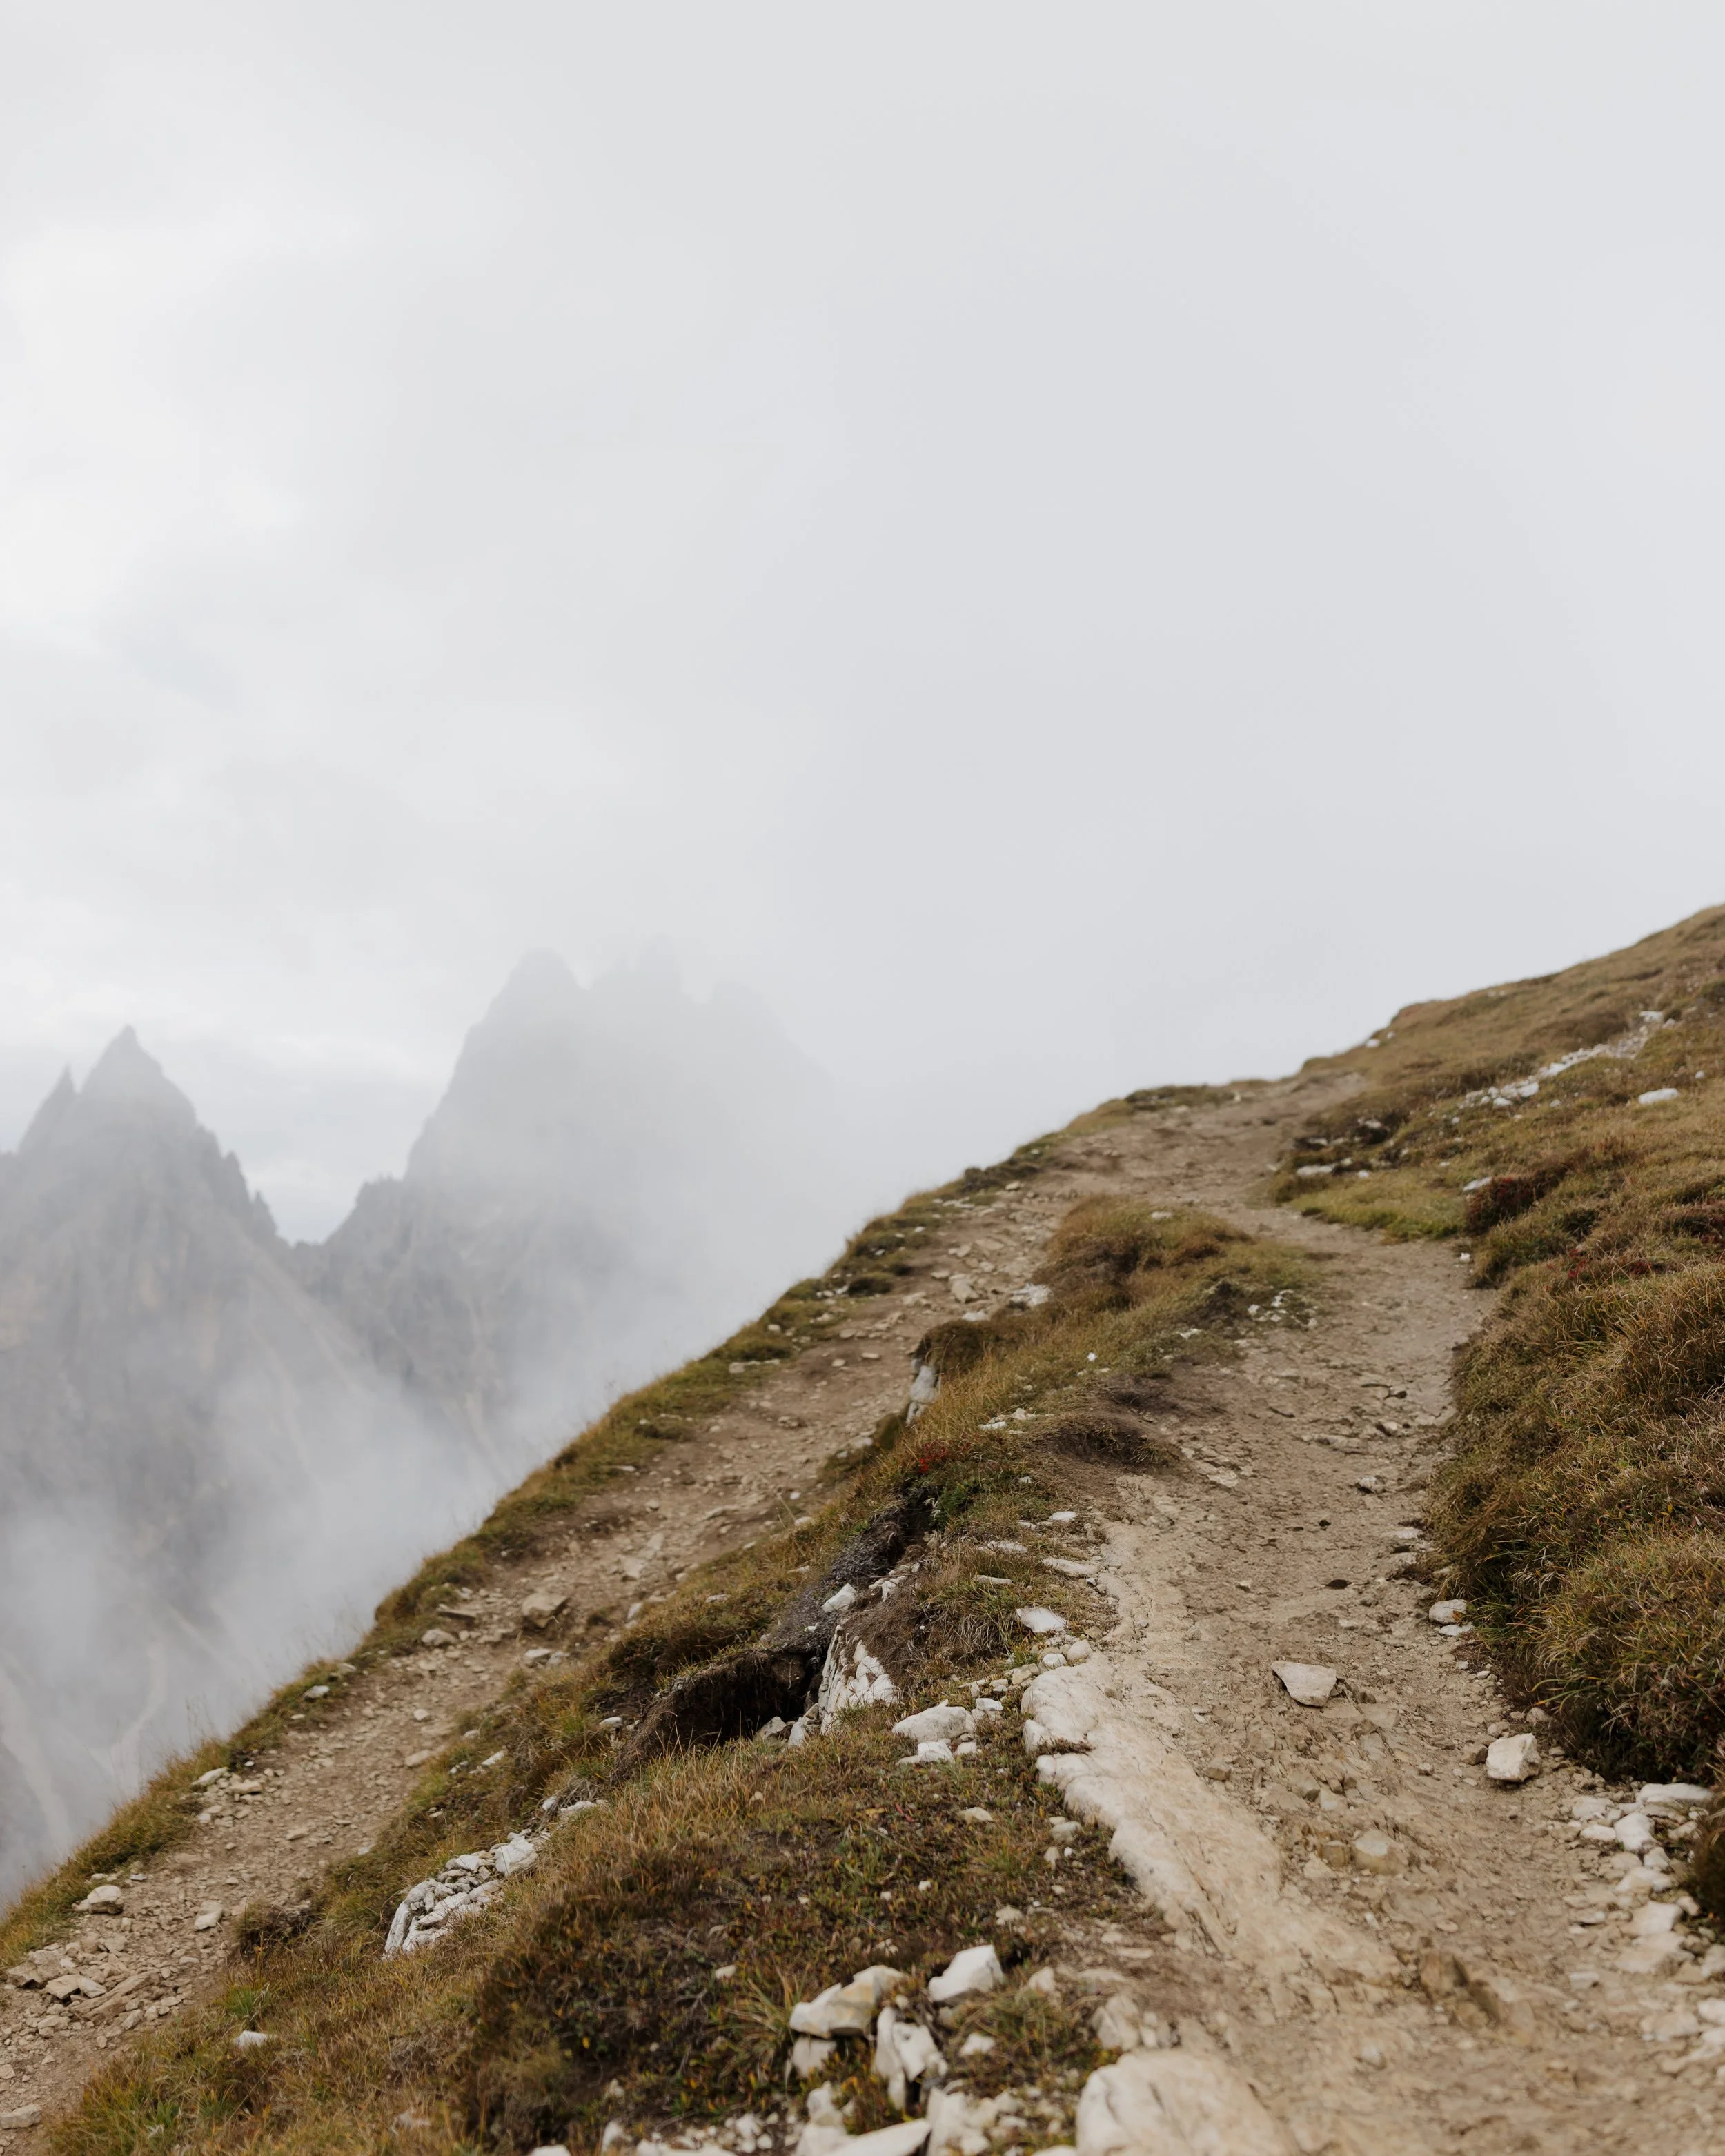
Step 3: Follow the obvious path south. The trail starts behind the rifugio, descends slightly on a rocky path, then flattens out before climbing steadily up a grassy hill.
Step 4: The path hugs a ridgeline. To your left, the Auronzo valley drops away dramatically. Ahead, the Cadini spires get closer with every step.
Step 5: After roughly 20-30 minutes of hiking, the famous viewpoint comes into view on your left - a narrow rock spur jutting out into open air, with the spires as your backdrop.
» Save this custom trail map for offline use (also shown below)
Rifugio Auronzo
Head south, following the trail away from the rifugio
The trail begins to climb uphill
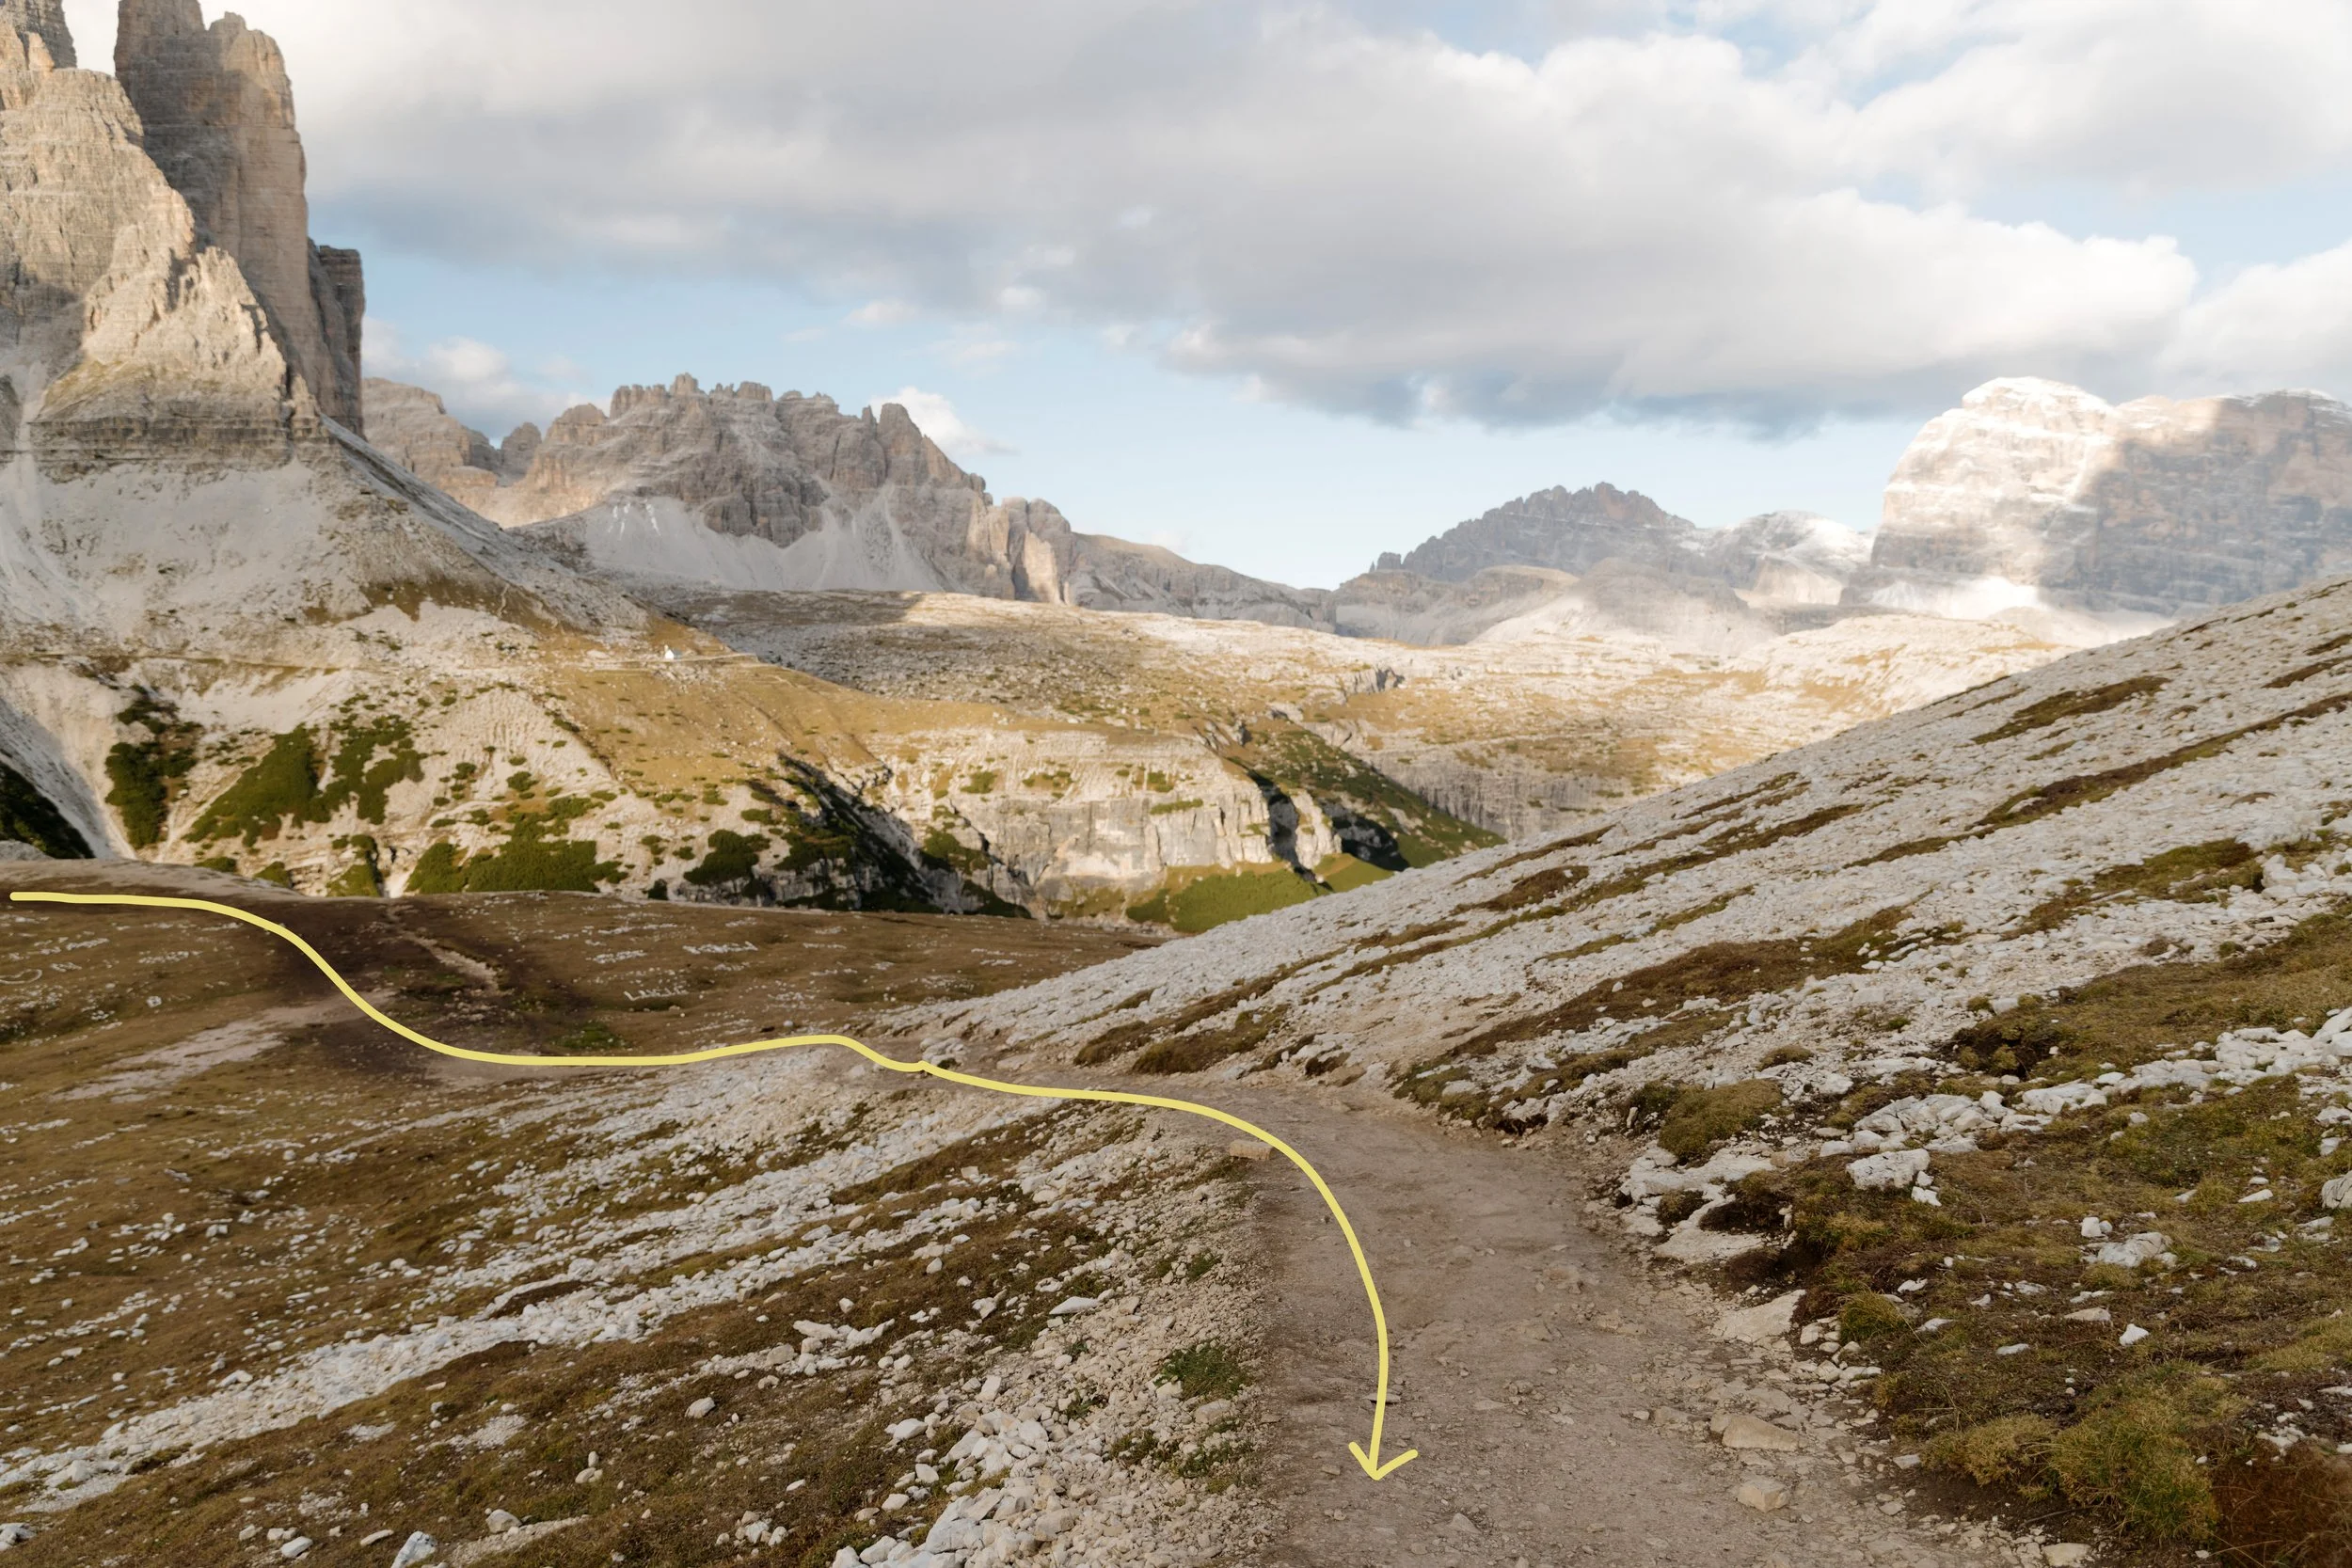
Short uphill section
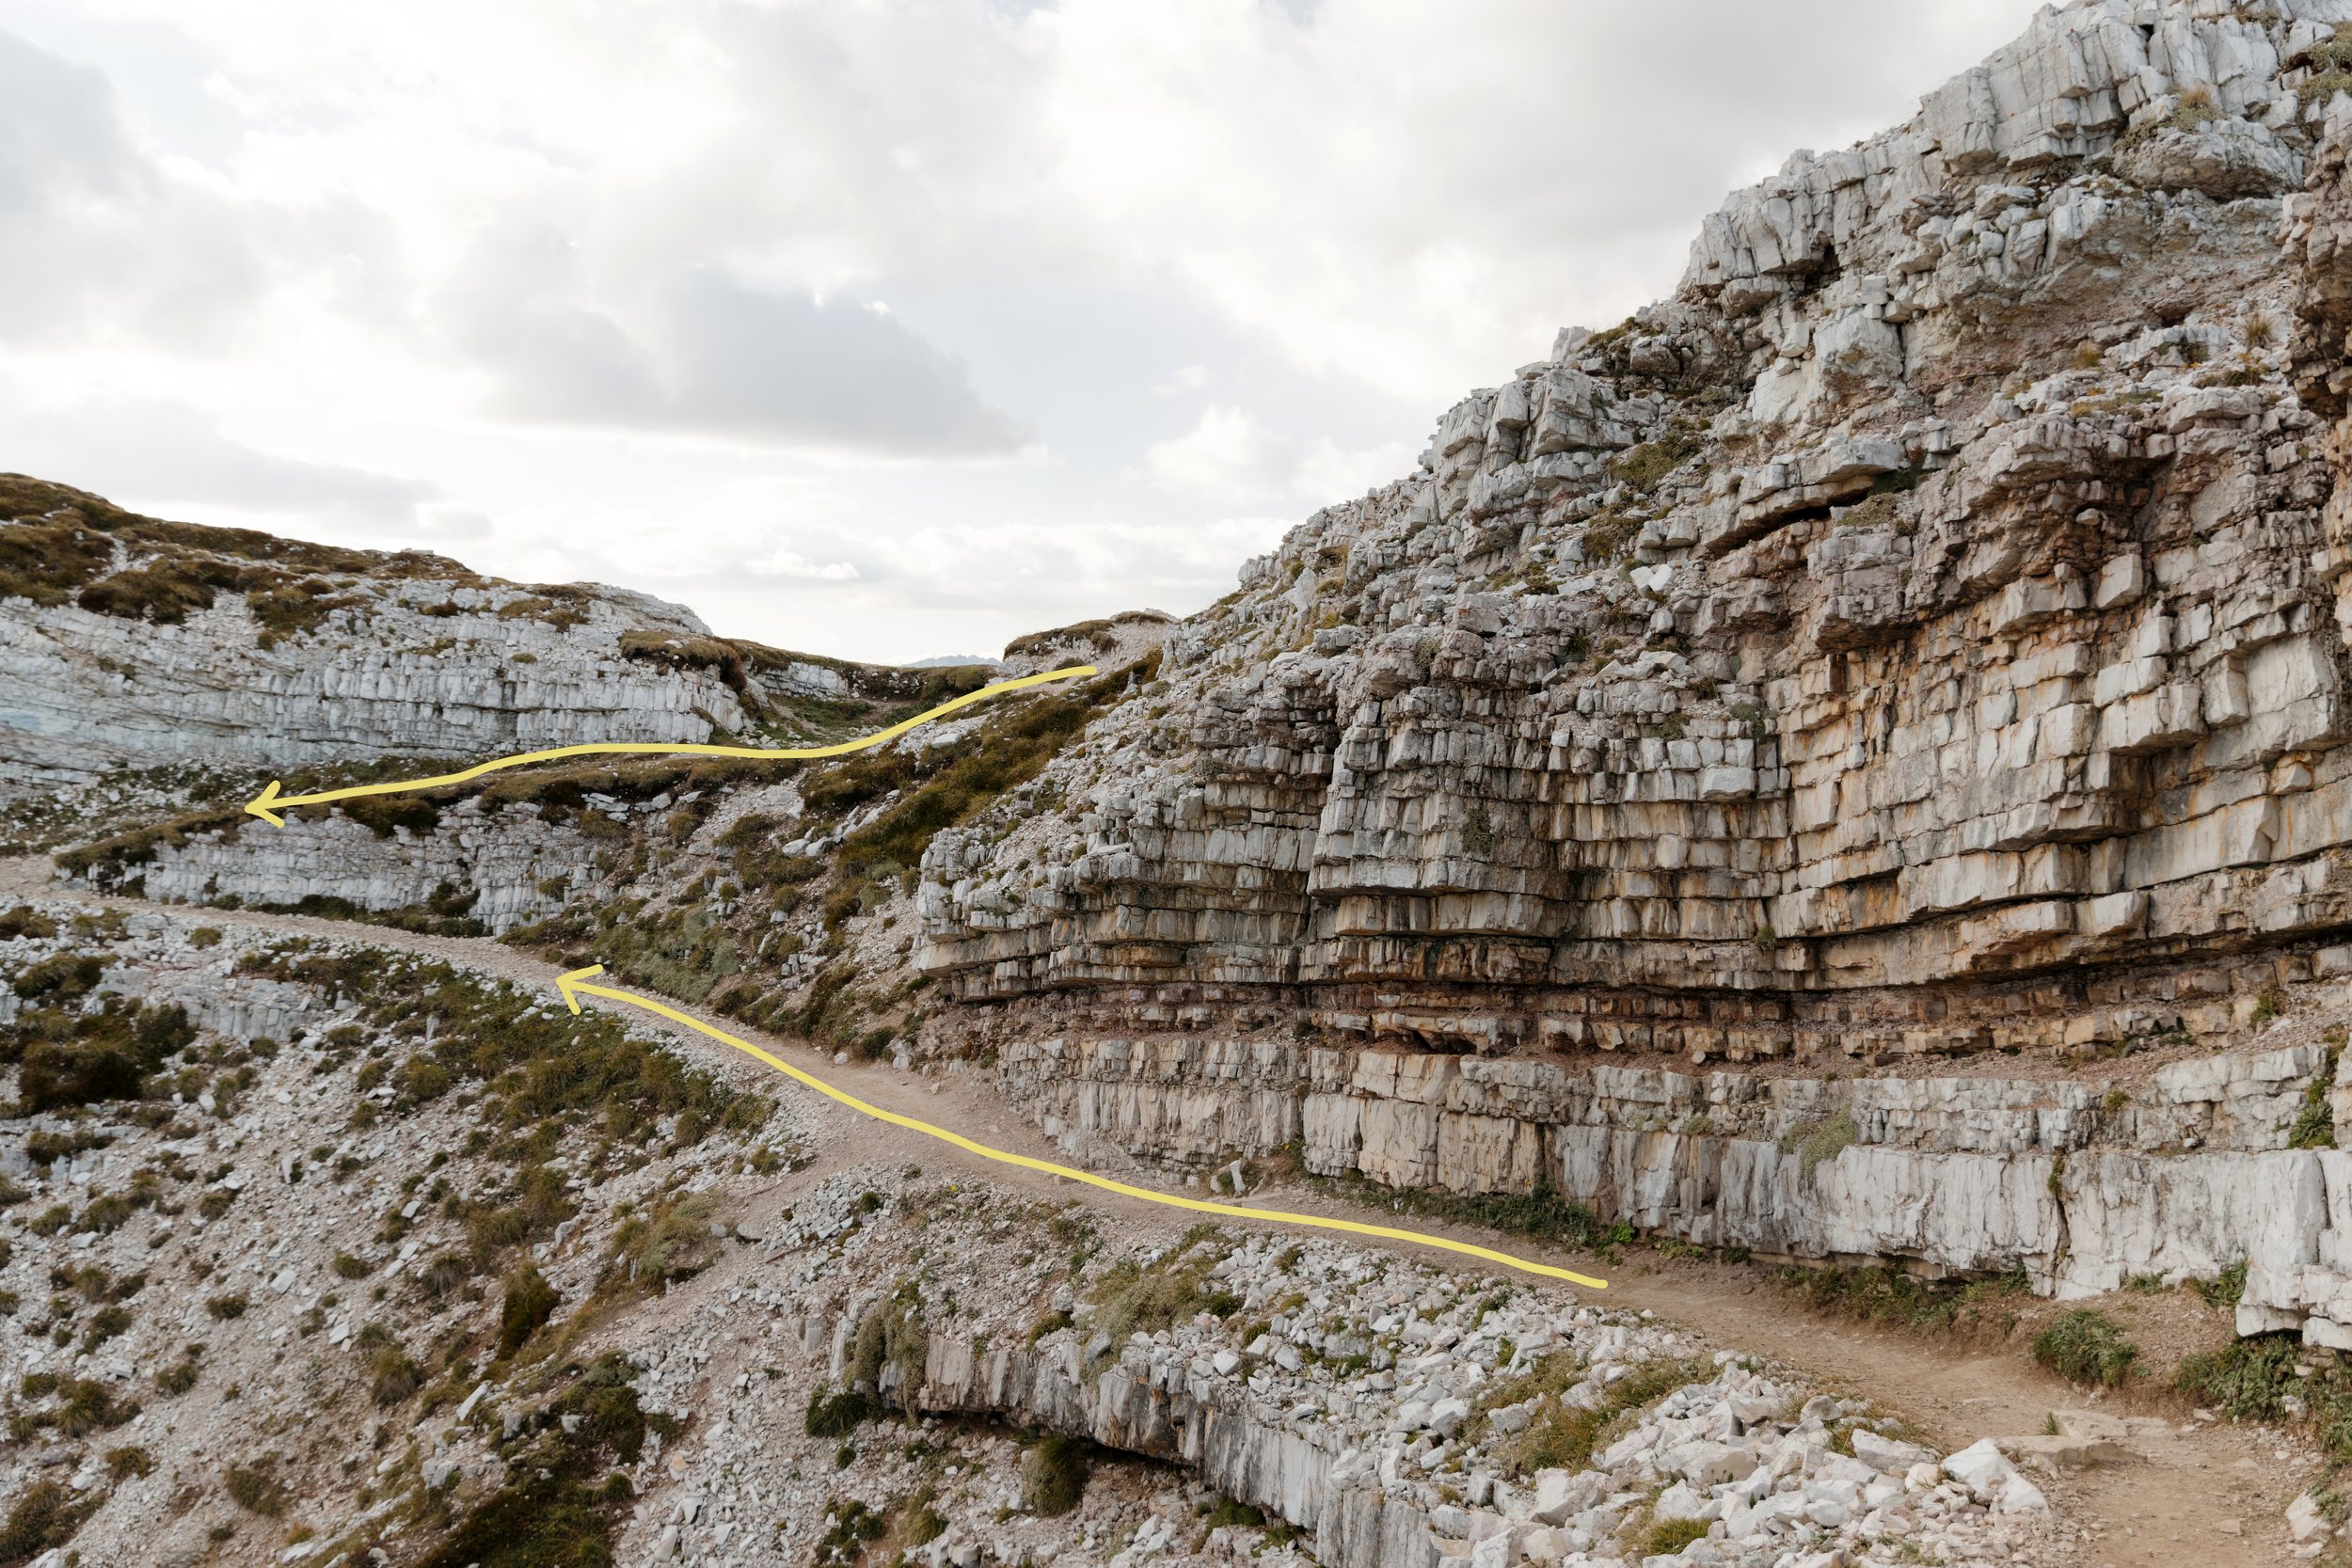
You can hug the ledge, or take the upper path instead
During the final stretch, the peaks will be in view!
Trail stats:
Trail number: 117 (toward Rifugio Col de Varda)
Distance: ~3.2 km (2 miles) round trip
Duration: 1 - 2 hours, not counting photo stops
Difficulty: Easy with some steep sections
Elevation gain: ~210 meters (690 feet)
Again, you can download this customized trail map for offline use before you arrive.
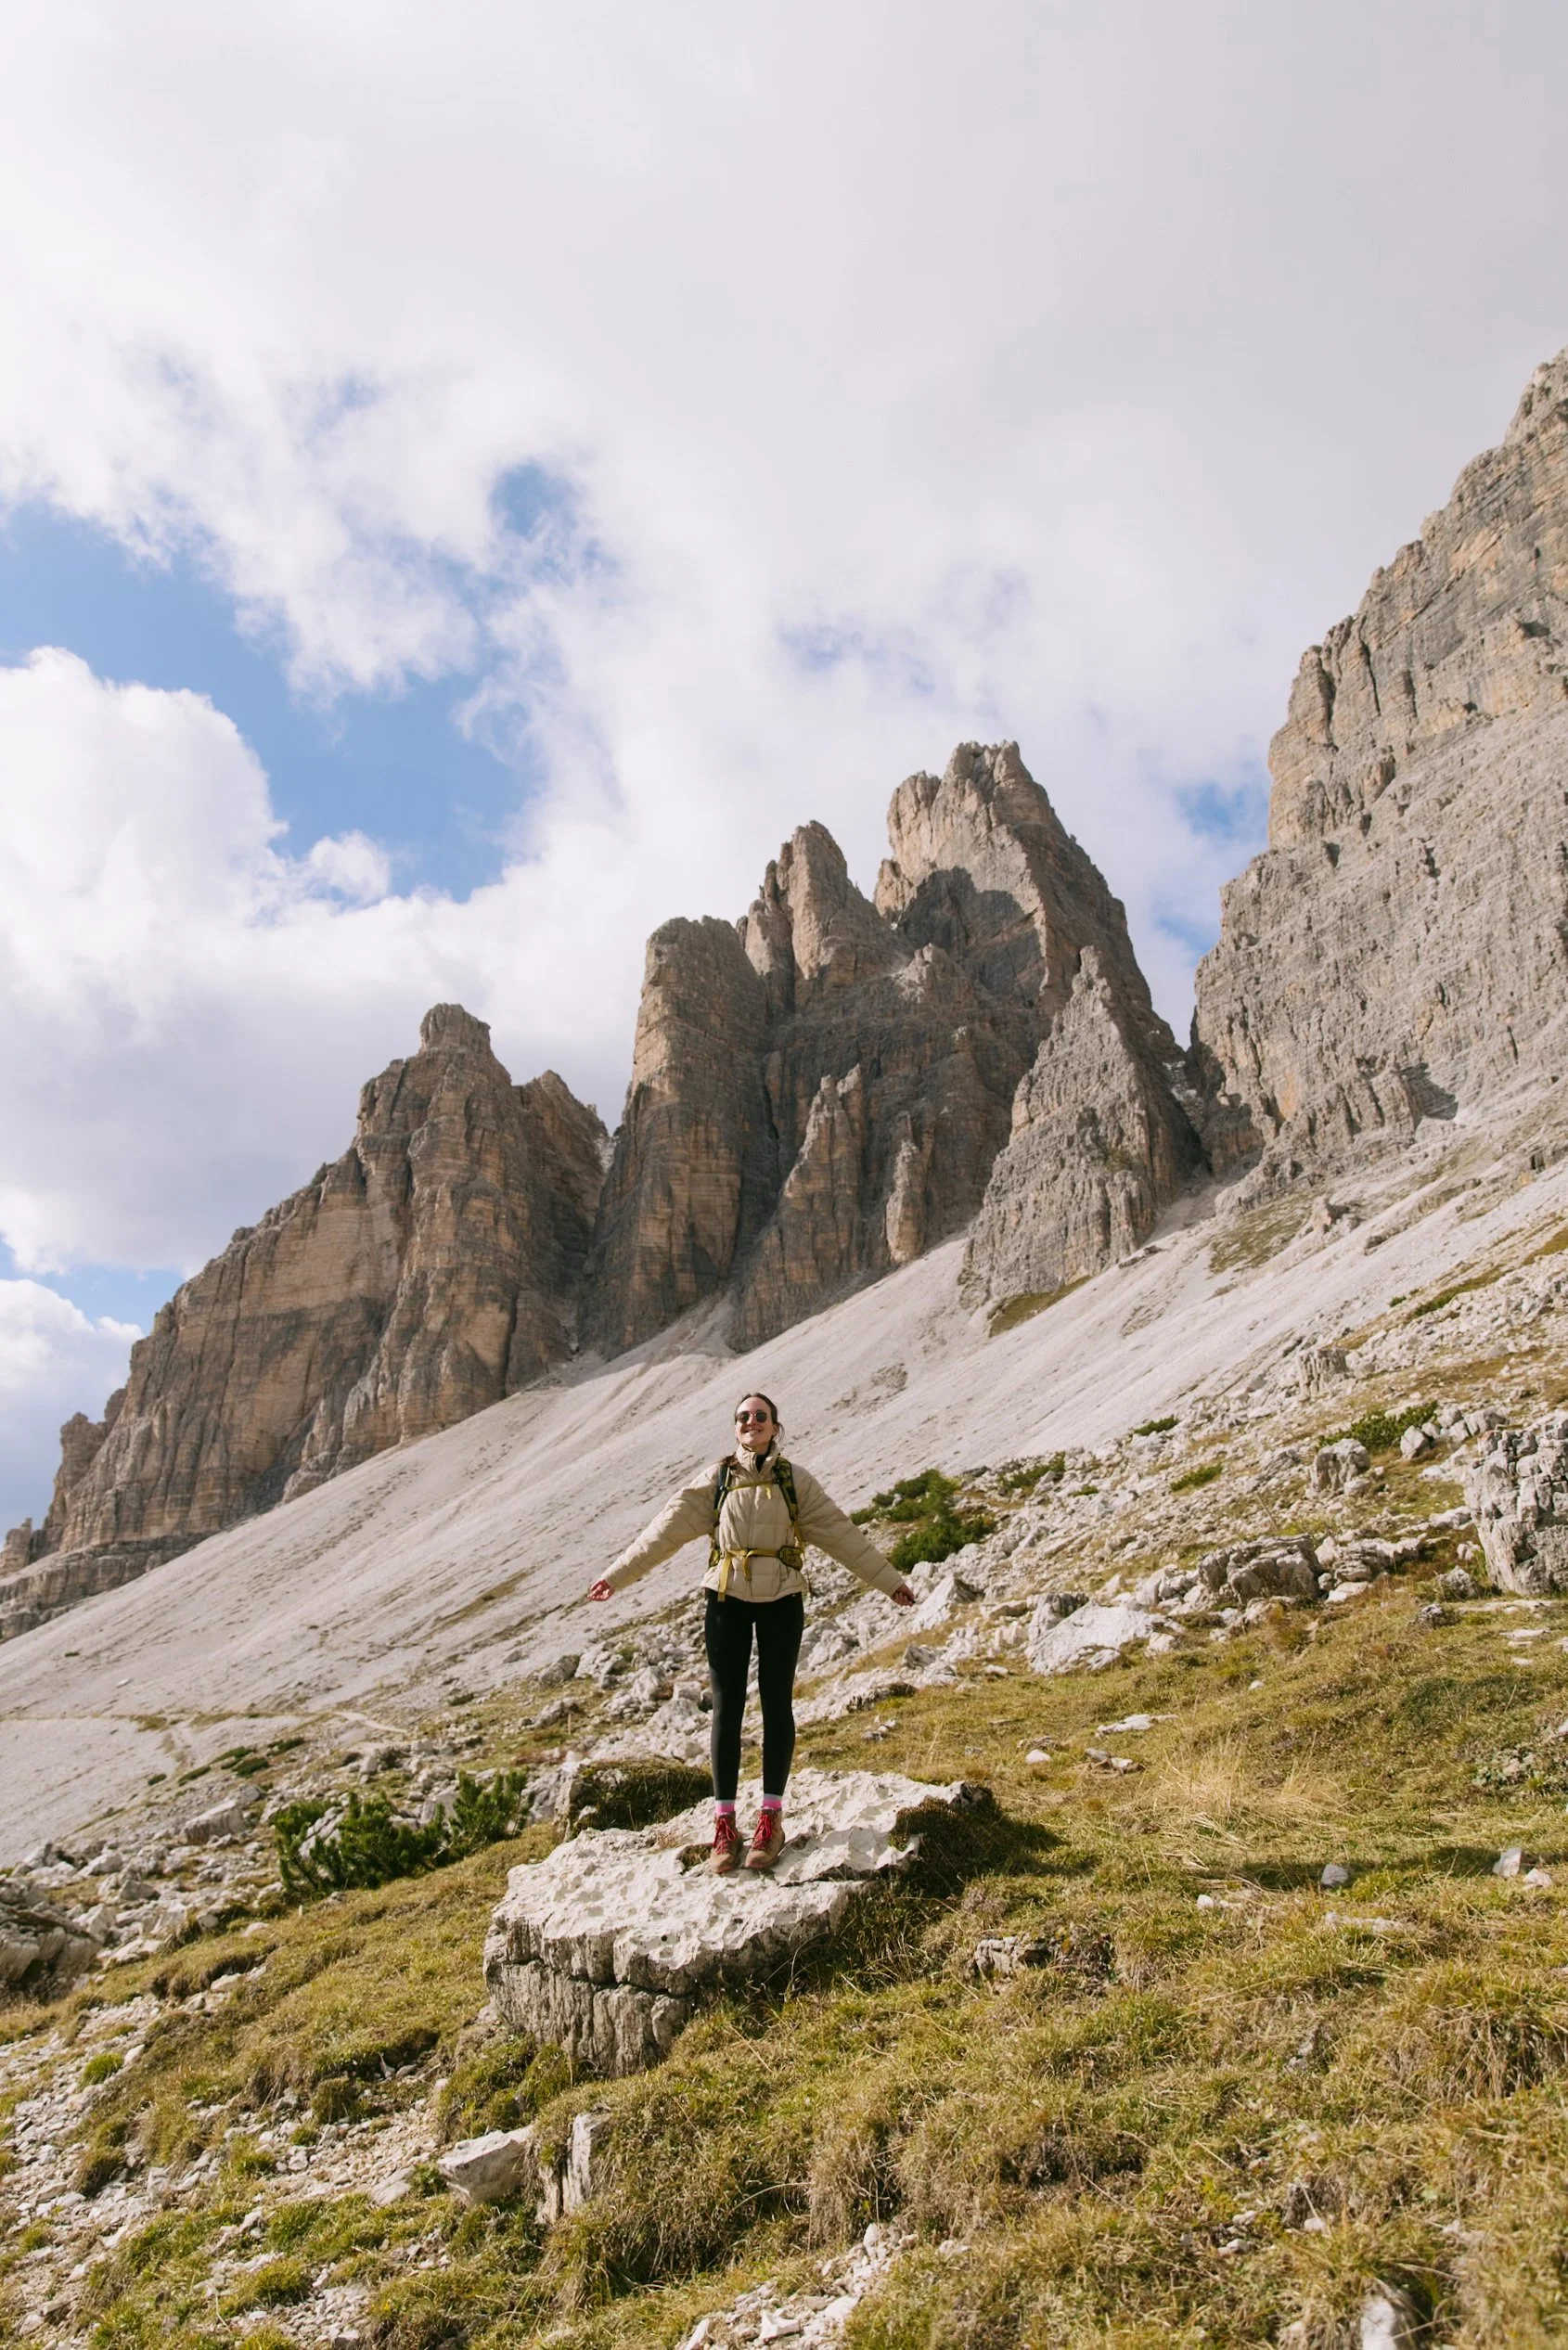
The Famous Viewpoint
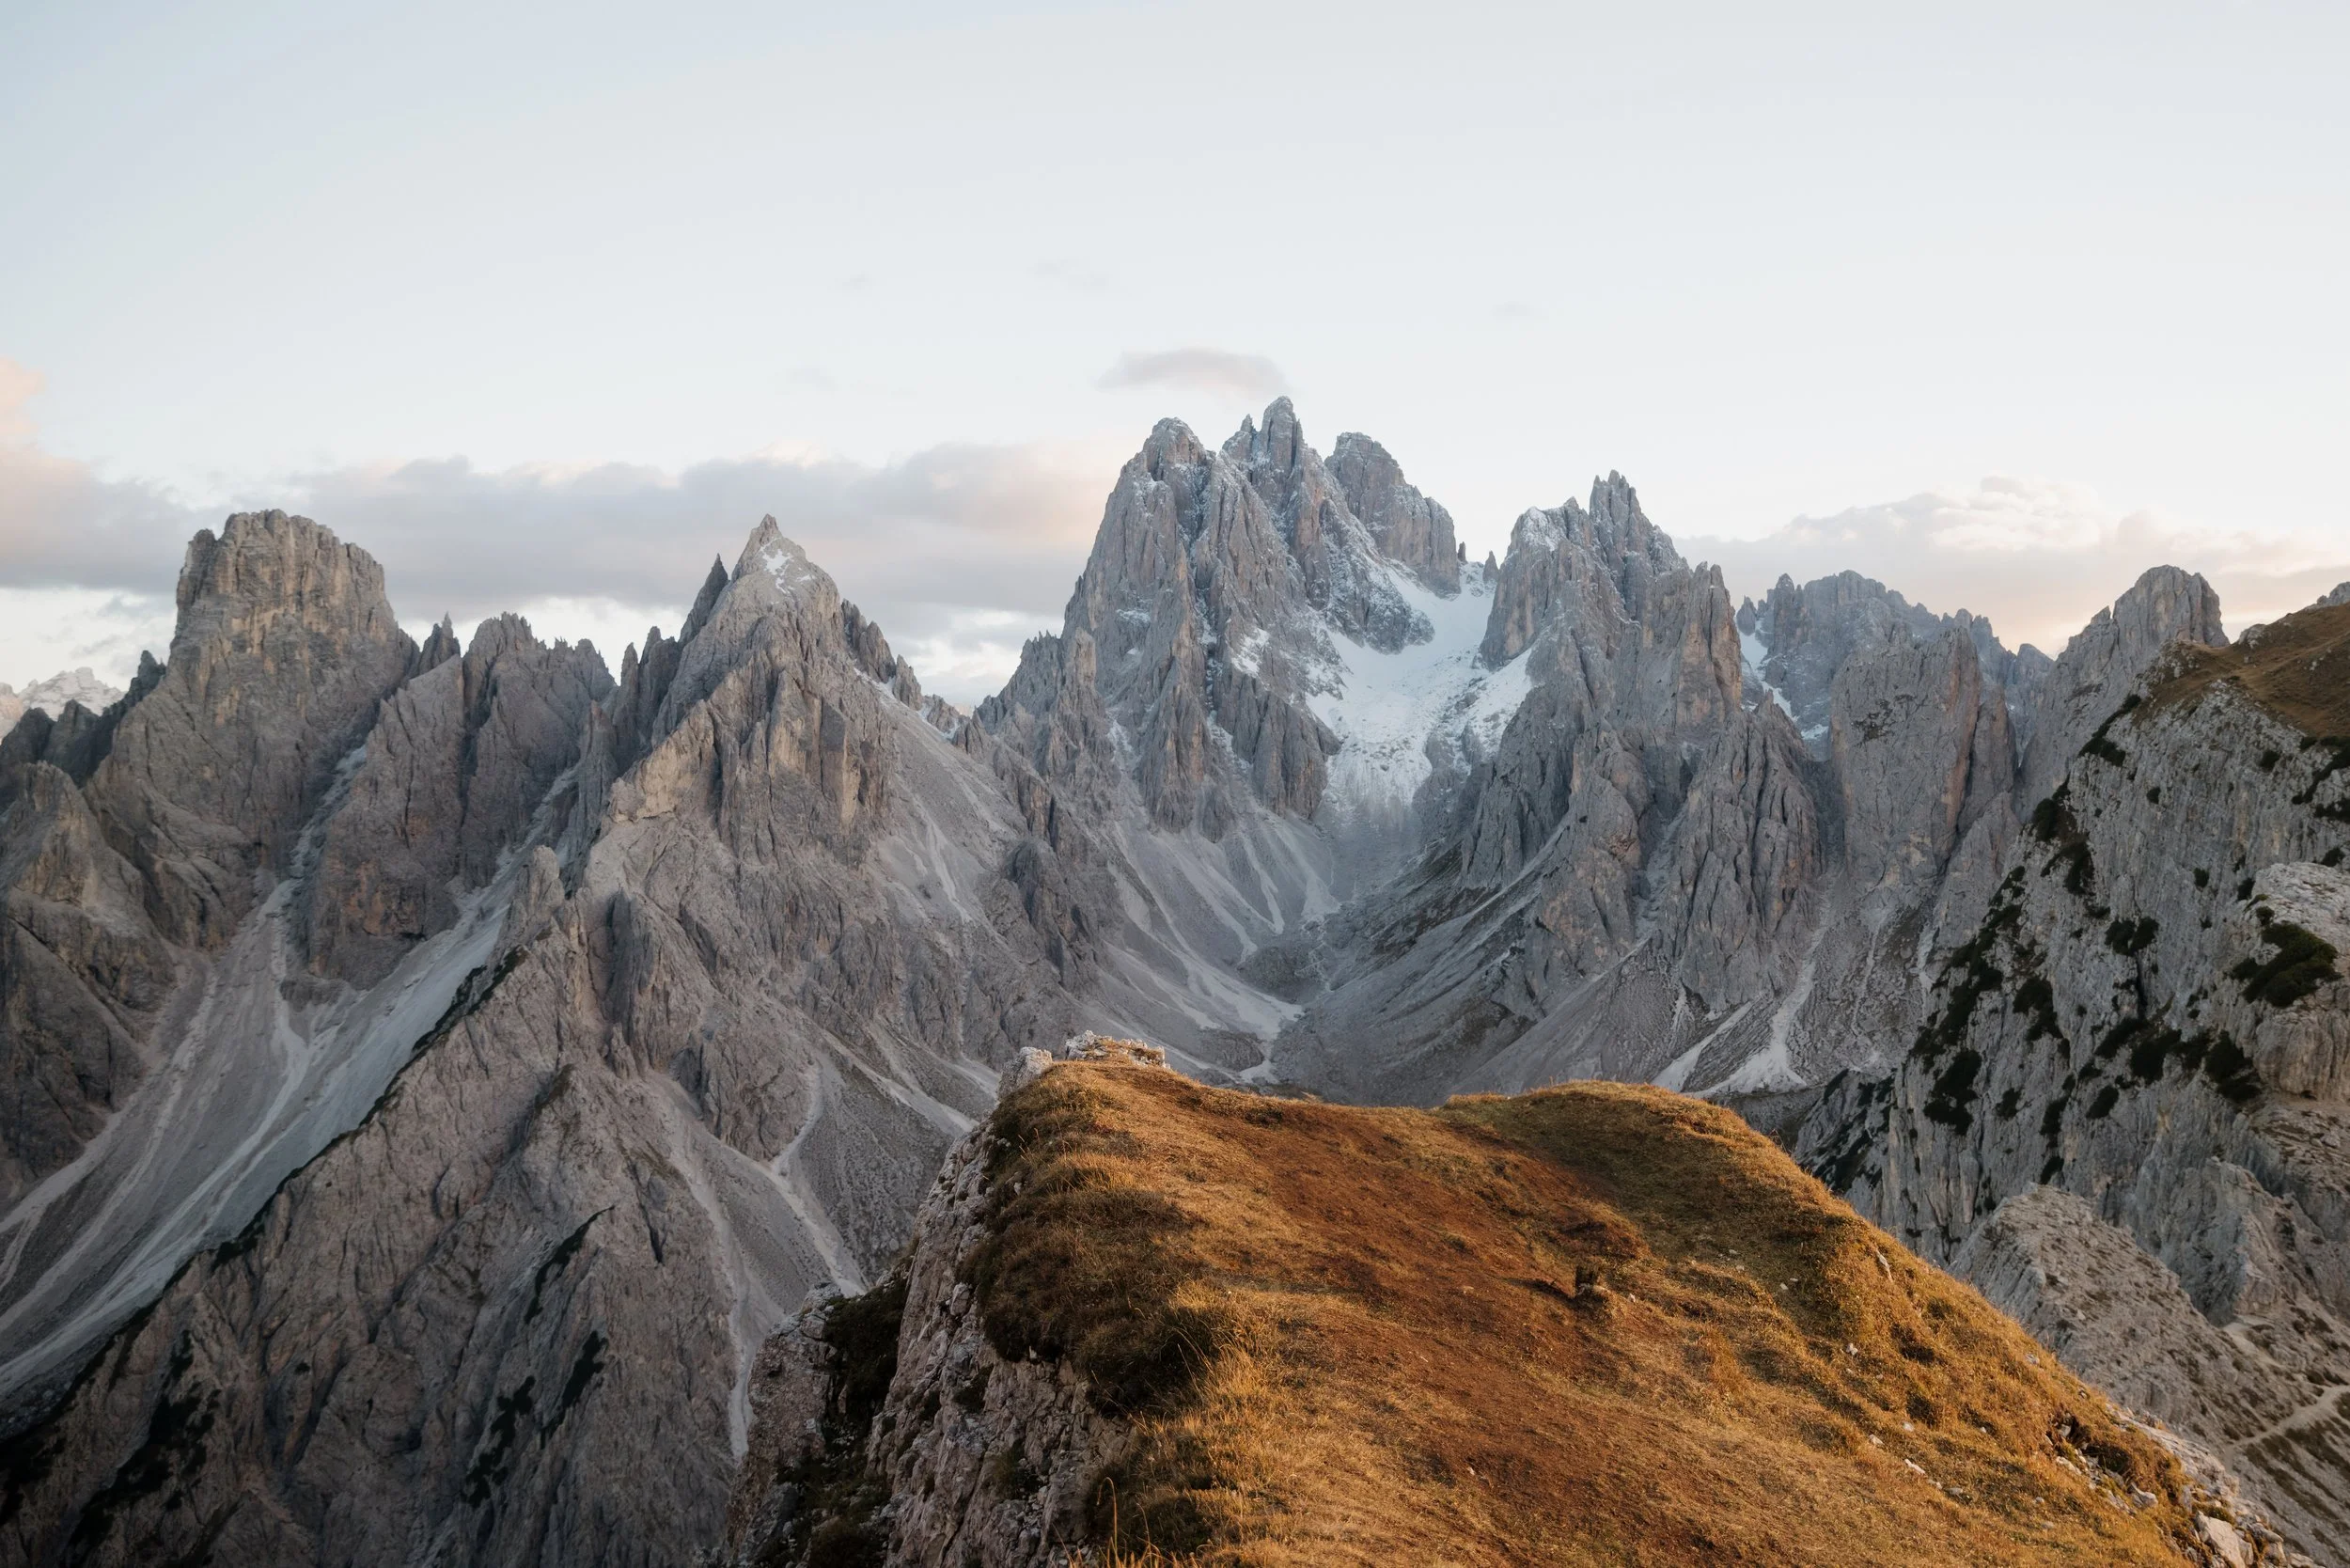
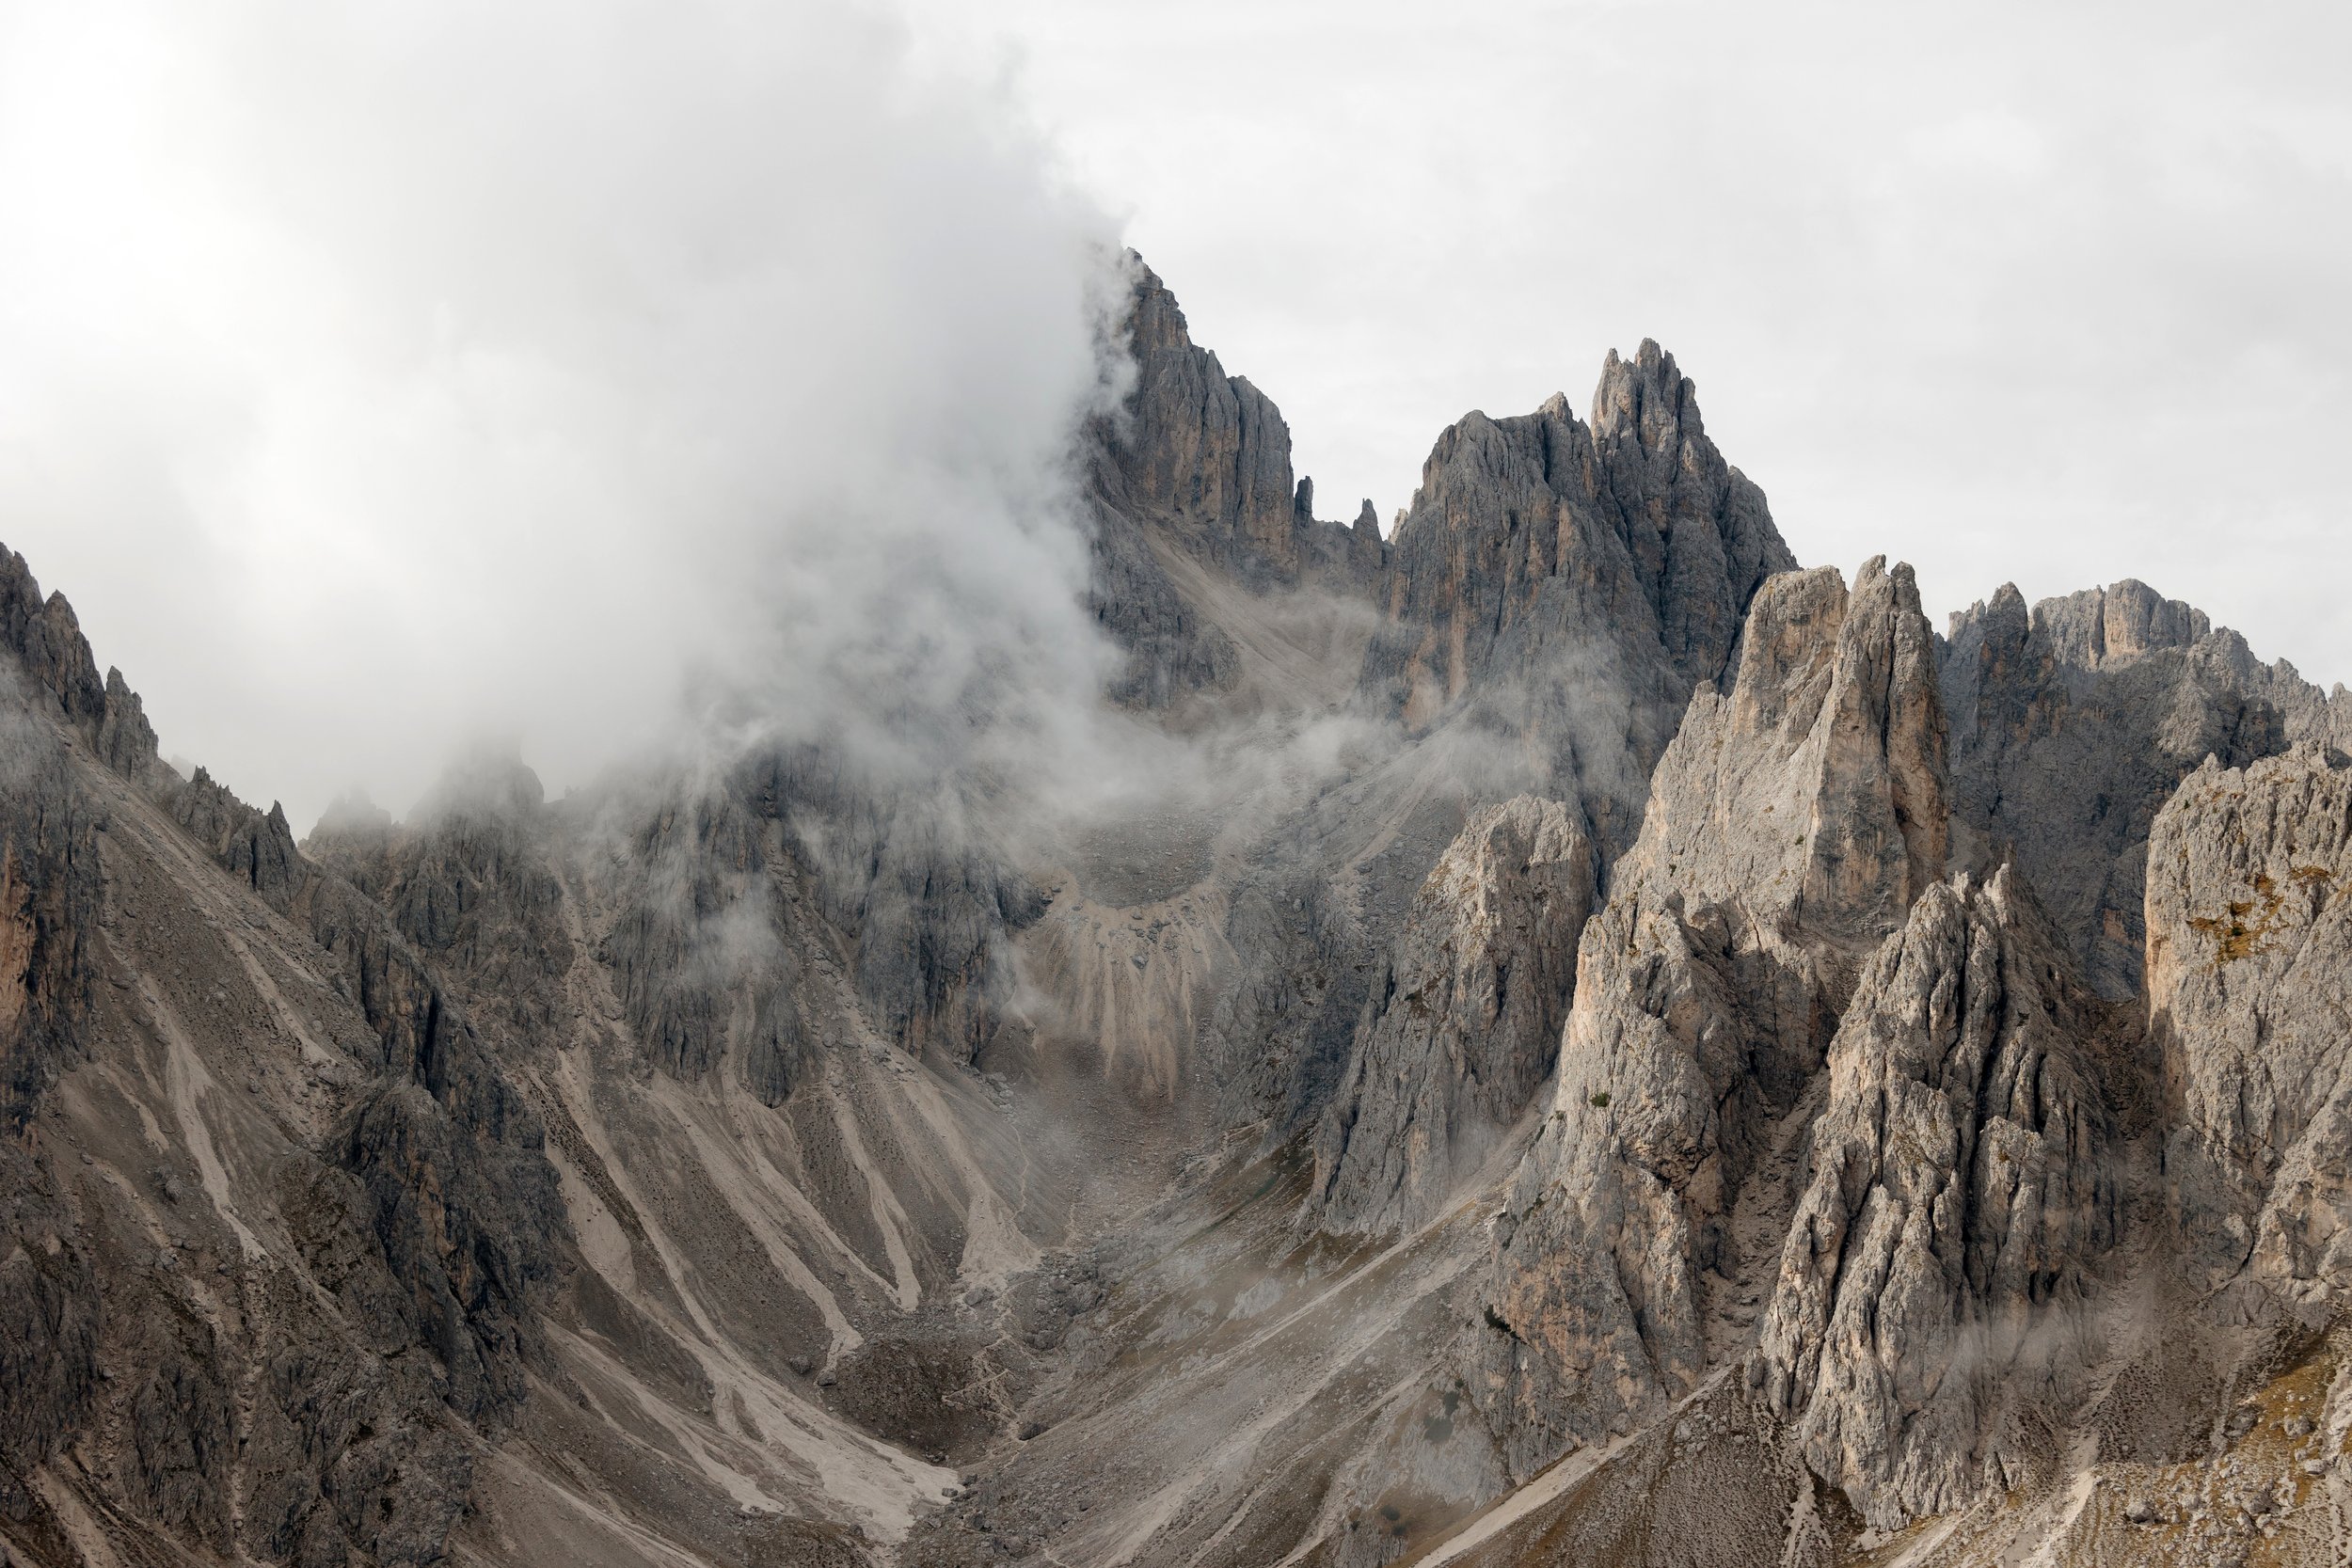
The viewpoint is a narrow outcrop of rock jutting into open air, with the jagged Cadini peaks framing the background on all sides. Standing there, you really do feel like you're on the edge of the world - the valley drops away below you and the peaks rise around you and there's nothing between you and the sky. Pure magic.
My most memorable visit to this spot involved arriving to find the entire viewpoint socked in with clouds. I really, truly thought we were out of luck. We waited anyway - maybe 15 to 20 minutes - and then the clouds began to part. Slowly at first, then all at once, until the sky was completely clear and every jagged peak was sharp against blue sky. It was surreal in a way that a cloudless arrival simply wouldn't have been. If you arrive to cloudy conditions, don't immediately turn back. Wait. It might just be worth it!
For the best photo: Have your hiking partner stand on the spur while you position yourself a good distance back and slightly to the side you hiked in from. This gives the most dramatic perspective with the full panorama of peaks behind them.
Safety note: The path to the tip of the spur is narrow, eroded, and fully exposed. In muddy, snowy, or very windy conditions, don't risk walking out onto it. No photo is worth a fall.
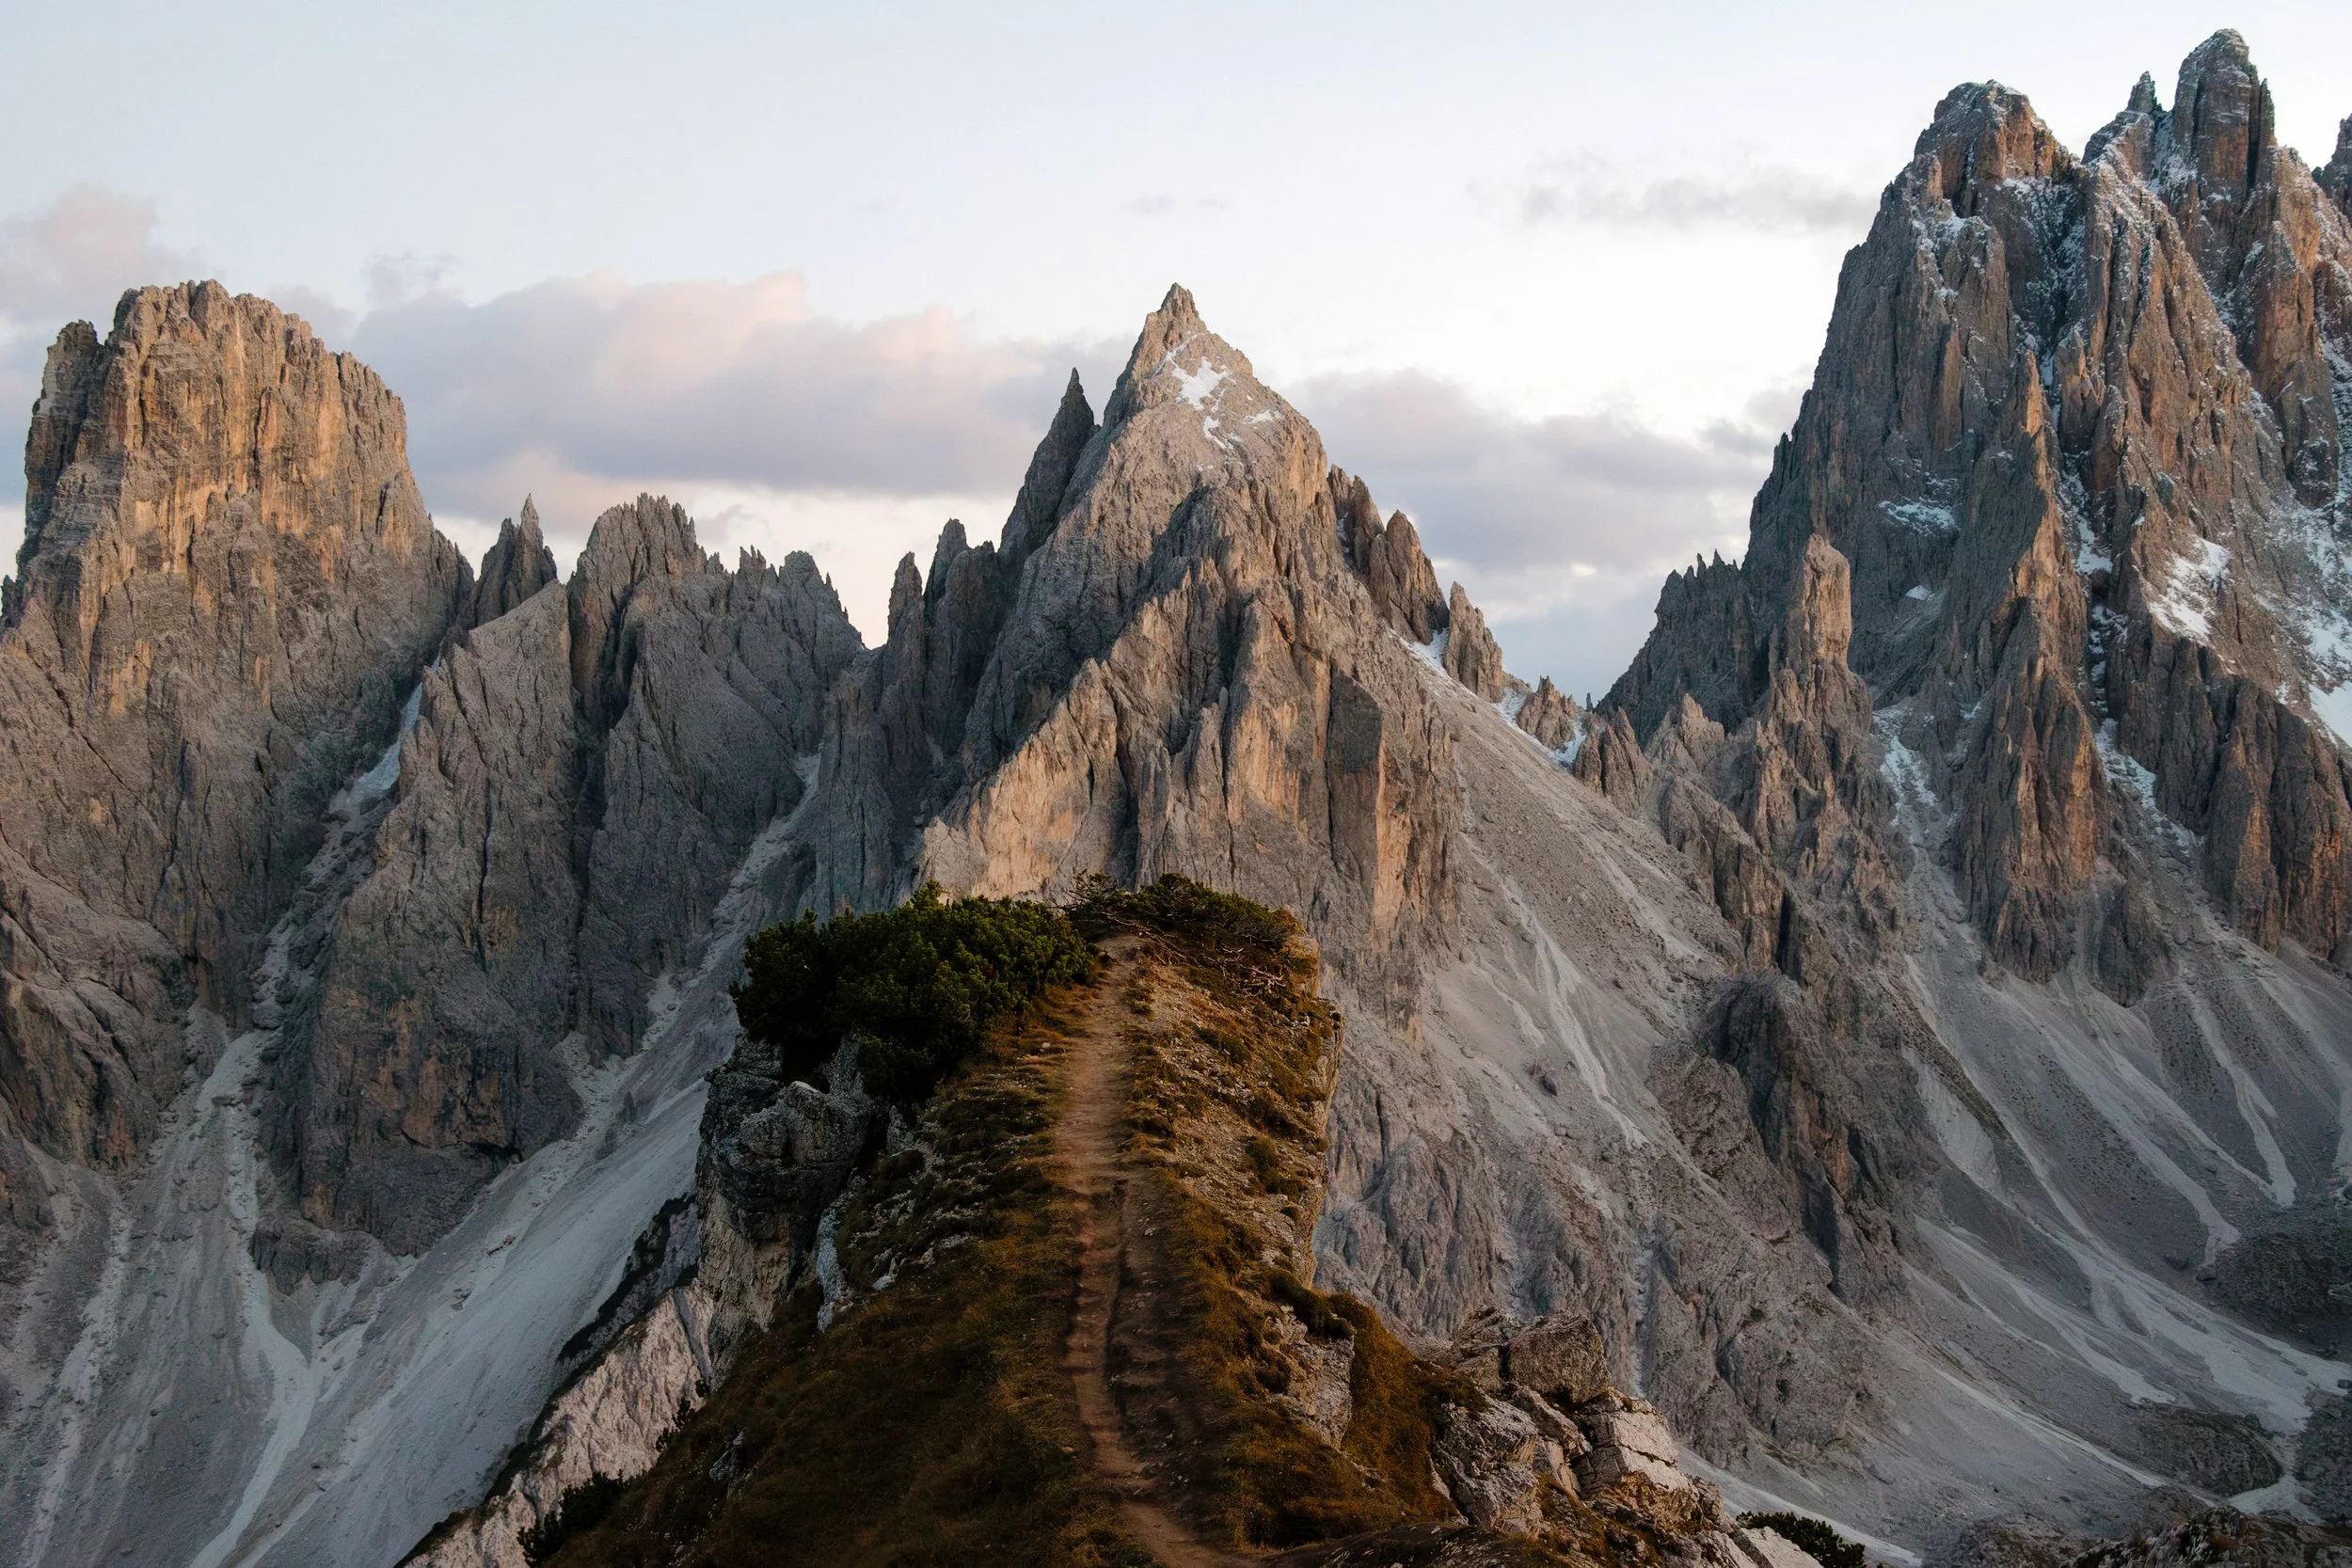
The Upper Viewpoint - My Personal Favorite
This is the tip I give everyone, and the one most guides leave out entirely.
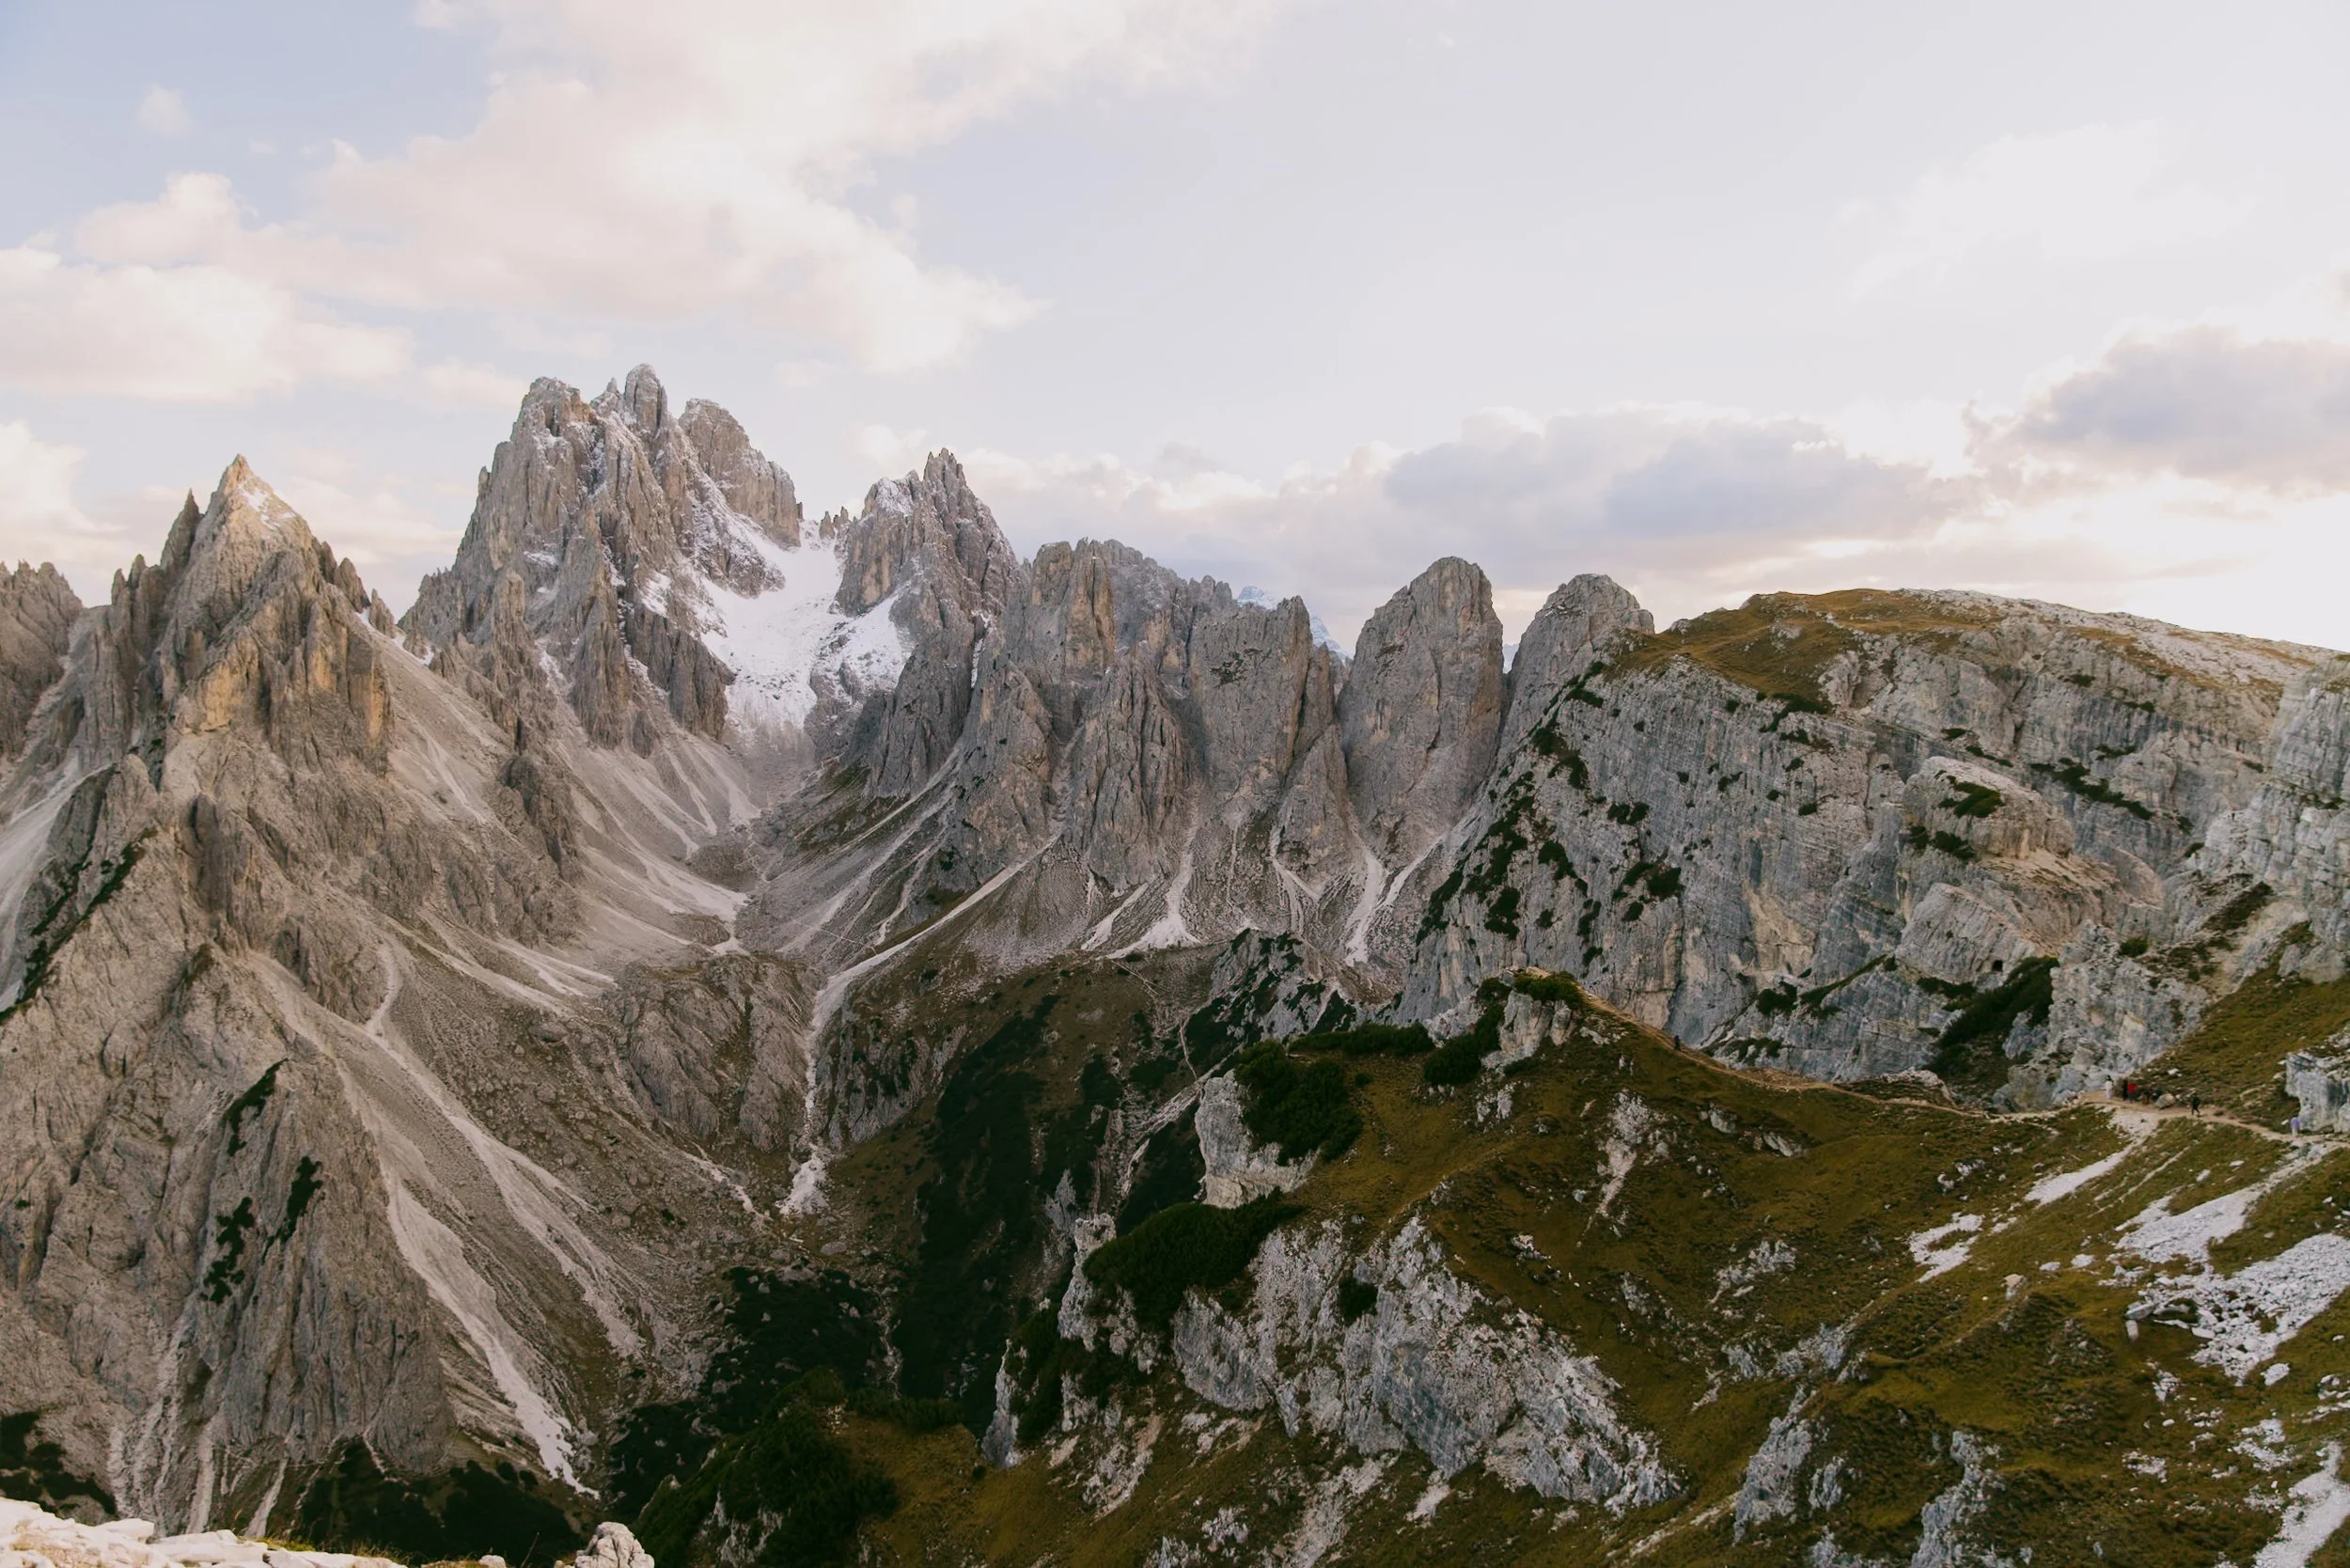
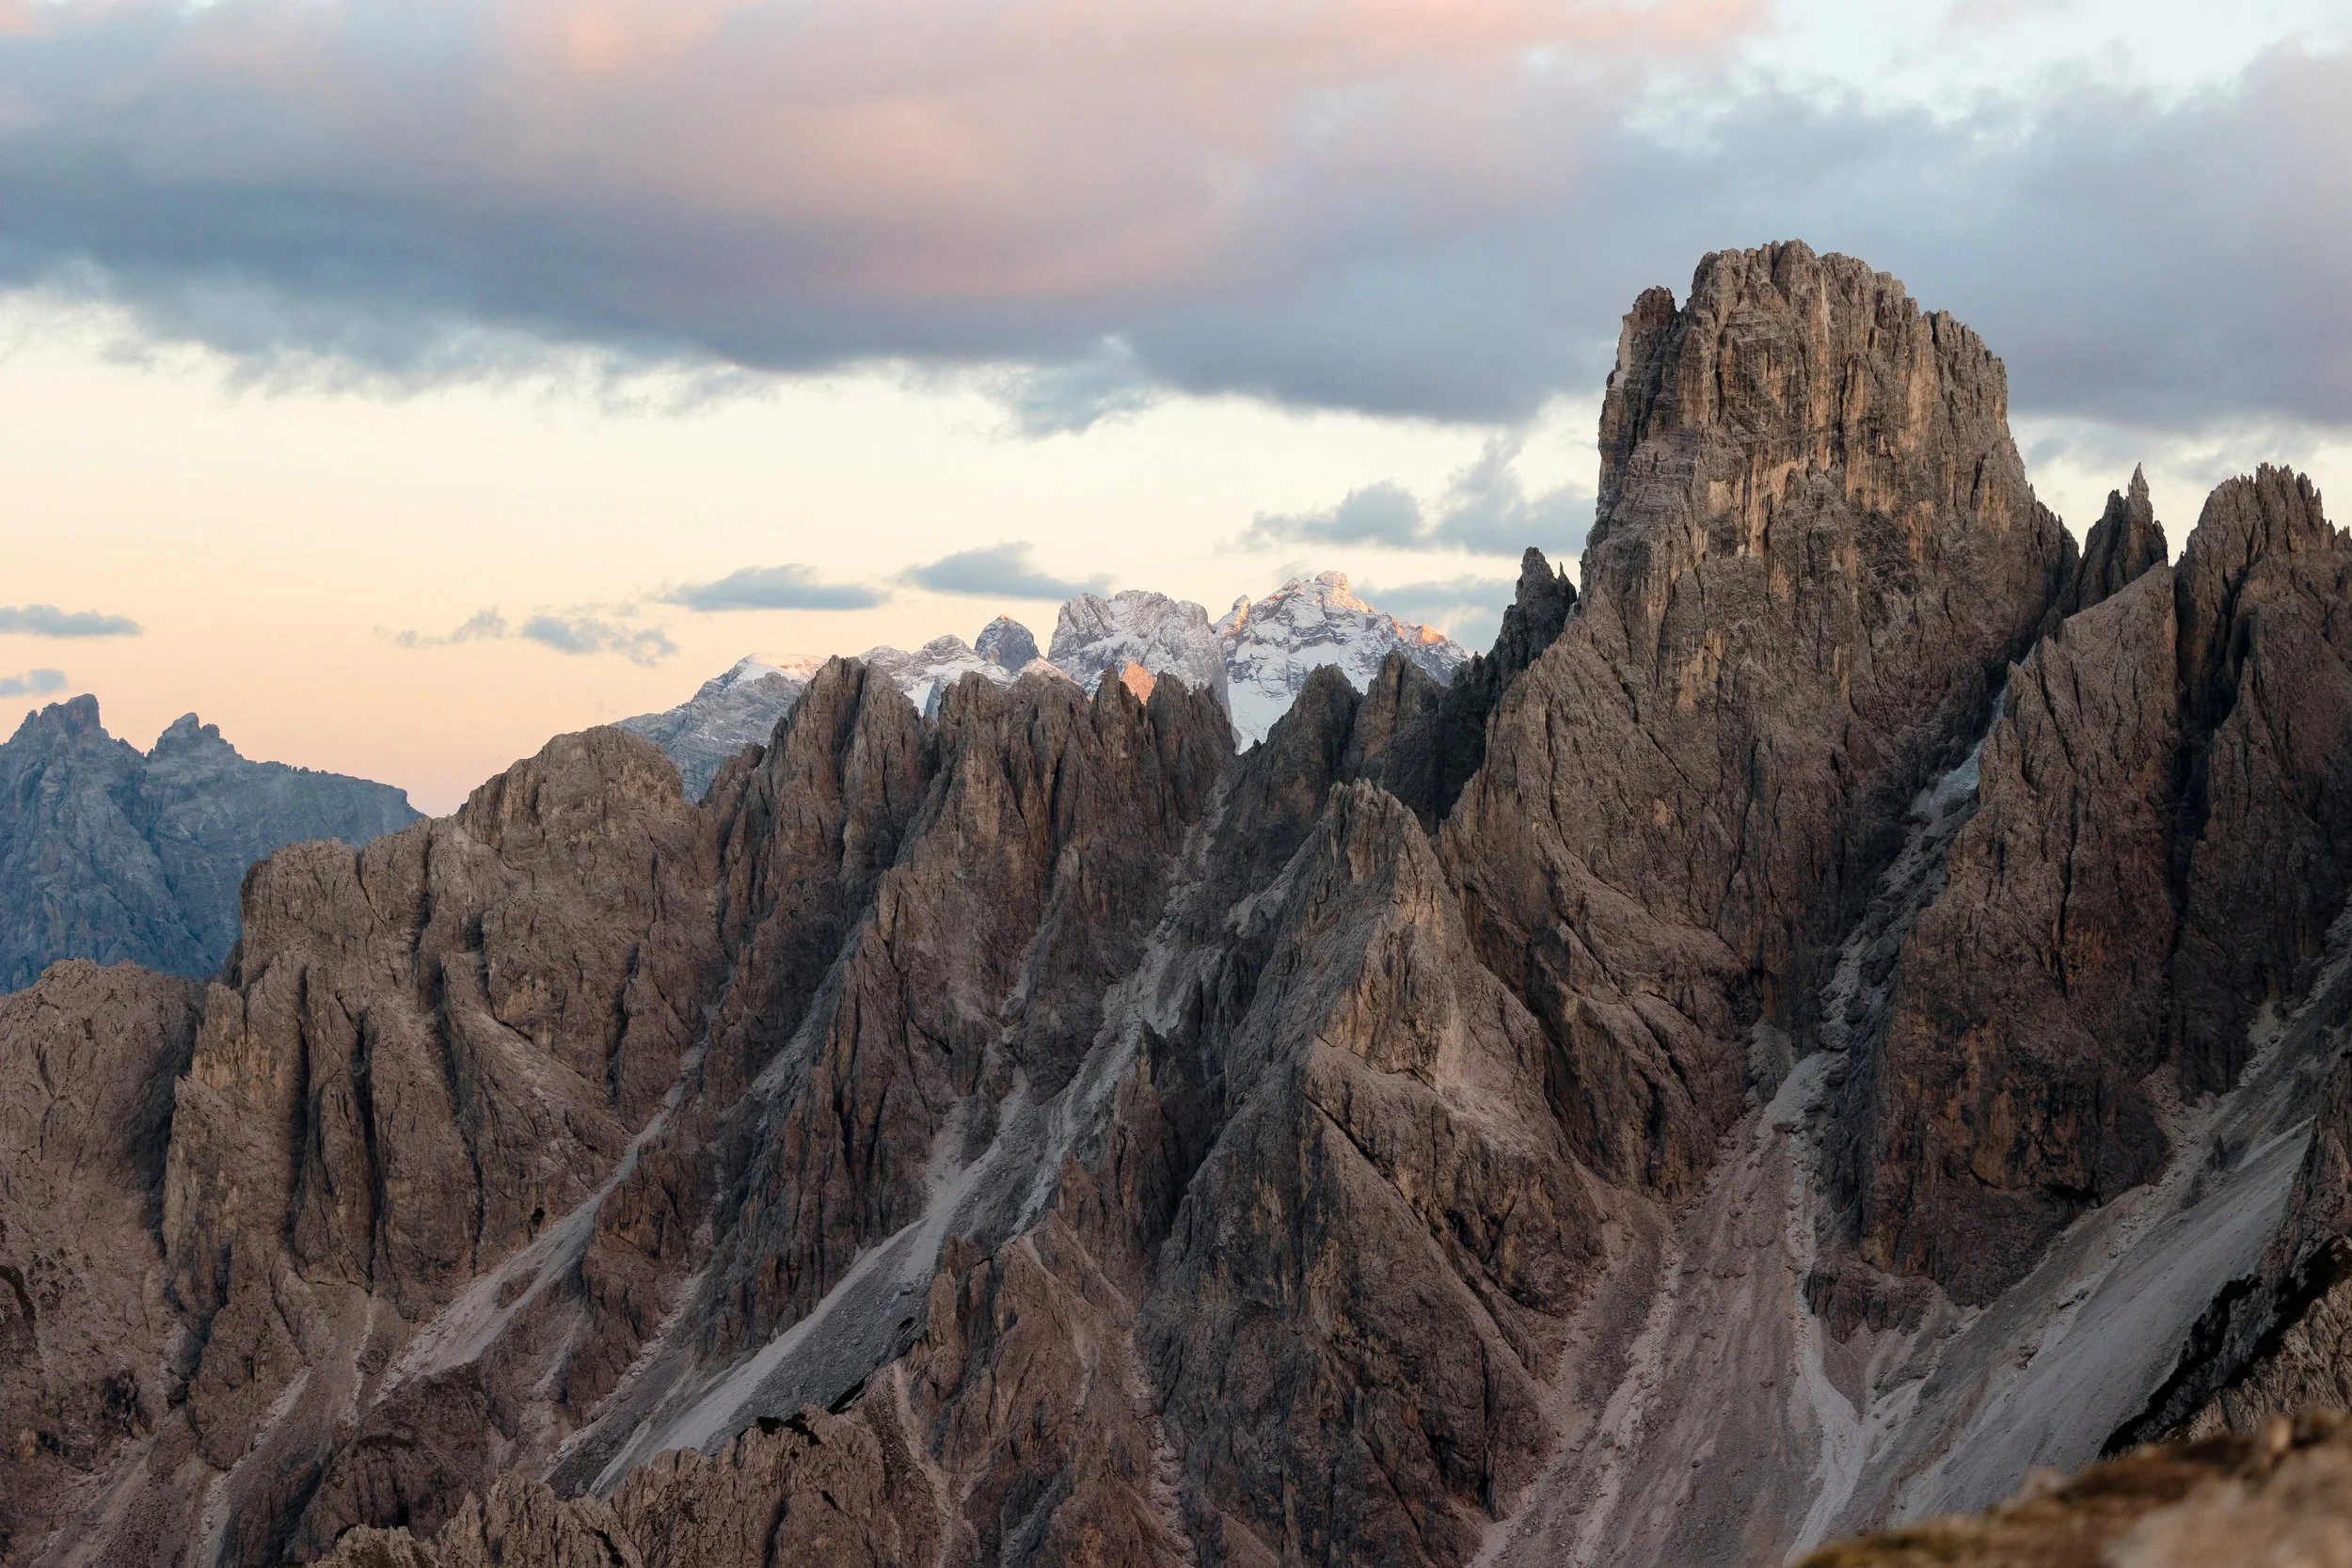
At the fork in the trail that leads left down to the famous rock spur, take a right instead. It leads uphill to a large open ridge - only a couple minutes from the main viewpoint - and the perspective from up here is completely different. You're looking down on the famous rock spur from above, which gives you a sense of its scale you don't get when you're standing right on it. You also get the full panoramic Cadini view plus - if you turn around - an expansive look at the backside of Tre Cime di Lavaredo. Two iconic views from a single spot, with a fraction of the people. Yes, please.
Honestly, I prefer this upper viewpoint for one reason above all others: it doesn't feel like a theme park queue. The famous spur gets busy, and waiting in line for a photo (sometimes for over an hour) on a narrow rock ledge in the middle of the Dolomites is honestly not the nature experience I'm interested in. Up here, you can sit on the ridge, take your time, breathe it all in, and relax rather than just joining a crowd.
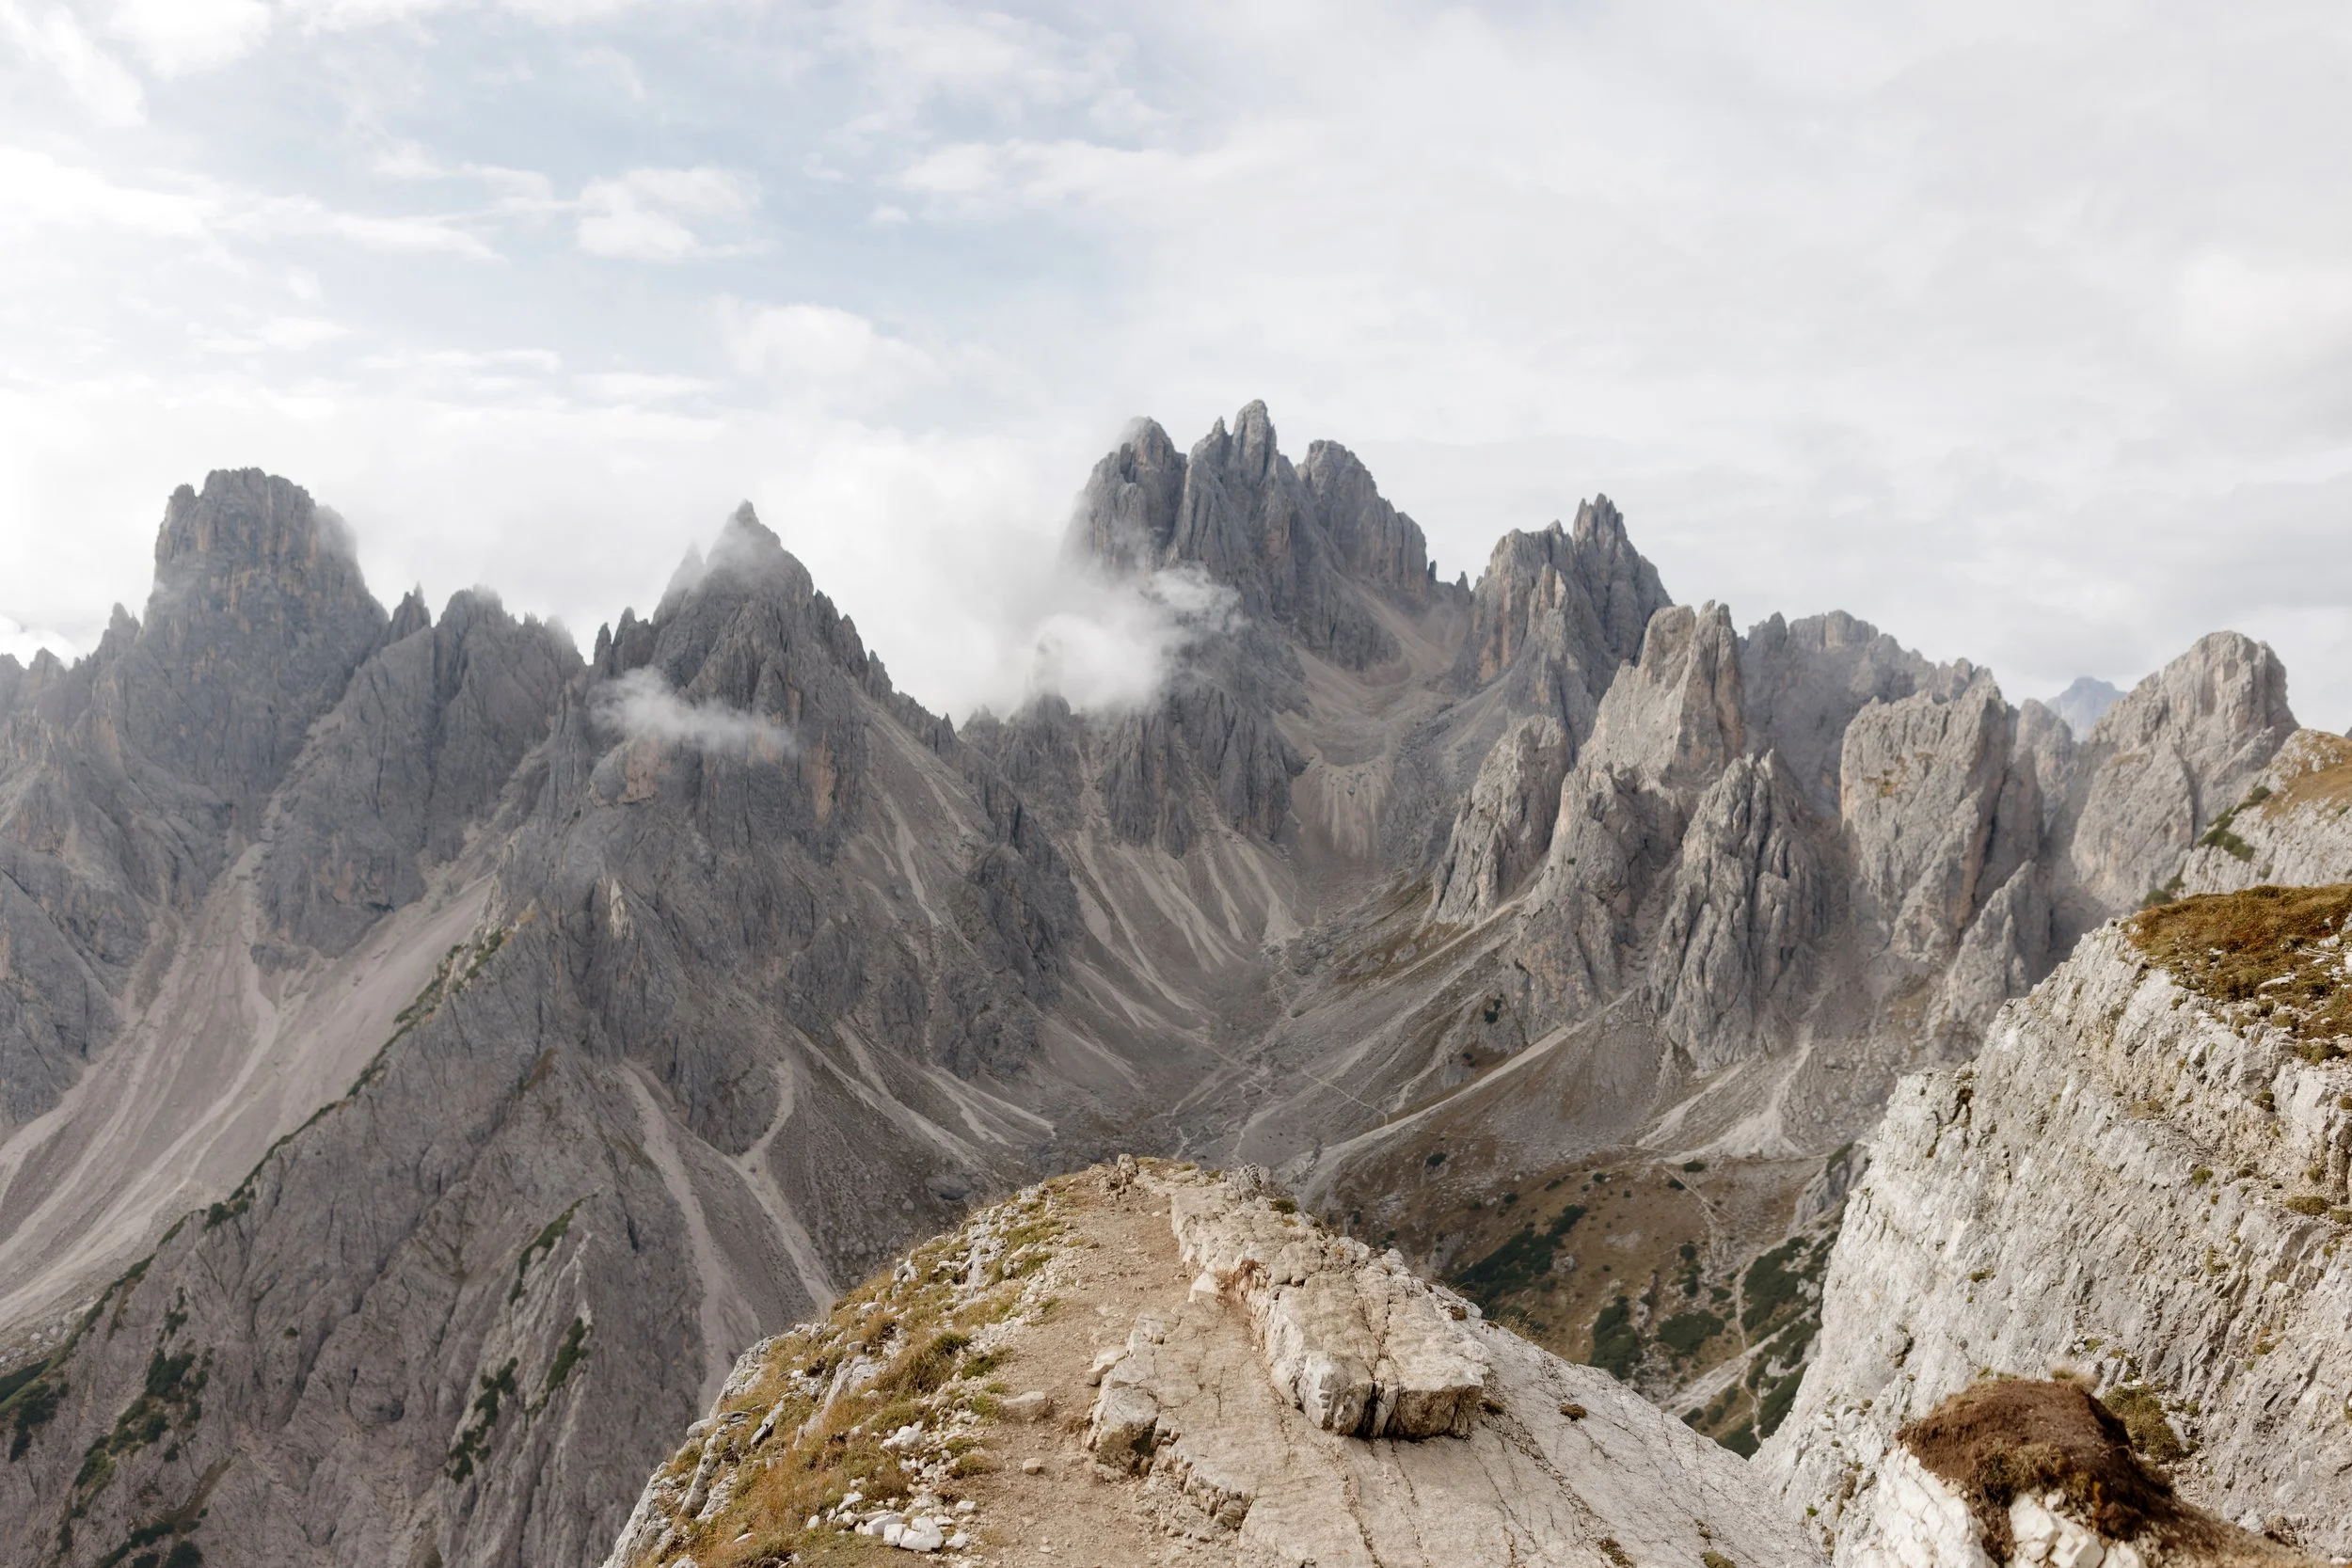
Alternate upper viewpoint at Cadini di Misurina
Another upper viewpoint
Hiking Cadini di Misurina Responsibly
I want to be super candid with you: this trail has been absolutely bombarded with visitors in recent years, and it’s obvious. I've seen handfuls of trash on the path, hikers cutting across protected meadows for a better photo angle, and drones buzzing constantly overhead. It's a lot. And because access to this area depends on the continued goodwill of local authorities and landowners, how we all behave here really does matter.
A few things to remember:
Stay on the marked trail. The meadows and rock faces alongside the path are fragile ecosystems. Cutting off-trail for a photo angle damages vegetation that takes years to recover - and it's also how viewpoints like this end up getting closed to the public entirely.
Pack everything out. Everything. Including fruit peels, tissues, and snack wrappers. The trail has a serious litter problem and it's entirely preventable.
Skip the drone. I know this is controversial, but the Cadini and Tre Cime areas are already way oversaturated with drone activity. It disrupts the atmosphere for every other hiker around you and isn't necessary to get incredible shots. Leave it at home for this one.
Carpool or take the shuttle. The Line 444 shuttle from Dobbiaco exists precisely because private car traffic to this area became unsustainable. If it works for your plans, use it.
Be mindful about what you share online. Encouraging responsible behavior in your captions - mentioning the parking reservation requirement, the importance of staying on trail - is a small thing that makes a real difference when posts reach thousands of people.
This place is beyond extraordinary, so treating it that way means it stays that way.
When to Visit Cadini di Misurina
Best Months
Mid-June to early July and mid-September to early October are the sweet spots. June brings wildflowers and fresh green in the valleys below. September into October means fewer crowds, cooler air, and that golden late-season light.
August is peak holiday season in Italy - maximum crowds, parking slots that book out far in advance, and a very different atmosphere at the viewpoint. Avoid if you have any flexibility.
October is my personal favorite month in the Dolomites, and Cadini is no exception - but it comes with a caveat. Early snowfall at higher elevations can close the access road on any given day without much warning. I was up there in early October once and the cold arrived completely without warning - wind that felt like mid-winter, fingers going numb within minutes. The sunset that evening was possibly the most magical I've ever seen in the Dolomites - everything glowing orange, pink, and purple from the peaks to the sky and back again. But dress for proper cold if you're going in October. It will surprise you.
Best Times of Day
Late afternoon and sunset is my preference. The setting sun hits the spires and turns them every shade of orange and gold, while the sky turns to cotton candy pink and purple. Most hikers have left by late afternoon. Bring a headlamp so you can hike back in the dark if you stay for the full sunset.
Sunrise means having the viewpoint almost entirely to yourself - but requires hiking out in the dark to catch the light. Totally worth it if early mornings are your thing.
Sunset at Cadini di Misurina
What to Pack
You're in high alpine terrain at over 2,300 meters. Weather changes fast - I've watched a clear sky become a cold, windy overcast within minutes. Pack accordingly even for a short hike!
Hiking boots or trail runners - the trail has loose gravel sections that get slippery. At minimum, boots with solid tread like Blundstones. No sandals (guys I’ve really seen it all, but I promise this is the worst idea, lol).
Warm jacket - wind-resistant and waterproof. The ridge is fully exposed and the wind can be brutal even in summer
Gloves and a hat - pack these even in July. If the cold wind hits on the exposed ridge, you'll want them immediately (ask me how I know…)
Headlamp - essential for sunrise starts or sunset finishes. Don't rely on your phone - cold temperatures drain batteries fast at altitude
Water - non-negotiable!
A small bag for trash - this trail has unfortunately seen a lot of littering in recent years. Pack everything out
Camera - a 24-70mm handles the wide landscape shots beautifully. A 70-200mm is worth bringing if you want compression on the peaks behind a subject
Other Things to Do Nearby
Since the hike is short, you'll likely have time for more that day:
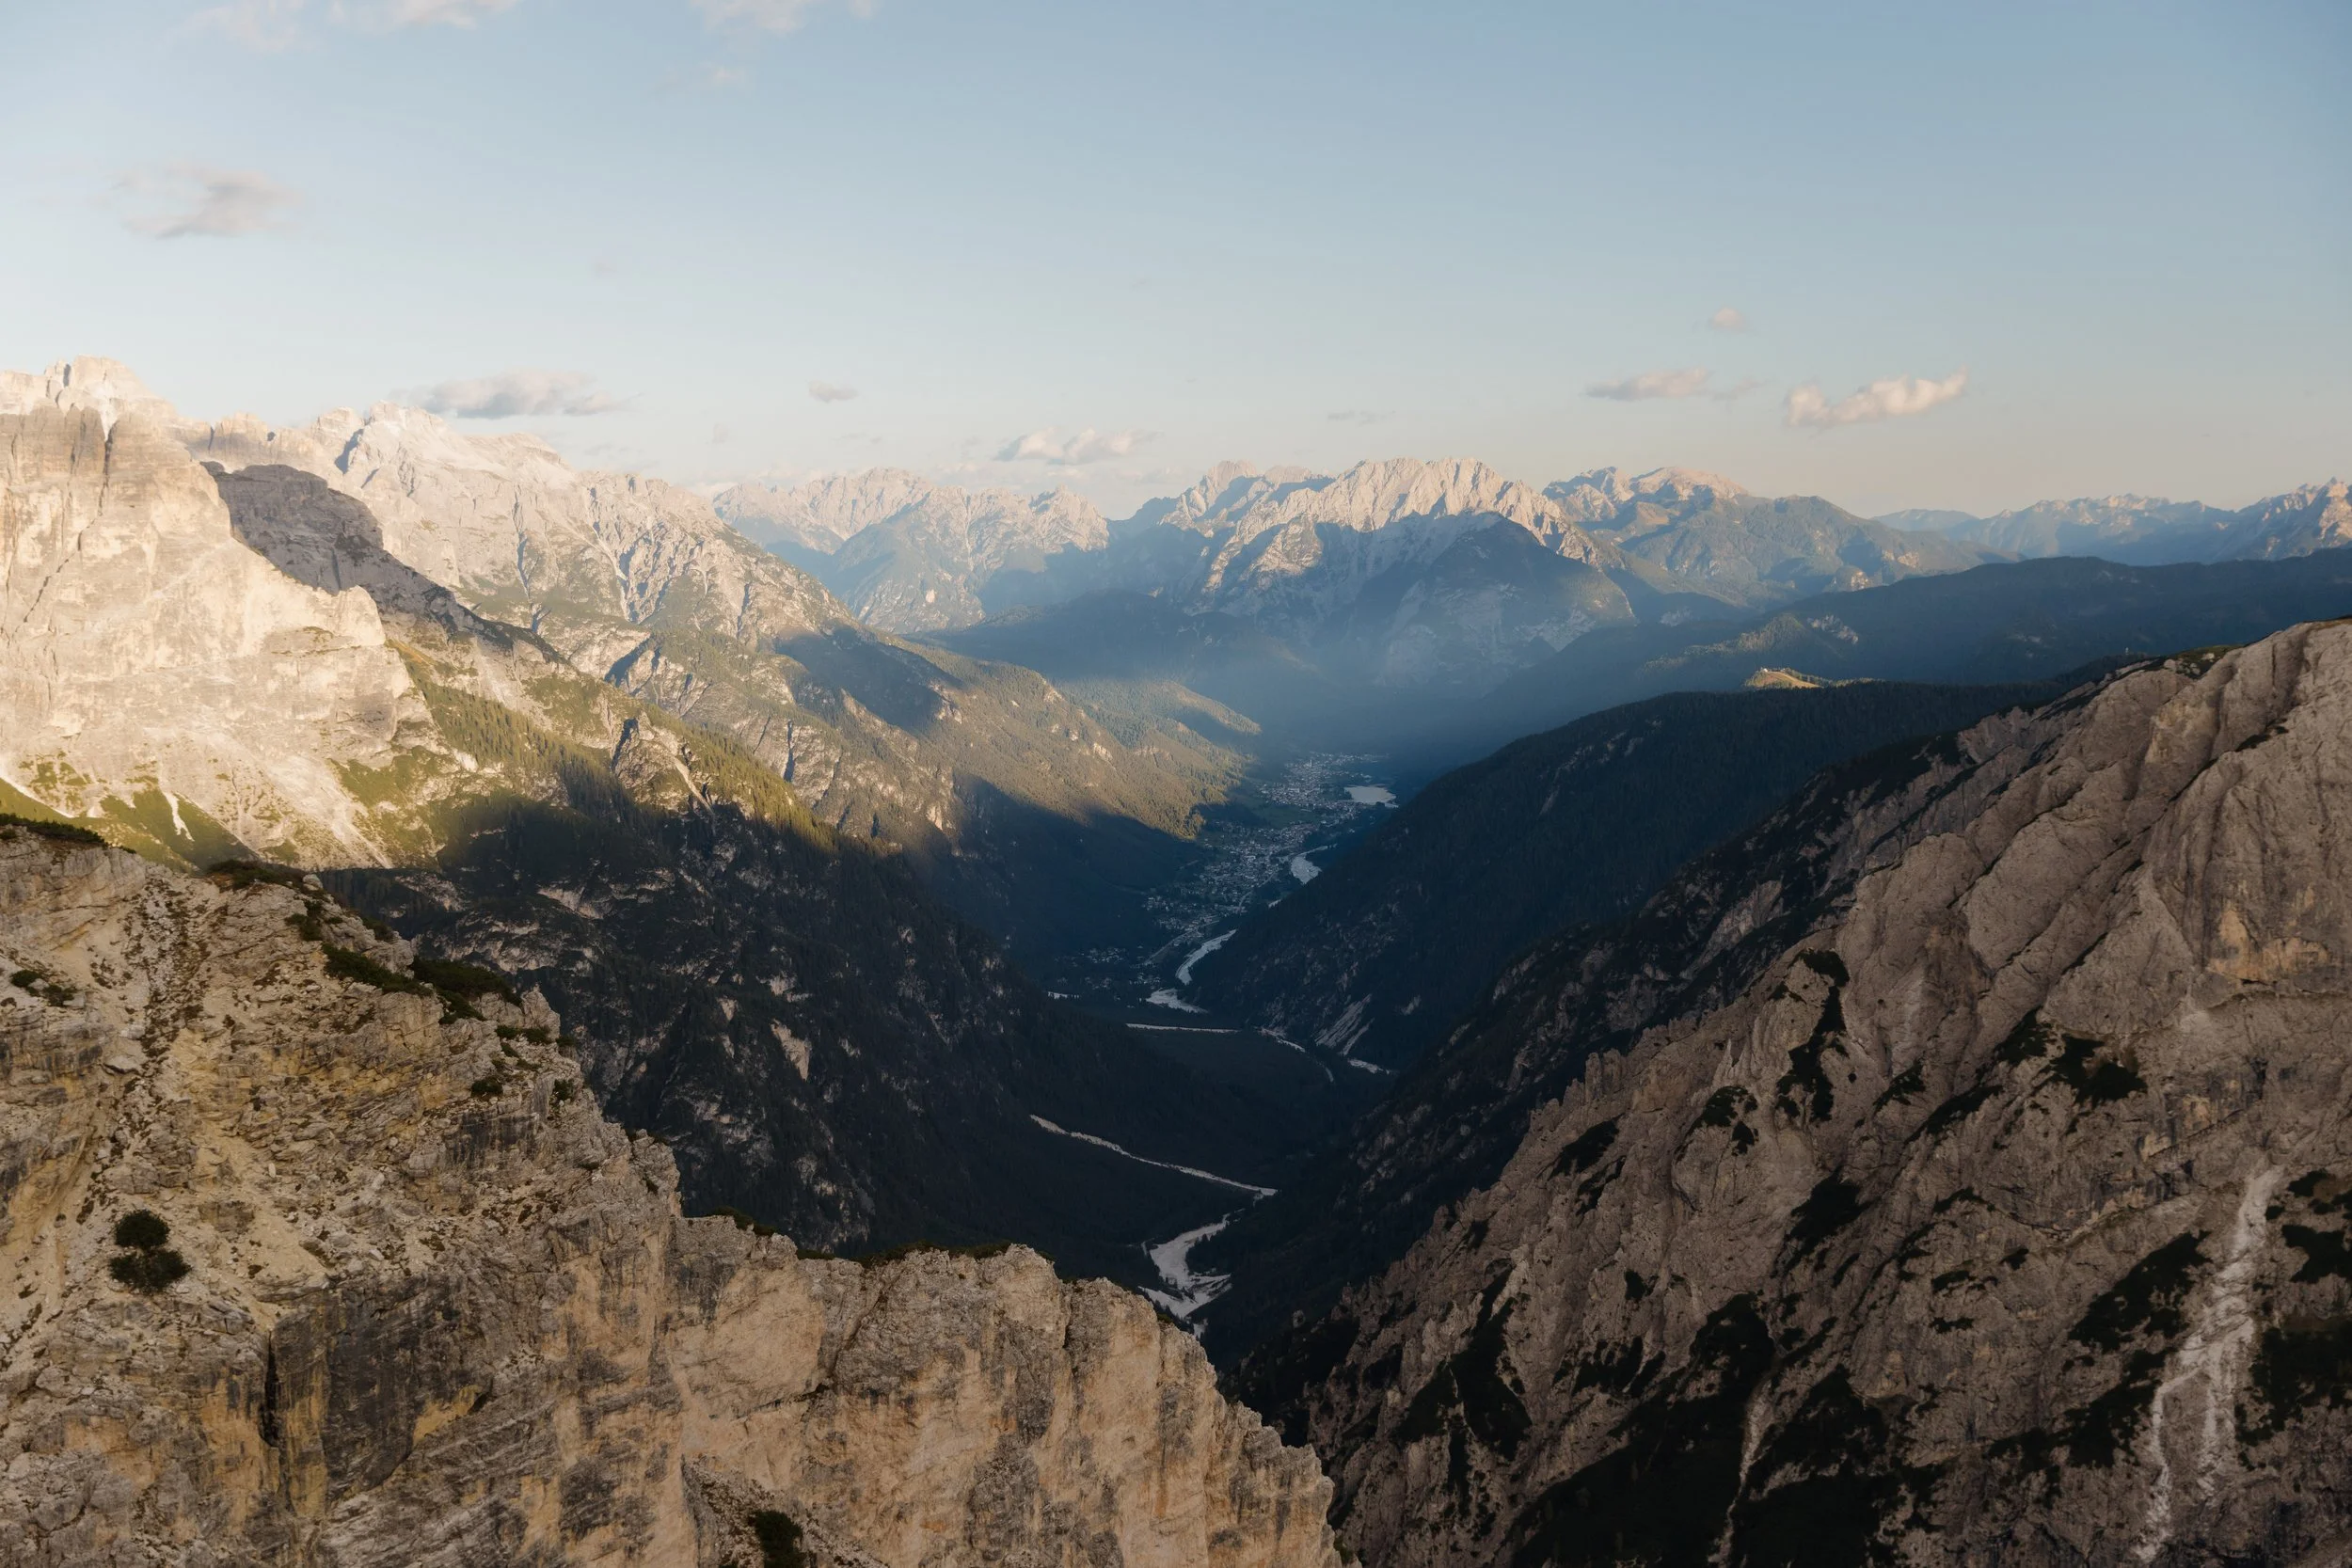
Tre Cime Loop: You're already at the right trailhead. Even if you skip the full loop, hiking out towards Forcella Lavaredo (about 45 minutes one way) for the classic north face view of the peaks is 100% worth it.
Lago di Misurina: Right at the base of the toll road - a beautiful alpine lake worth a slow drive past if nothing else. On a still morning or evening, the lake reflects the surrounding mountains and the Grand Hotel Misurina so perfectly it looks like a mirror. On certain mornings the reflection is so sharp it genuinely doesn't even look real. Worth pulling over and grabbing a photo, if so.
Lago d'Antorno: A smaller, quieter lake just up the road from Misurina - particularly beautiful at golden hour. There's a nice circular lakeside trail worth a short walk.
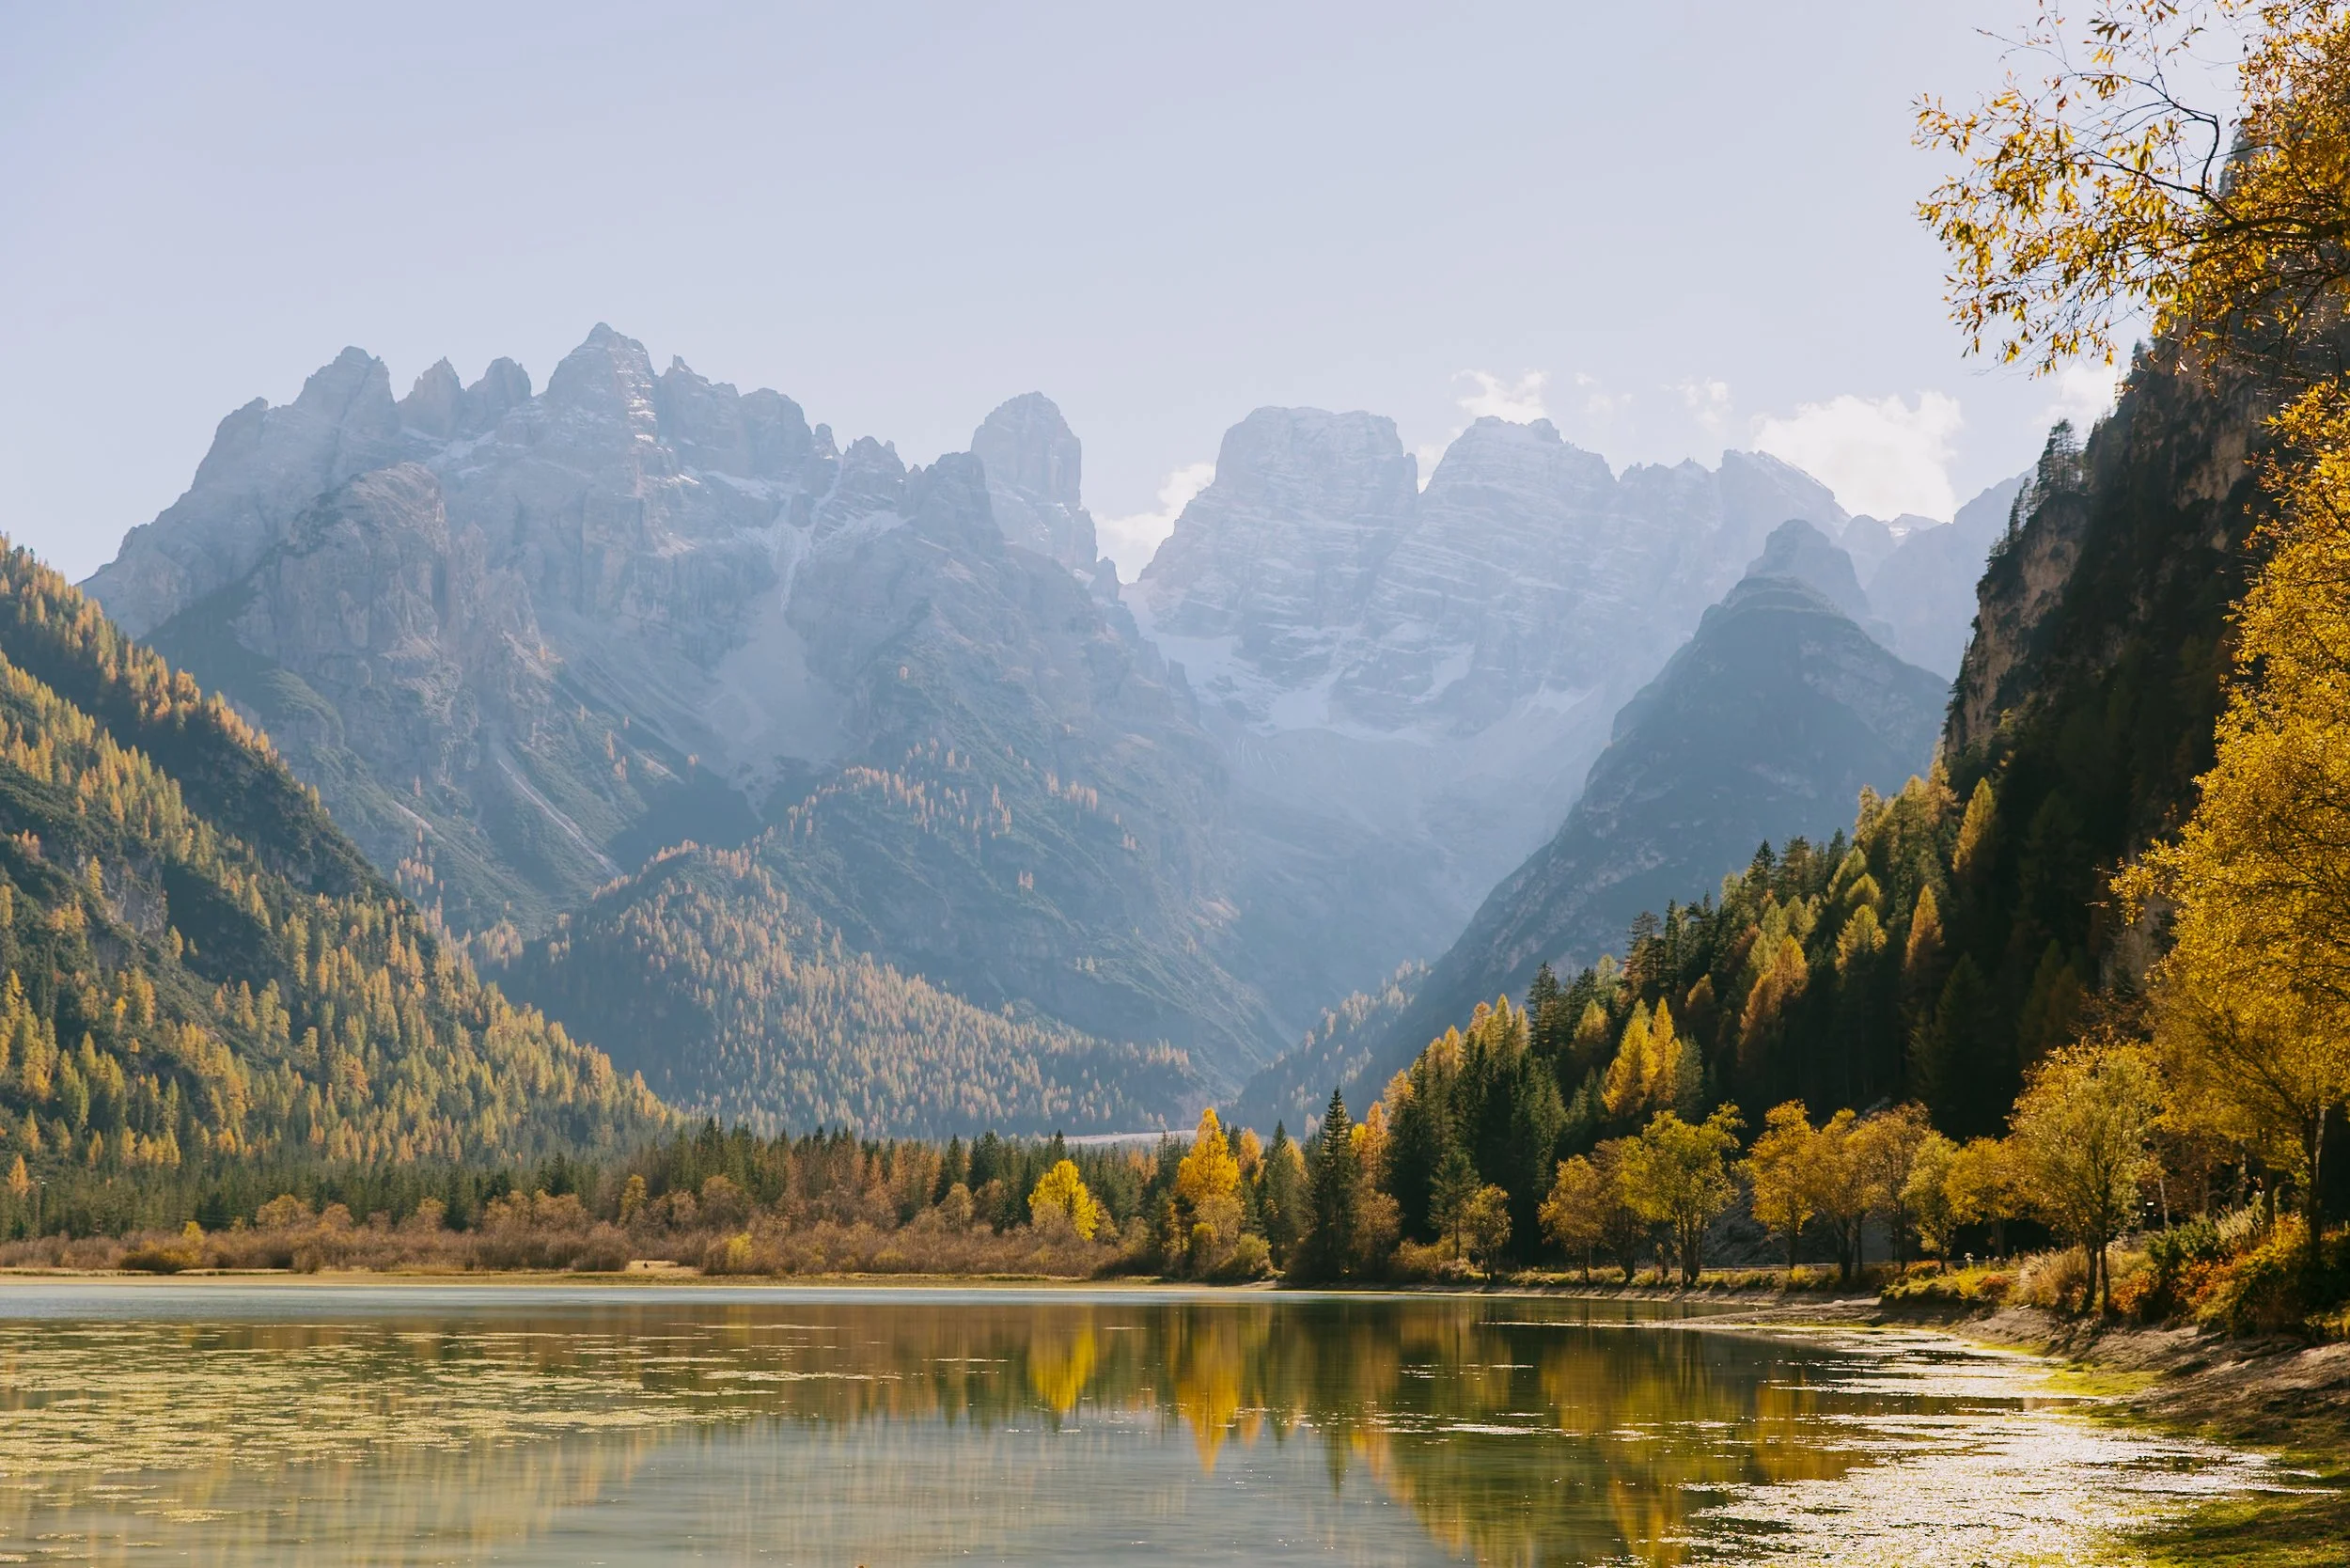
Lago di Landro: Tucked in a gorgeous valley further north, this lake is pure magic. Lovely mountain views (and reflections) on a clear day, and a nice restaurant right beside it for a post-hike meal. Their spinach spätzle with ham is 10/10.
Hiking the Tre Cime loop
Lago di Landro
Where to Stay Nearby
Camping: Camping Toblacher See on Lake Dobbiaco is about 30-35 minutes from the trailhead and one of the most scenic campgrounds (with luxe cabins also available) in the area.
Hotels: Look for accommodation in Misurina (closest to the trailhead), Auronzo di Cadore (more budget-friendly options), or Cortina d'Ampezzo (upscale, most amenities, about 30 minutes away).
My top picks:
Dolomiti Lodge Alverà - A gorgeous alpine-style boutique hotel just outside Cortina d'Ampezzo with an on-site spa, pool, and restaurant.
Skyview Chalets - Upscale adults-only lakeside chalets on the same property as Camping Toblacher See.
Chalet Alpenrose - Right beside Lago di Misurina - one of the closest accommodations to the toll road and trailhead.
B&B HOTEL Passo Tre Croci - I've stayed here multiple times after hiking Cadini - 20-25 minutes from the trailhead, super basic but still comfortable with convenient on-site dining options.
Looking down on Auronzo di Cadore from the trail
FAQ
Q: Is a parking reservation required for the Cadini di Misurina hike?
A: Yes, this is the most important thing to know before planning your visit. The toll road to Rifugio Auronzo operates under a mandatory online reservation system for the entire season. You will be turned away at the base of the road without one. Book at auronzo.info as early as possible - July and August slots sell out fast.
Q: How difficult is the Cadini di Misurina hike?
A: It's considered easy for the average hiker - short, well-marked, and not technically demanding. There's one section with a steeper drop-off on the side that can feel exposed if you're not a fan of heights, but it's easily avoided by taking the higher path. Wear proper footwear regardless - the trail has loose gravel sections that get slippery.
Q: Can you combine Cadini di Misurina with Tre Cime in the same day?
A: Definitely, and this is what I'd recommend for most visitors! Both trails start from the same Rifugio Auronzo parking lot. Hike to Cadini first (shorter, 1-2 hours), then continue to the Tre Cime loop, or at least walk out to Forcella Lavaredo for the iconic view of the north side of Tre Cime. It makes for a full but wildly rewarding day.
Q: How early should I arrive at Rifugio Auronzo?
A: As early as your reservation window allows. The parking lot fills to its 100% capacity quickly on summer mornings, and arriving early means the viewpoint is quieter and the light is better. For sunset visits, arriving a couple hours before golden hour gives you time to hike at a relaxed pace.
Q: Is Cadini di Misurina worth it despite the crowds?
A: Yes - and I say that having been there multiple times at different levels of busyness. The key is timing: late afternoon and sunset visits are dramatically quieter than midday. Shoulder season (September into early October) is a completely different experience from August. Also, be sure to walk past the famous rock spur to the upper viewpoint. You'll have the better view with a fraction of the people.
Q: What is the best time of year to hike Cadini di Misurina?
A: Mid-June to early July and mid-September to early October are the sweet spots. June has fewer crowds than peak summer. September is quieter with beautiful light and turning colors. October is my personal favorite for color and atmosphere - but be prepared for cold and the possibility of the road closing due to early snowfall.
Q: Can I bring my dog to Cadini di Misurina?
A: Happily, yes! Dogs are allowed on the trail and in the park, but must be kept on a leash at all times.
Q: What if I arrive and it's cloudy?
A: Wait. Seriously. I've arrived at the Cadini viewpoint to find it completely cloud-covered and almost turned back - but after 15-20 minutes the clouds parted and we got a completely clear bluebird sky. Mountain weather moves fast in both directions. Give it at least 20-30 minutes before giving up on the conditions. Personally? I’d wait even longer…but it depends on how much schedule wiggle room you have.
Final Thoughts
The Cadini di Misurina viewpoint has been called overhyped, overcrowded, and overexposed - and on a busy August midday, I honestly do understand why. But I've also stood up there at sunset in early October with cold wind in my face and the entire sky turning orange and pink around me, and I can tell you that in that moment it felt like one of the most extraordinary places I've ever been.
Timing is everything here. Go at the right hour, walk past the famous spur to the ridge above it, and give the clouds a chance to clear if they're not cooperating. The version of Cadini di Misurina that exists outside of chaotic peak hours is worth every bit of the planning it takes to find it.
Buon viaggio!
Have a nice trip!
More Dolomites planning guides:
How to Visit Lago di Braies (Pragser Wildsee)
How to Visit the Seceda Ridgeline in the Dolomites: Best Routes, Viewpoints & Tips
Alpe di Siusi Hiking Guide: How to Visit Seiser Alm & Best Trails for First Timers
Ultimate Guide to Lago di Carezza (Karersee) in the Dolomites
How to Visit Santa Maddalena in Val di Funes
How to Get to Cinque Torri in the Dolomites (3 Best Ways + Map)
How to Visit Passo Gardena - Everything You Need to Know
Like this post? Pin it for later!
How to Hike Cadini di Misurina: Complete Trail Guide